robertahegy
Moderator/Tech Counselor
Yup!! Should be pointing inward so high pressure entering inlet will force the rubber flaps up against the cowl.
Roberta
Roberta


Can't speak for everyone, but I didn't use one mainly because it's my first time building, and changes from the standard way of doing things have already cost me so much time I'm now in a "get 'er done" mode of doing it exactly as the plans say.I do not understand why everyone does not use a plenum....
I do not understand why everyone does not use a plenum.
I've looked at them many times but the lack of access to the engine, extra weight and overall complexity does not make up for the slight potential improvement over a well executed baffle system. Plenums are too often used as a crutch for people who ignore the basics.
")
I've looked at them many times but the lack of access to the engine, extra weight and overall complexity does not make up for the slight potential improvement over a well executed baffle system. Plenums are too often used as a crutch for people who ignore the basics.
I'm completely revamping the baffles on the Rocket, but I am still not going to a plenum yet. We'll see how the flight test program works out before I throw in the towel on that one.
Mark, Dan, or anyone who has instrumented their plenum...
Any idea if a well executed plenum delivers similar pressure as a pitot style induction system? In other words, if you have an excellent plenum, does it make sense to ditch the pitot style induction scoop and tap into this source of pressure? If the resultin MP is the same, then the loss of the induction scoop and resulting reduction in wetted area should net a gain.
Of course, looking at the F1 guys seems to indicate this is not the case - the induction scoop is very prominent in most cases.
My current plan is to baffle the engine in the usual manner (no plenum lid), but I'm going with the Glassair style "great wall" chin baffle and open inlets (low Vi/Vo).


Mark, Dan, or anyone who has instrumented their plenum...
Any idea if a well executed plenum delivers similar pressure as a pitot style induction system? In other words, if you have an excellent plenum, does it make sense to ditch the pitot style induction scoop and tap into this source of pressure? If the resultin MP is the same, then the loss of the induction scoop and resulting reduction in wetted area should net a gain.
Of course, looking at the F1 guys seems to indicate this is not the case - the induction scoop is very prominent in most cases.
Might it be easier to set up a well sealed cowl if the cowl is not trying to seal against a ever-moving engine?
Take a close look at the inlets on Rutan's Boomerang. The inlet lip and connecting duct you see extending out the front of the cowl is all hard glass, and part of the plenum. Sealing is around the outside of the duct, behind the lips...
Take a close look at the inlets on Rutan's Boomerang. The inlet lip and connecting duct you see extending out the front of the cowl is all hard glass, and part of the plenum. Sealing is around the outside of the duct, behind the lips.

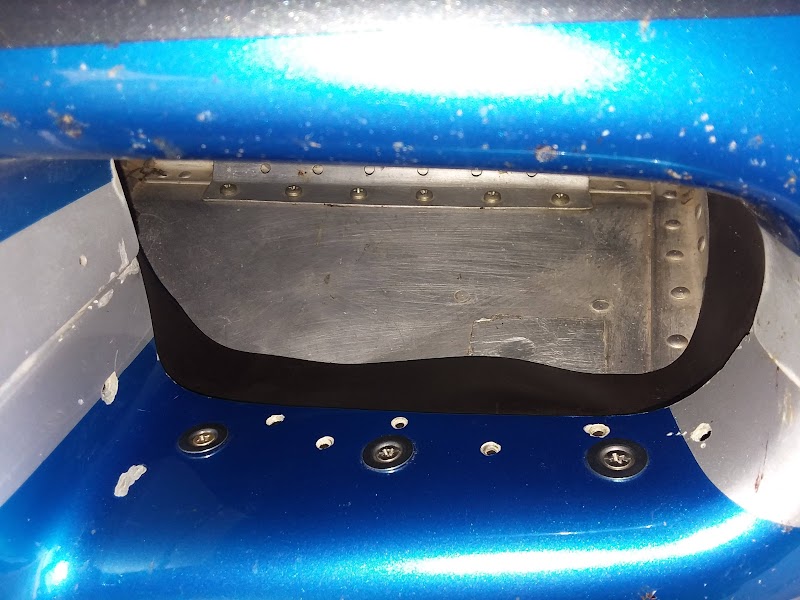
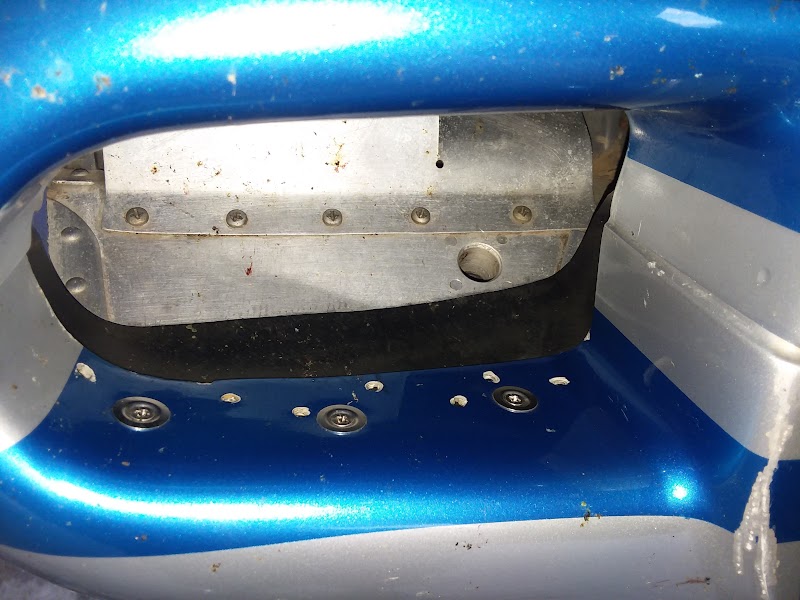
A lot of these photo's are missing. However I'm now suspecting that I may have some large leaks in my back corner seals. I don't believe mine fold over like this and I just assumed the air pressure pushed everything up and tight. Is it acceptable to rivet them in place with a backing washer if I can't get them to stay folded over?
I am just about ready to cut my baffle seals and drill the holes for the rivets to hold them on. Since there are no dimensions in the plans I am planning on starting with seals 3-1/4" high and setting them 1" down on the baffles. This will give 2-1/4" to seal against the cowl. The rivets will be 1/2" down from the top of the baffle. Does this sound like a reasonable starting point?
Considering all RV fabrication tasks, the thing I most often see done badly is baffle sealing rubber. Flap seals arranged so they blow open, seals that seal against nothing, puckers, gaps, overlaps, you name it...the list of sins appears to be endless.
However, I have seen some installations that were beautiful. Believe me, I look; I'm the nut case who walks around fly-ins while peering into cowl openings like some kind of airplane up-skirt pervert
Builders need to see some really good seals. Who has pictures? Who can show us how it's done? Post those photos please. You'll help a whole generation of RV builders enjoy lower CHT and oil temperature, while going faster due to reduced cooling drag.
I think what you want is enough material to touch the cowl plus an inch or maybe a bit less. Seals which are too long will cause the seal edge to bend down and away from the cowl after the point of contact, creating a leak path.
So, you might start with your proposed length on a section, cleco the seals in place, and check fit looking in through the air inlets and oil door. Trim to length based on what you observe and cut the others to match.
This seems like a good idea - do you have any photos of the inside?... I removed the riveted on seals and replaced with a removable plate and seal for each side. Each attaches with three screws after the lower cowl is installed. ...
https://photos.app.goo.gl/Kwx3hDNC4WLfDBcF9
Note the nice, even wear marks on Walt's seals. There are a few leaky spots, but not many.


Fantastic. Thanks.Some photos in a couple other threads:
Tips and tricks for baffles seals?
The baffles on my RV8 had a few cracks and rips, though my engine temps were just fine. Because I'm OCD and a habitual tinkerer I've decided to replace them while the plane is down for it's condition inspection. I pulled off the black cloth reinforced baffles, and bought a bunch of the red...vansairforce.net
Baffling Ramp Corner
I'm trying to close up the last egregious gaps in my baffling. This is an older RV-6 and I have not been able to find any good pictures of how others have handled the corners of the ramp on the lower cowling.. Mine looks like this: If I try to extend the baffling on the curve of the lower...

 .
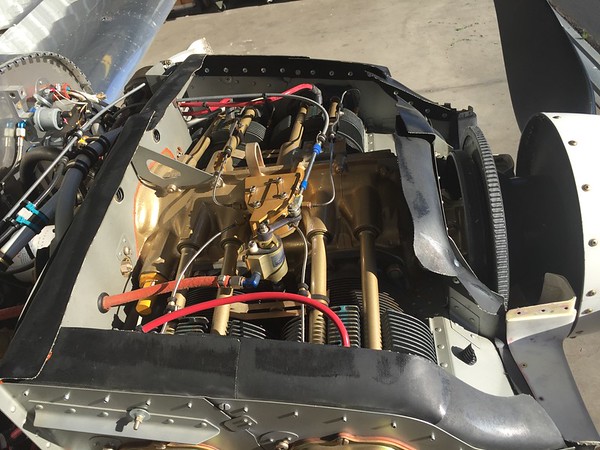
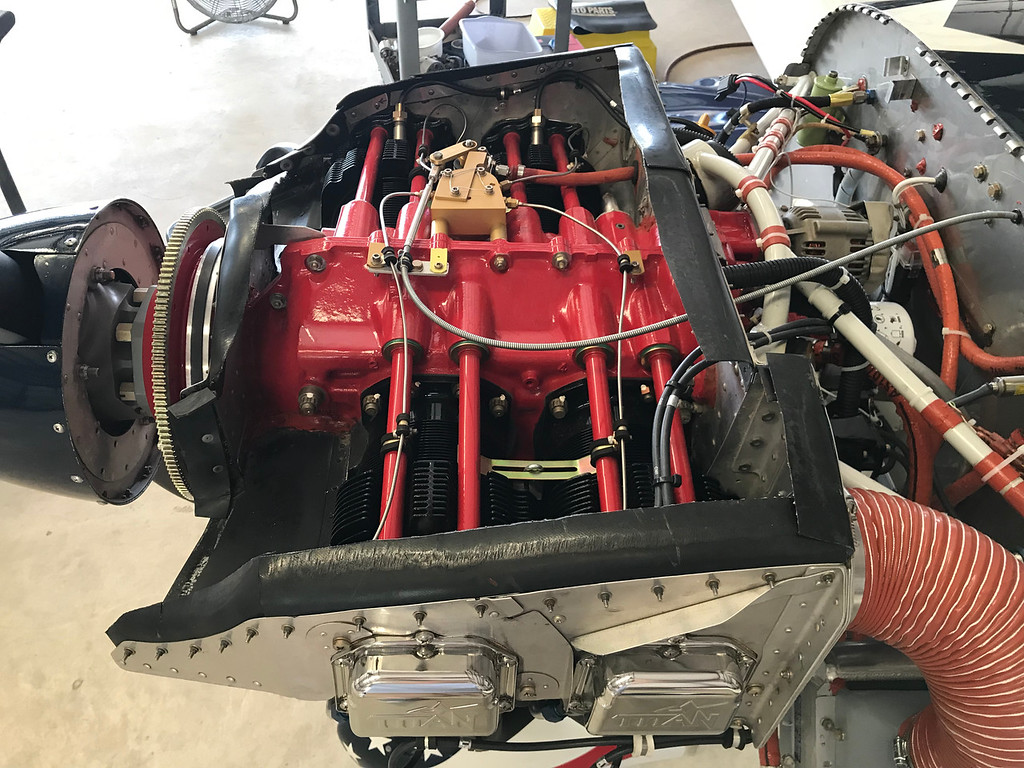
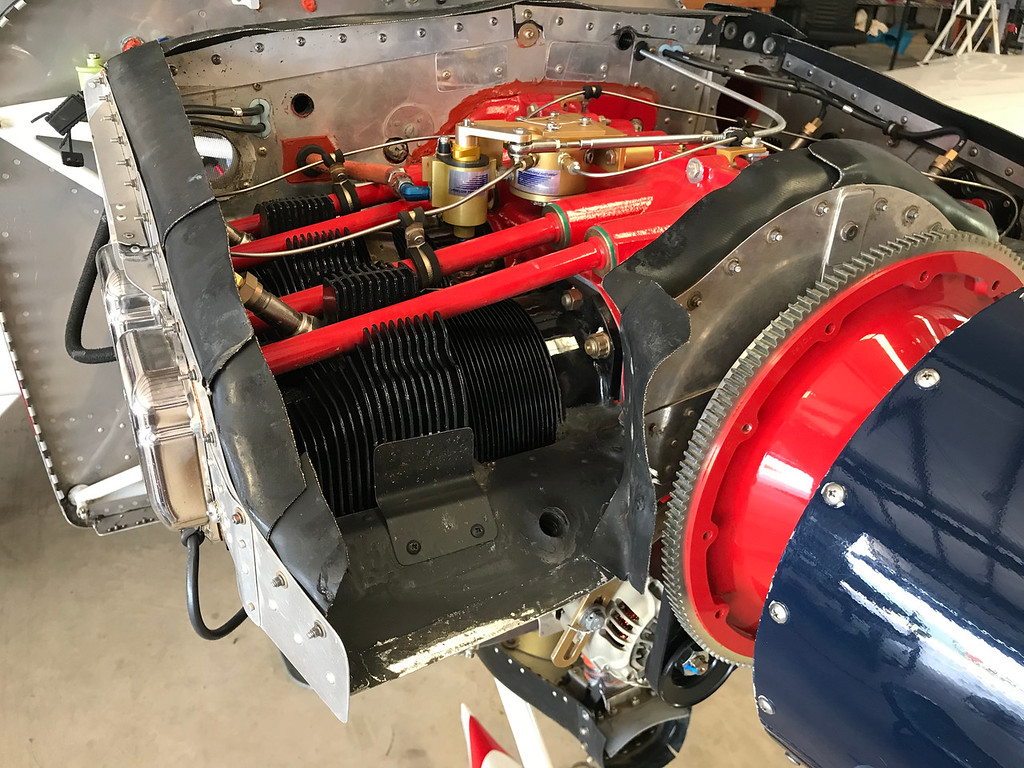
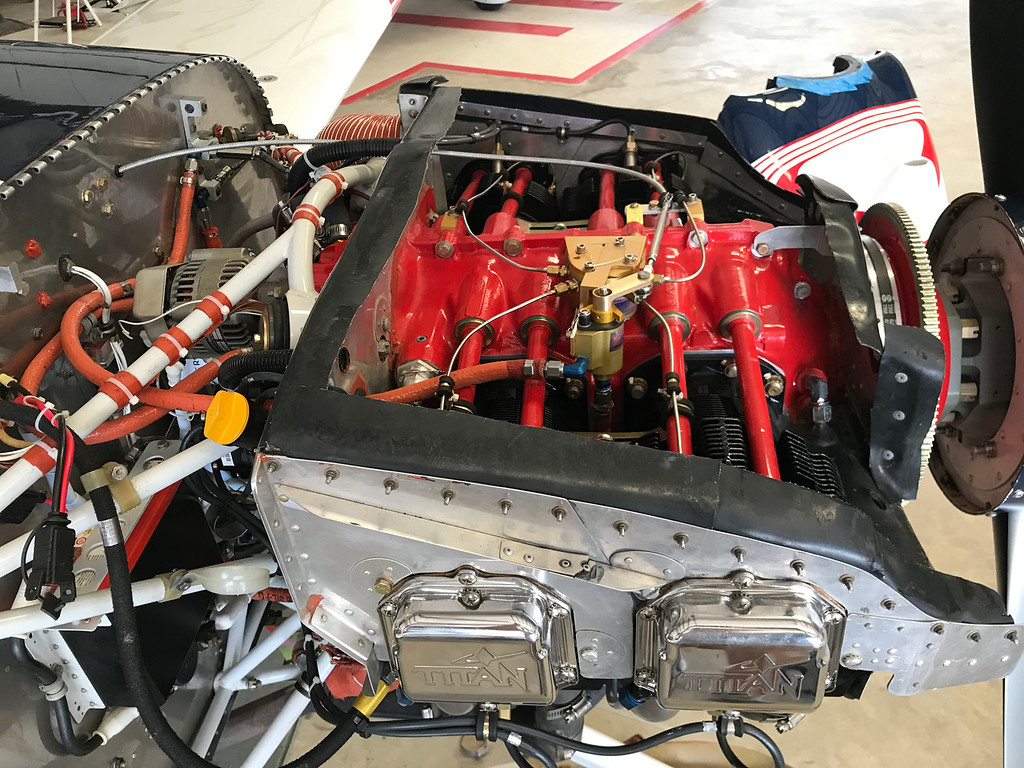
.Nice looking baffling seals! BUT: what is with the ramps on the front cylinders? Blocking for cold weather.....?Ok, I’ll bite. Last year after getting my RV7A home from an engine teardown inspection and rebuild I experienced higher than desired CHTs during climb out. Chased a lot of dead ends and eventually replaced my baffling which solved the issue. I’ll proudly show my baffling.
View attachment 63754View attachment 63753.
At the forward ends on each side, the baffle is intended to be trimmed so that it follows the contour of the inlet ramp on the upper cowl . Then have baffle seal installed that seals against the inlet ramp.Ok, I’ll bite. Last year after getting my RV7A home from an engine teardown inspection and rebuild I experienced higher than desired CHTs during climb out. Chased a lot of dead ends and eventually replaced my baffling which solved the issue. I’ll proudly show my baffling.
View attachment 63754View attachment 63753.
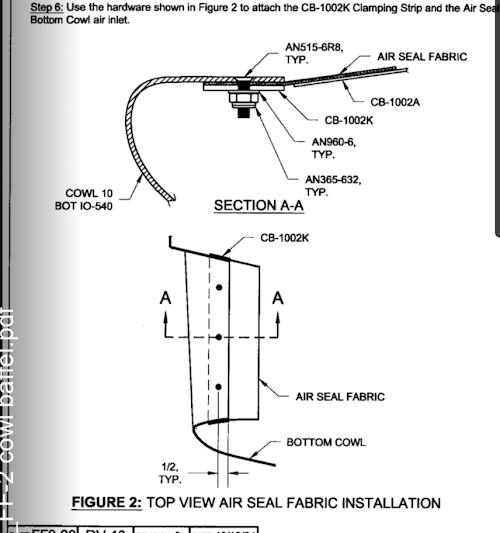
My experience is that sealing the little cracks does not help much. I didn't put any silicone sealant along the edges of the baffles between them and the engine. I used flexible rubber baffles - not the stiff rubber - and my temps are very cool. I did use angle to attach the rubber to the aluminum to give a bit more structure. Probably not needed, but it was not too heavy.Has anyone tried putting a double sided high temp 3m tape to be between the aluminum baffles and baffling material to prevent leaks?
With this then it would not likely to be the need to put a seam of silicone along the top or even install the retaining or clamping strips. Of course will still need the rivets or bolts as in the plans.
Tim