Appologies for any drift here but hopefully my question will help others. I am currently cowling a -4 with 0360 and Vetterman 4 pipe downturn exhaust. Archives have suggested:
1-Provide nice curved surface to guide air around the engine mount tubes
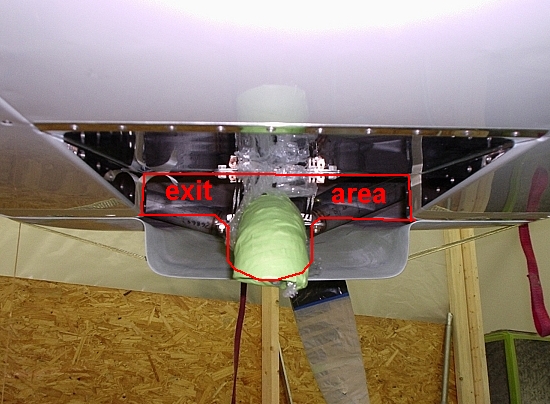
2-Dimension the exit area to conform to the Horton Vi/Vo ratio
3- If you need climb cooling add cowl flap
4- Dont cut off the downturn tubes but “maybe” trim parallel to free stream
Would Steve or Dan please suggest a “prescription” for a layman to follow on this task ?
Larry, first suggestion is to think in terms of building a system. Whatever individual modifications you might make should be considered in a system context. Bandaids only go so far, and real bolt-on speed is rare.
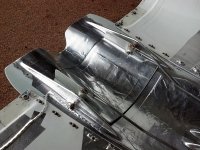
Next, remember the little things. I'm going to take one subject as an example, that 4-pipe exhaust. You're thinking about cutting off the downturns, but in the context of how to reduce cooling drag, the best bet would be to stack it under a workbench somewhere.
Why? First, they have a lot of surface area, a minor deal, but it all adds up. I don't know the tailpipe diameter, but I'll guess 1.25"D for illustration. Total exhaust area is 4.9 sq in for the four pipes, exactly the same as a single 2.5"D tailpipe on a 4-into-1. However, skin friction is roughly doubled, because total surface circumference is doubled, and one system goal was exit velocity.
Consider cowl exit shape. Four pipes don't package well, and they eat up a lot of exit area, thus requiring more frontal area. Our goals were to reduce exit area and frontal area. Look up Axel's RV-4, which is about as far as a fella can go eliminating frontal area a 4-pipe. Frontal area is reduced, but the pipes are outboard, near the gear leg fairings. That junction is not likely to be low drag, and the pair of down-pointing exhaust streams form an invisible wall. It's not just a matter of eliminating lengths of pipe hanging down in the freestream. It's also the plume of high velocity exhaust.

Let's look at Dave Anders' RV-4, or his friend Brian Schmidtbauer's Mustang II. Those are fixed exits with a single tailpipe. Overall cowling frontal area is about the same as Axel's, or maybe even a wee bit more. However, neither suffer from an exhaust plume wall, and in Dave's case, the outboard areas near the gear legs are slick. The exits are at the point of maximum fuselage cross section with little or nothing to trip the flow; consider that in the context of Steve's pressure tutorial. If desired, either could add variable area forward of the firewall plane, and shrink the fixed exit some additional amount, but instead they've gone with a degree of exhaust augmentation to supplement low speed cooling.
Looks familiar to RV14 owners, yes?
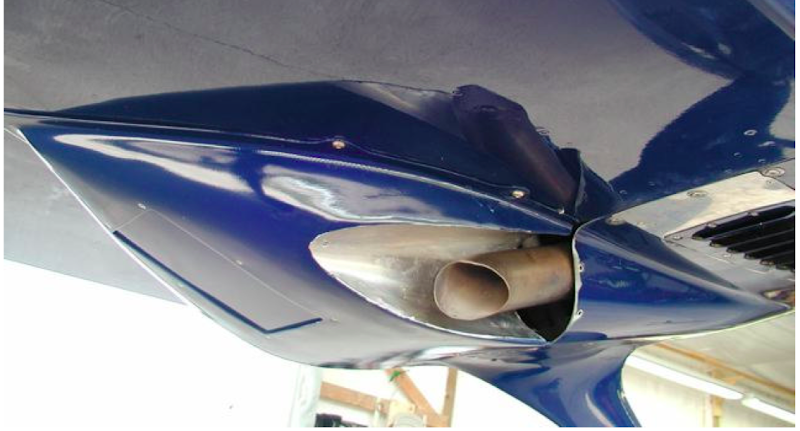
Augmentation comes with its own design issues, so I elected to work toward a good variable exit strategy for low speed cooling. The RV-8 already has clean areas outboard, toward the gear legs, so I chopped off a whole bunch of frontal area by eliminating the entire "backward coal shovel" from the bottom of the stock cowl, eventually reducing the fixed exit to a slot 1.625" high. It's supplemented with variable for climb or cool cruise, which only adds about 8 sq in of frontal area when fully open...not what most would consider a "cowl flap". The tailpipe is slash cut to point the plume rearward, although not directly aft where it would be entirely thrust. That's a compromise to keep the airplane practical; low noise and belly drumming, not so much floor heat. I visualize the plume as an ordinary tube extended into the airstream. Like that phantom tube, angling it back reduces drag. Exhaust smut on the belly tells me it reattaches a little past the wing spar, which tells me the compromise is working; recall that RV8s tend to crack the belly skin at the ends of the floor ribs, just in
front of the spar...where I did not want it to drum. Point here is that (1) it's a single plume, not two wide plumes, and (2) sometimes compromises are necessary. If I was building an RV-8 for Reno, it would be different.
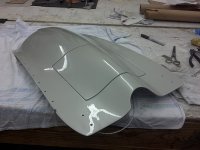
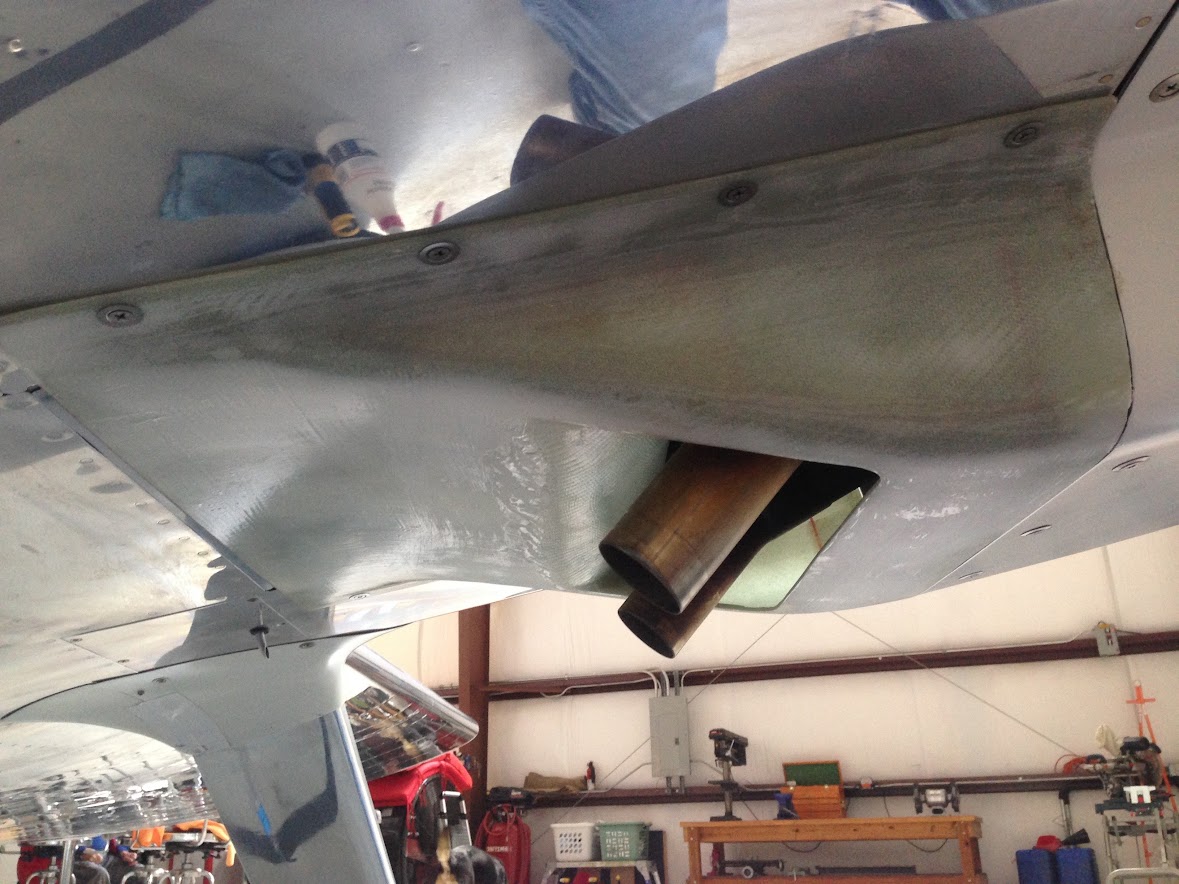
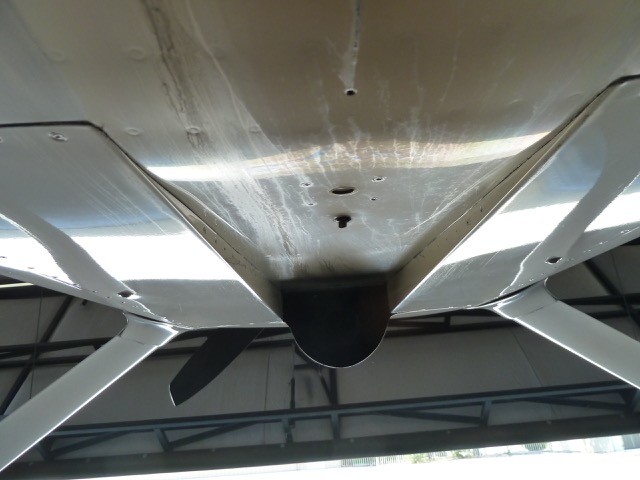
Cowl and exhaust as delivered. Targeted exit area sketched in, tailpipe as yet uncut.
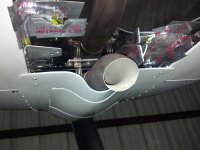
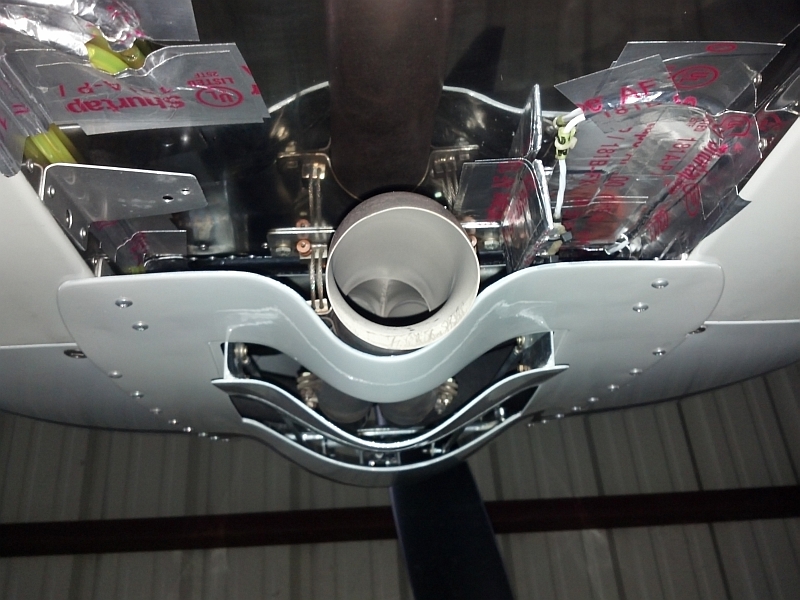
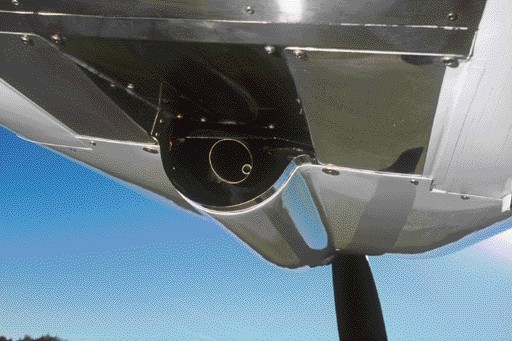
Finished exit, with variable area forward and cut pipe. The trash in the exit is measurement gear, all since removed.
I can't offer a specific prescription, just ideas. You'll have to do like the rest of us...sit on a stool and stare at it a while, read some books, think about it in your spare time, then build, then
measure if you really want to know how well you did.