What's new
Van's Air Force

Don't miss anything! Register now for full access to the definitive RV support community.

Home built annunciator

trib

Well Known Member
I've seen a couple of posts where members have built annunciator panels for their GPS. I have installed a Garmin 155XL, which is the same GPS as the 300XL, just without the additional com. The annunciators I have seen have 2 switches and a number of LEDs. Resistors are also mentioned. The installations look simple and clean. Can anyone provide the details on their installation? A wiring sketch would be most helpful. I can handle a soldering iron with no problem, but the circuit design is a little beyond me!

thanks!
 
Indeed, all I did was click on the photo link in your post, grab the BBCode and use the IMG tags here.

Not sure if you can see it in your original post or not, but all I get is a photo-sized notice that the image is not currently available in about a dozen different languages. :confused:

Technology - wonderful when it works....
 
I see both and the BBC link takes me to the photo.
The new fangled Flicker interface (which I hate) may not be happy with what you are viewing it on?
Strange...
 
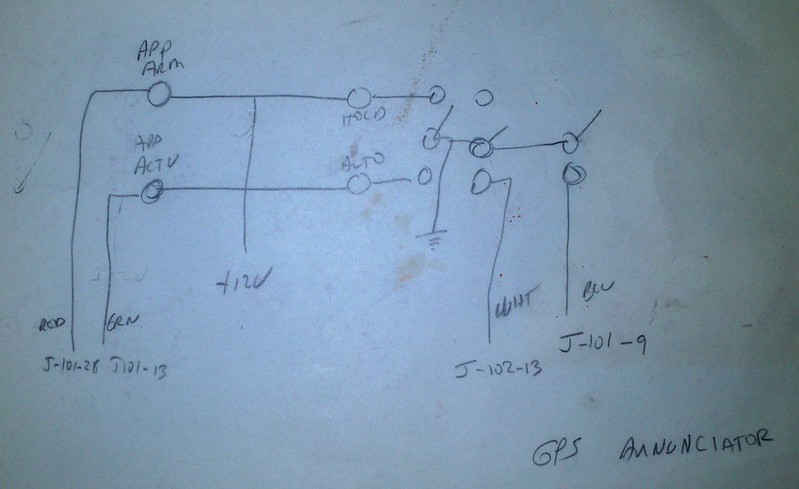
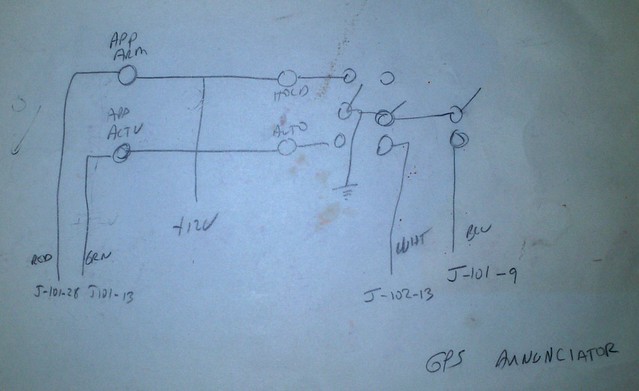
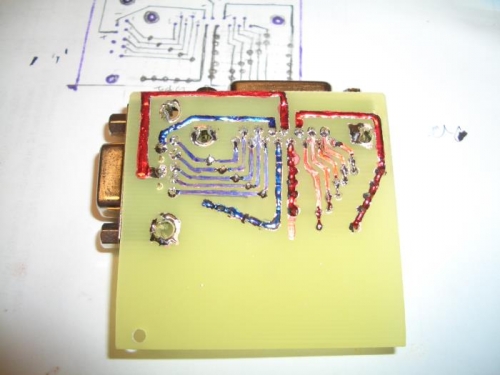
I don't have my schematic available to post at the moment, but can dig it up if you like. My panel isn't for the GPS, but the same circuits should apply. I have 5 light circuits in my annunciator. There are both a dim and test function. The unit is very simple, and for just a couple lights wouldn't even need a board or case.

All of my lights are made to have a common pwr (+) with switched ground (-). The circuit would work for a common ground also, but you would have to reverse the diodes.

The dim switch is SPDT, the com is connected to ships power, one lead goes to the DIM buss and the other to the On Buss.

The ON buss is connected to the lights by diodes to isolate it from the DIM buss.

The DIM buss connects to each light through a resistor.

The Test switch is SPST Mom and connects from ground to the TEST buss.

The TEST buss connect to each light through a diode. That keeps the lights trigger (contact) signal from feeding back through the test buss an lighing all the lights.

All these diodes are there to eliminate the need for multi-pole switches. If you only want a couple lights, you could just use a two-pole switch for the dim and test fuction. One pole for each light.

FP26082013A0003Z.jpg

FP26082013A00040.jpg

FP26082013A00043.jpg

FP26082013A00044.jpg
 
Dave,

This is a quote from your earlier post which had a photo of your annunciator:

We built our own annunciator.
2 switches 4 LEDs 4 resistors.

Did you revise it to a single switch? Also, I don't see any mention of resistors. I think I understand the sketch.

thanks again!
 
TRIB, for your particular GPS, is there any actual switching needed or just some indicator lights with a "press to test" option? How many indicator lights?
 
switch question

Dave,

I want to make sure I understand your sketch as far as wiring the single SPDT switch goes. You mention it is a momentary switch. I interpret this as a 1-7 type, (ON)-OFF-(ON) SPDT from aeroelectric terminology. From your sketch, terminal 1 would be wired to the ground wire for the HOLD LED, terminal 2 would be wired to the aircraft ground, and terminal 3 would have three wires; one to the AUTO LED ground wire, one to J-102-13 and one to J-101-9. In operation, I don't understand how this would function.
 
Dave,

This is a quote from your earlier post which had a photo of your annunciator:

We built our own annunciator.
2 switches 4 LEDs 4 resistors.

Did you revise it to a single switch? Also, I don't see any mention of resistors. I think I understand the sketch.

thanks again!

The resistors are internal to the LEDs
There are still two switches .

1-7 type, (ON)-OFF-(ON) SPDT is correct but it could be OFF-(ON) if one was available
 
Dave,
From your sketch, terminal 1 would be wired to the ground wire for the HOLD LED, terminal 2 would be wired to the aircraft ground, and terminal 3 would have three wires; one to the AUTO LED ground wire, one to J-102-13 and one to J-101-9.

SW1
Terminal 2 and 5 wired to the aircraft ground
Terminal 1 to AUTO LED
Terminal 3 to HOLD LED
Terminal 4 to J-102-13

SW2

Terminal 1 and 3 to J-101-9
Terminal 2 wired to the aircraft ground
 
Now I get it

Thanks Dave,

I just spent the last couple of hours looking at the 155xl install manual and an install manual for an annunciator. I finally got that your sketch was of two switches, with the 2 contacts on the far right being a seperate switch ( the momentary switch you described). I logged on to tell you I had figured it out, but you'd already given me the details. The terminal details may be of help to others, too. The end result is I better understand how the equipment functions. Thanks again for your help.

One final question is do you have a source you recommend for the leds?
 
question for Dave and my schematic

Dave,

Looking at your schematic, it appears that when the switch is selected to AUTO, the J-102-13 is aligned to ground. From the schematic for the 155/300XL, I read that J-102-13 should be grounded when the switch is in the HOLD position, and open when in the AUTO position. Can you confirm this? The schematic is below:

15hxvgo.jpg
[/IMG]

I've redrawn your sketch with the position revised as above and also included the message and waypoint indicators. Does it appear correct? From your sketch I assume that the indicator signals from the Garmin simply provide the path to ground when activated to illuminate the LED. My sketch is below. The detail might be helpful to those less electronically proficient, such as myself :)

2czty6t.jpg


hopefully I put in the images into the post correctly!
 
Dave,
Looking at your schematic, it appears that when the switch is selected to AUTO, the J-102-13 is aligned to ground. From the schematic for the 155/300XL, I read that J-102-13 should be grounded when the switch is in the HOLD position, and open when in the AUTO position. Can you confirm this?

It is entirely possible that I got the pins #'s backwards which would do that....:confused:
IT works and is wired to the Garmin drawing...
I'll have to crawl under and verify which is up and which is down.
I used micro-toggles, but don't think they are pinned different.
 
Back
Top