

barely
I'm New Here
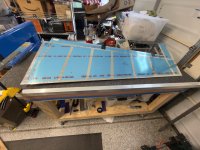
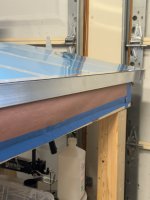
I just finished the trailing edge on my RV-10 rudder. I used 3M tape as the adhesive between the skins and the wedge.
First, I’m doing almost all of this by myself. I can’t often count on someone to help. I borrowed a DRDT-2 to dimple the vertical stabilizer, and that was a royal pain. Trying to maneuver the skin while pulling the handle was not easy. I didn’t mess up any of the dimples, but I came close a few times.
That experience motivated me to invest in a CARD1 from Clemson Aeronautics. I figured that using the foot pedal on the Numatx mounted to the CARD—giving me two free hands—would make things a lot easier. If I had already had a regular pneumatic squeezer, I'd have used that and added a foot pedal to it, but I already had the Numatx.
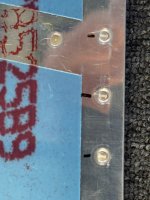
It took some fiddling to figure out how to configure the setup for doing the trailing edge. My first thought was to use the usual PSI-based control for the 1/2 set -- leaving the pin with full travel and lowering the PSI way down. I tried that on some scrap, but it wasn’t as consistent as I wanted at the lower pressures. I ended up setting the pin length to achieve the desired rivet squeeze and used normal pressure. I did the same for the angled set.
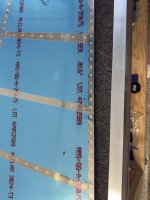
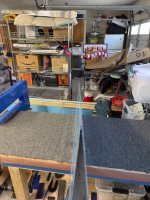
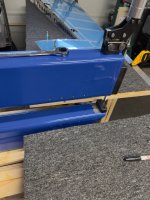
You can see in the pictures below how clean it came out.
All-in-all, I'm really pleased.
First, I’m doing almost all of this by myself. I can’t often count on someone to help. I borrowed a DRDT-2 to dimple the vertical stabilizer, and that was a royal pain. Trying to maneuver the skin while pulling the handle was not easy. I didn’t mess up any of the dimples, but I came close a few times.
That experience motivated me to invest in a CARD1 from Clemson Aeronautics. I figured that using the foot pedal on the Numatx mounted to the CARD—giving me two free hands—would make things a lot easier. If I had already had a regular pneumatic squeezer, I'd have used that and added a foot pedal to it, but I already had the Numatx.
It took some fiddling to figure out how to configure the setup for doing the trailing edge. My first thought was to use the usual PSI-based control for the 1/2 set -- leaving the pin with full travel and lowering the PSI way down. I tried that on some scrap, but it wasn’t as consistent as I wanted at the lower pressures. I ended up setting the pin length to achieve the desired rivet squeeze and used normal pressure. I did the same for the angled set.
You can see in the pictures below how clean it came out.
All-in-all, I'm really pleased.

")
