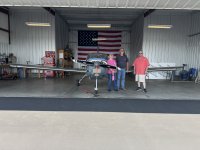
Got the wings mounted today for hopefully the last time, fitted my 3d printed AirBox spacer and reinstalled the air filter, put 5 gallons of 93 octane no ethanol gas in it and ran the fuel pumps. So far no leaks detected.
What kind of sound do you all hear from the pumps running on one vs running on two?
Found some coolant on top of cylinder #2 which had to come from the hose above it that connects to the divider. Not sure what to make of that because I could never find the source. Engine has not been ran yet so if it is leaking, it is at cold/no pressure.
Thanks Nancy and Bob for the help!