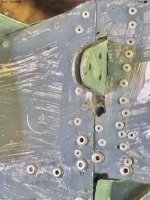
I've got a question for you all. I'm doing the bottom wing skins and the rivet I'm questioning is circled. This rivet helps support the flap bracket.
This is the rivet that connects the bottom skin, rear spar, and flap bracket rib. Is it too flat? Due to it's location I can't measure the height with a caliper, I can't even see it without a camera.
Trying to decide if I should replace it.

This is the rivet that connects the bottom skin, rear spar, and flap bracket rib. Is it too flat? Due to it's location I can't measure the height with a caliper, I can't even see it without a camera.
Trying to decide if I should replace it.