Van's Air Force

The definitive Van's Aircraft support community! Buying, building or flying an RV? Join our exclusive family of mentors and enthusiasts!

Dehydrator & Oil Separator

skelrad

Well Known Member
Friend
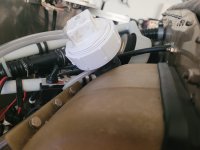
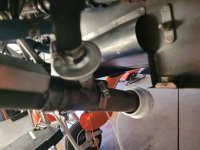
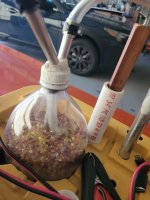
I have my engine on a closed dehydrator loop while it sits on the plane in my garage as I finish the build. I'd love to have the option to keep the closed loop for humid Seattle winters when I may not be able to fly as frequently as I'd like (I've tried an open loop in the garage - it goes through desiccant super quickly in the winter). My plan is to put the Antisplat oil separator and/or crankcase vacuum kit on. Anybody have a way to make a closed loop system work with that type of setup? Not having a free breather line to connect a hose to makes it a little tougher.

1771642622884.png
 
Last edited:
I used a closed loop configuration for awhile and the return line just slipped over my AS oil separator output tube. I bought some larger-diameter silicone tubing off Amazon and stepped it down to the return tubing with a barbed fitting and some zip ties. I can’t remember the size, but it was nice and secure. I abandoned the closed loop concept a few years ago because hooking it up required that I lay down on my back and get under the plane, and that was too much trouble. Instead, I bought 15 lbs of silica gel beads and put 7.5 lbs in the chamber. With fresh beads, I’ll get a humidity of 5%. When it gets to 15-20%, I change the beads for the other 7.5 lbs and take the used ones home to cook. I usually have to do that swap about 3 to 5 times a year.
 
Last edited:
The only way to have a total closed loop is to include the exhaust, intake, and the breather. For me, it's not practical. I just "blast" dry air into the breather using the Black Max engine dryer. You could also put it into the oil filler. If you have the beads, it does mean that you'll need to dry them regularly.

Biz idea: create a cheap nitrogen generator and pump in nitrogen
 
I used a closed loop configuration for awhile and the return line just slipped over my AS oil separator output tube. I bought some larger-diameter silicone tubing off Amazon and stepped it down to the return tubing with a barbed fitting and some zip ties. I can’t remember the size, but it was nice and secure. I abandoned the closed loop concept a few years ago because hooking it up required that I lay down on my back and get under the plane, and that was too much trouble. Instead, I bought 15 lbs of silica gel beads and put 7.5 lbs in the chamber. With fresh beads, I’ll get a humidity of 5%. When it gets to 15-20%, I change the beads for the other 7.5 lbs and take the used ones home to cook. I usually have to do that swap about 3 to 5 times a year.
I've tried the open loop concept, but with the high winter humidity in Seattle, I could never get the humidity below 60% (and the gallon of desiccant I have was pretty well saturated in just a little over a week). The closed loop I have now works great, but with adding the ASA crankcase vacuum setup, the breather tube outlet becomes unusable. I'll keep noodling on it.
 
Just noodling.
Could you install a "T" on the vent with a PCV valve down stream? You would have to remember to cap the Tee or put a valve on it. If my auto memory serves, PCV valve only flows one direction.
 
Just noodling.
Could you install a "T" on the vent with a PCV valve down stream? You would have to remember to cap the Tee or put a valve on it. If my auto memory serves, PCV valve only flows one direction.
I think that's probably the only viable option. Adding a T close to where the tube exits the crankcase and making it accessible through the oil dipstick door would make hooking it up super easy. I'll have to check to see what the PSI of the pump I'm using is. It would be nice and dummy proof if the T had a one way valve that the pump could overcome.
 
I used the AS vacuum kit, then you can plug 1 exhaust with the return line. Works good here.

however, vacuum port is positioned where I could see just into the tube from below. When I took it off for inspection it was coking up higher in the tube than I can see from below. Frequent PCV valve removal and inspection required!
 
I live in Florida and worry about the humidity also. I decided to put in a closed system so that I would slowly but consistently maintain a lower humidity. I eventually added the anti-splat check valve on the breather tube that you picture above. I used a 2 in sewer drain access fitting on both the oil dipstick and the exhaust pipe with the anti-splat check valve. It is possible that the one open exhaust valve in the engine is on the other side but it doesn't seem worth it to me to put in the tee and do both exhaust pipes. I'm not entirely sure of the accuracy of my humidistat but I typically run 24 - 28% relative humidity. I'm in the middle of a condition inspection so the cowls are off but the oil dipstick attachment fits through the oil door without a problem. The entire installation after a flight is mere seconds. The desiccant is held in a 2 L soda bottle where I've modified the cap to allow the return air to be driven to the bottom of the bottle and the dry air to be pumped to the top of the oil dipstick as the anti-splat check valve requires that the air flow goes that direction. I've tried to take pictures to show what I have done. I hope this helps.
 

Attachments

  • 20260222_081549.jpg
    20260222_081549.jpg
    1.9 MB · Views: 46
  • 20260222_081613.jpg
    20260222_081613.jpg
    1.6 MB · Views: 48
  • 20260222_081537.jpg
    20260222_081537.jpg
    1.8 MB · Views: 43
  • 20260222_084644.jpg
    20260222_084644.jpg
    1.6 MB · Views: 54
Last edited:
Just noodling.
Could you install a "T" on the vent with a PCV valve down stream? You would have to remember to cap the Tee or put a valve on it. If my auto memory serves, PCV valve only flows one direction.
Not really. Under high vacuum, the plunger will work against the spring and mostly close. With little or no vacuum, theay are open. Definately not a check valve. They don't necessarilly have a lot of open area to flow and probably a bad idea to put one on a big bore lyc breather path wih all sorts of blowby. I would avoid this idea.
 
I used the AS vacuum kit, then you can plug 1 exhaust with the return line. Works good here.

however, vacuum port is positioned where I could see just into the tube from below. When I took it off for inspection it was coking up higher in the tube than I can see from below. Frequent PCV valve removal and inspection required!
This seems like the most straight forward option. I'll find a rubber stopper to use on the exhaust and give it a test run. My plan is to check the valve every oil change (I also have the pressure relief valve).
 
Back
Top