enigmakv
Well Known Member
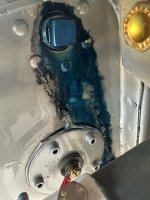
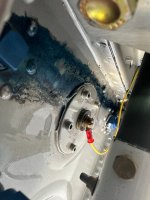
In hunting down the source of a strong odor of fuel in the cockpit after sitting closed for overnight or longer periods (in addition to prepping for the condition inspection) I have removed the seats and most of the panels and covers in the cockpit. The good news is that no fuel leaks are evident in any of the cockpit fuel lines. In 2025 there was a -14A for sale that had "minor heat damage". My sig.other found the salvage listing which included the description that the pilot smelled fuel fumes in the cockpit and upon turning on the master switch a FIRE erupted.
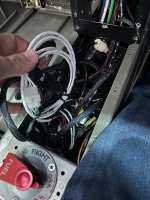
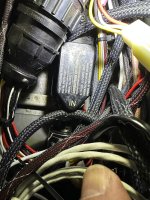
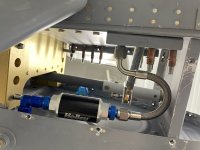
My questions are about the fuel filter and pump. These exist in the -14 in the tunnel under the control panel and in my plane they are BURIED under a rats nest of wiring (see photos).
Is it normal to have this much wiring shoved on top of the fuel filter, pump and fuel lines?
Isn't at least the fuel filter an inspection item on the condition inspection? How would that even be accomplished?