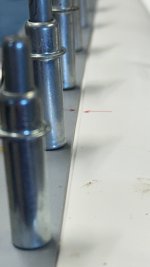
I have a slight gap (approx. .050") between the edge of the rudder skin and the lip of the joggle in the fiberglass tip. indicated by arrows in the attached photo. The gap does not run the entire length, only in the middle. I'm looking for the best way to fill this gap. Can I simply tape the rudder skin right up to the very edge, then with the tip clecoed in place, fill the slight gap with thickened epoxy? I'm guessing the would require a minimum amount of epoxy. Once cured, I would feather the epoxy to the rest of the tip. Would this not result in a lip that it now buts nicely against the entire length of rudder skin? Comments or suggestions appreciated.

Van's Air Force
You are using an out of date browser. It may not display this or other websites correctly.
You should upgrade or use an alternative browser.
You should upgrade or use an alternative browser.
Filling joggle seam
- Thread starter Rv8bill
- Start date

I think that would work fine, but I think you should add some chopped fiberglass to the slurry to make it more structural. Of course roughing the surface of the substrate up with 80 grit before applying this mix should be done. You could use flox as a filler, but even though it is very hard (cured), it’s not as structural as the fibrous chopped glass. Taping/protecting the metal adjoining surface makes a nice narrow gap that can be sanded smooth. Maybe add a couple layers of micro after, to fill in any voids or pin holes to make that filler disappear.
 www.westsystem.com
403 Microfibers Filler | WEST SYSTEM Epoxy
WEST SYSTEM's 403 Microfibers Adhesive Filler is used to thicken epoxy blended resin/hardener and create a multi-purpose adhesive.
www.westsystem.com
For future, or the benefit of others, the step, or Joggle if you will, is rarely straight, and rarely square along the run.
This can be fixed by sanding with a sanding block that has a relatively sharp shoulder. This will allow the tips to sit with a small uniform gap.
This can be fixed by sanding with a sanding block that has a relatively sharp shoulder. This will allow the tips to sit with a small uniform gap.
My fix, probably not acceptable.
Sand the part so whatever you apply will stick.
Apply a release agent to the skin so whatever you apply won't stick. Maybe heavy packing tape and wax.
Apply micro with a little flox as mentioned above and install the tip. Some may get pushed out.
Cure.
Disassemble and finish sand.
Sand the part so whatever you apply will stick.
Apply a release agent to the skin so whatever you apply won't stick. Maybe heavy packing tape and wax.
Apply micro with a little flox as mentioned above and install the tip. Some may get pushed out.
Cure.
Disassemble and finish sand.
What I do:
- Micro in the gap, and any divots in the fiberglass. Sand flat after it cures. Include those horrible pop rivets in this process.
- Add a single bid of glass over the gap and over the row of now micro ballon filled pop rivets. Cover with peal ply.
- After the glass is cured, a skim coat of micro over the area. After set sand and feather in the edges.
Carl
By the way, a .050 gap isn’t much. Paint will fill some of it. If you don’t like the unevenness, use your sanding block and make the gap consistent along the entire tip.Thanks to all!
Good luck whatever you choose. Little things that will be forgotten as you build on.
By the way, a .050 gap isn’t much. Paint will fill some of it. If you don’t like the unevenness, use your sanding block and make the gap consistent along the entire tip.
Good luck whatever you choose. Little things that will be forgotten as you build on.
Exactly. Gap width can be almost anything and look great, as long as it's consistent along the entire length in view. And yes, leave room for paint. Tiny gaps at fabrication just mean paint chips down the road. My personal minimum is the width of a hacksaw blade kerf. A hacksaw blade and a sanding block would tidy up the gap in the photo with no fill at all.
The assumption here is that the fairing will be removable, the usual preference for the bottom of a rudder. Blended tips are different deal.
