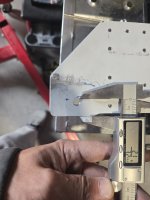
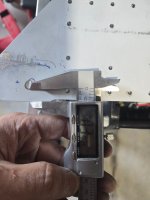
Has the other wing rear connect been drilled yet? And, was the aircraft leveled (cabin longeron reference) before measuring your wing angle-of-incidence -- this can make a big difference in measuring the wing angle-of-incidence because you're using a level on each wing to make that measurement. If both wings don't have the same angle-of-incidence, you will get a "heavy wing" during flight -- the same angle-of-incidence on both wings is highly critical.Thank you for sharing your approach.
As to other questions, I will have to figure out as I go. Fuel tank attachment bracket can be remade and redrilled so I don't think that will be a big challenge. As to wing incidence, maybe I'll be lucky to be within spec not to rework the fuselage part. Maybe the wing moved as I was drilling the hole in increments but the initial measurement was fine, or the initial measurement was wrong to begin with.

Last edited:
")