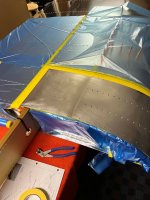
More like an 1/8 ". Used edge of tongue depressor, Put it right along the edge of the overlap where bottom/leading edge skin lays on top skin. None under that joint. Yes used a new micro fiber towel to wipe excess off after clecoing the wing walker doubler on, then immediately riveted while sealant was still wet and would flow a bit. Wiped again. Turned out ok and wiping wet Proseal a lot easier than sanding epoxy imho. Further, that gap now has sealant the full width of the doubler, remains flexible, and provides structural support in the gap where people put their weight on one foot. Can't hurt and that's the way I read the KAI after looking at the structure. Be sure and prime the underside of the doubler and the top skins that lie under the doubler. Clecoed the doubler down and masked to the edge. Rattle canned it with SEM. Be sure and let primer cure out, i let it sit about 5 days before putting Proseal on and riveting. Pix with first pass of primer, I know it looks light because it is.