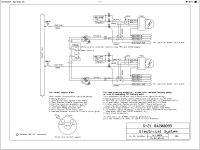
So all P-Mag drivers know there is power, P-lead. Assume x2 P-Mags, to test you ground one P-Mag P-Lead and on opposite P-Mag you turn the power off to test self-power function.
Question is how to do. What did you do? Would you do it different next time.
#1) Two power (toggle) switches and one Standard "Mag Switch, Off, L, R, Both, Start). Advantages or PRO is fairly standard like any airplane and provides some key security. The CON is that big Mag switch. To test you do the standard MAG check as any plane with the added steps of cycling off and back on power to the opposite Mag via Toggle switches.
#2) Two DPDT (toggle switches) On-On-(On) that allows you to turn P-Mag OFF (grounded P-lead), Turn P-Mag ON (Power and P-Lead Open), and TEST (P-lead Open, Power off in momentary position). To start PUSH Button. To do run up simply turn one switch power to off (down) and the opposite to TEST (momentary). Back P-mag that was off back ON, and repeat for opposite side. PRO two DPDT 3 Position switches gets the job done. CON: Not "Cessna" standard", expensive Mil Spec Locking Toggles, and no key and security, although security can be done with external means (keyed or hidden kill switch in series, Prop or throttle locks).
#3) Two SPST (toggle switches, On-OFF for P-Lead only. Toggle will be mounted upside down, meaning, DOWN is Closed and UP is Open. The power will be by CB's, that can either be pulled or a CB with toggle switch built in. So you will have 4 separate switches, 2 for power and 2 for P-lead. Start will be Push Button. Fairly elegant solution. CON not standard where a Cessna driver would understand without training, and no key security like #2. Possible Pilot induced errors. The PRO's are no expensive MAG switch and Special Mil-Spec Lock Out Toggles.
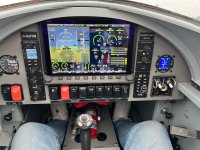
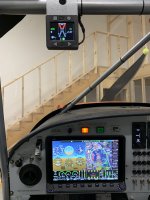
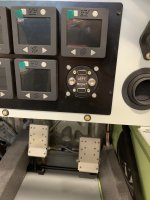
Pictures appreciated. Thank You
Question is how to do. What did you do? Would you do it different next time.
#1) Two power (toggle) switches and one Standard "Mag Switch, Off, L, R, Both, Start). Advantages or PRO is fairly standard like any airplane and provides some key security. The CON is that big Mag switch. To test you do the standard MAG check as any plane with the added steps of cycling off and back on power to the opposite Mag via Toggle switches.
#2) Two DPDT (toggle switches) On-On-(On) that allows you to turn P-Mag OFF (grounded P-lead), Turn P-Mag ON (Power and P-Lead Open), and TEST (P-lead Open, Power off in momentary position). To start PUSH Button. To do run up simply turn one switch power to off (down) and the opposite to TEST (momentary). Back P-mag that was off back ON, and repeat for opposite side. PRO two DPDT 3 Position switches gets the job done. CON: Not "Cessna" standard", expensive Mil Spec Locking Toggles, and no key and security, although security can be done with external means (keyed or hidden kill switch in series, Prop or throttle locks).
#3) Two SPST (toggle switches, On-OFF for P-Lead only. Toggle will be mounted upside down, meaning, DOWN is Closed and UP is Open. The power will be by CB's, that can either be pulled or a CB with toggle switch built in. So you will have 4 separate switches, 2 for power and 2 for P-lead. Start will be Push Button. Fairly elegant solution. CON not standard where a Cessna driver would understand without training, and no key security like #2. Possible Pilot induced errors. The PRO's are no expensive MAG switch and Special Mil-Spec Lock Out Toggles.
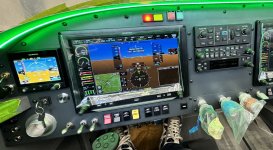
Pictures appreciated. Thank You