Rick6a
Well Known Member
Clay,
They are just "Legend Lights" available at Spruce.
http://www.aircraftspruce.com/catalog/elpages/legendlights.php
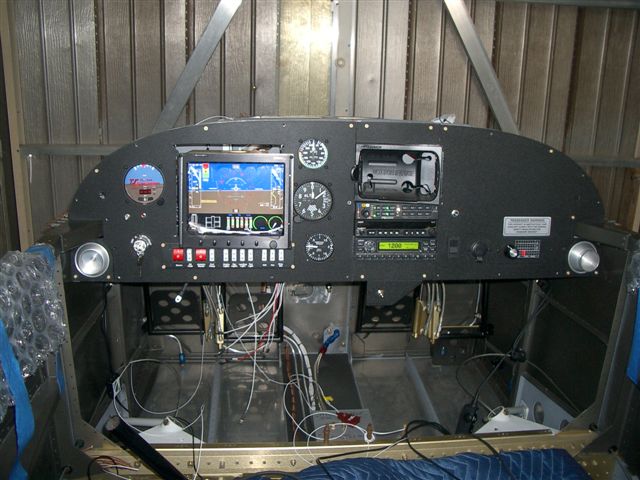
They are made in several colors including clear. Stack em horizontally, vertically, or just position as desired. I arranged 6 into a modular prewired package and the unit is attached to the back of the instrument panel with 2 nutplates. For custom lettering not available from among those commonly sold...such as "Canopy Lock" use your word program and a suitable font or a Brother electronic labeler.

They are just "Legend Lights" available at Spruce.
http://www.aircraftspruce.com/catalog/elpages/legendlights.php
They are made in several colors including clear. Stack em horizontally, vertically, or just position as desired. I arranged 6 into a modular prewired package and the unit is attached to the back of the instrument panel with 2 nutplates. For custom lettering not available from among those commonly sold...such as "Canopy Lock" use your word program and a suitable font or a Brother electronic labeler.
Last edited:
") Lucky for me, the parts I used are available off the shelf. My light configuration is (mostly) wired to illuminate when the circuit is on so they are not really "warning lights" per se. The builder always reserves the option to make things as simple or complex as desired. Finally, simple fellow I am, I shot the panel with Tempo black wrinkle paint marketed for such use. From past experience, I know it is tough stuff for rattle can paint and holds up really well. Even though slightly textured, it readily accepts dry transfers.
Lucky for me, the parts I used are available off the shelf. My light configuration is (mostly) wired to illuminate when the circuit is on so they are not really "warning lights" per se. The builder always reserves the option to make things as simple or complex as desired. Finally, simple fellow I am, I shot the panel with Tempo black wrinkle paint marketed for such use. From past experience, I know it is tough stuff for rattle can paint and holds up really well. Even though slightly textured, it readily accepts dry transfers.