What's new
Van's Air Force

Don't miss anything! Register now for full access to the definitive RV support community.

RV-10 Window install adhesive...continued

rongawer

Well Known Member
Merry Christmas fellow -10 builders!

I'm finally to the point where I'm about to install my windows and am considering the adhesive options. This topic has been discussed many times, so I'm not looking for "the best method". I took some time off from building (life got in the way...), but before then, I had considered using SikaFlex 295UV.

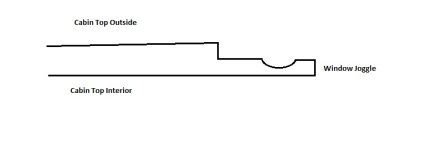
Looking at SikaFlex 295UV "How To" installation document, it states that you need at least 3/16" spacers and "Due to the large coefficient of expansion, the window must have a gap of at least 3/8” between the edge of the window and the frame." Both of these requirements make me question how to use Sikaflex for the RV-10 windows.

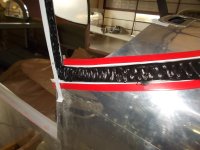
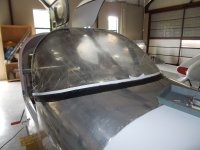
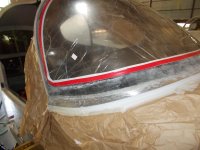
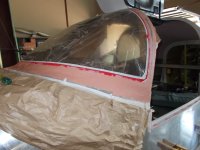
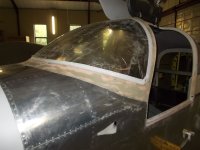
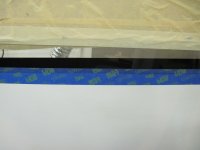
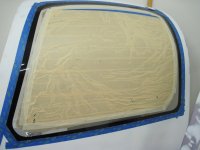
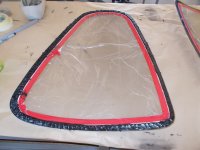
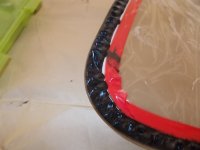
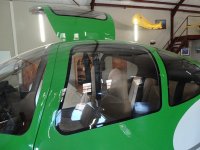
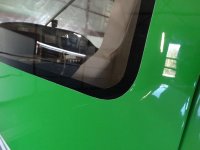
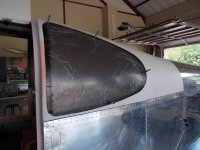
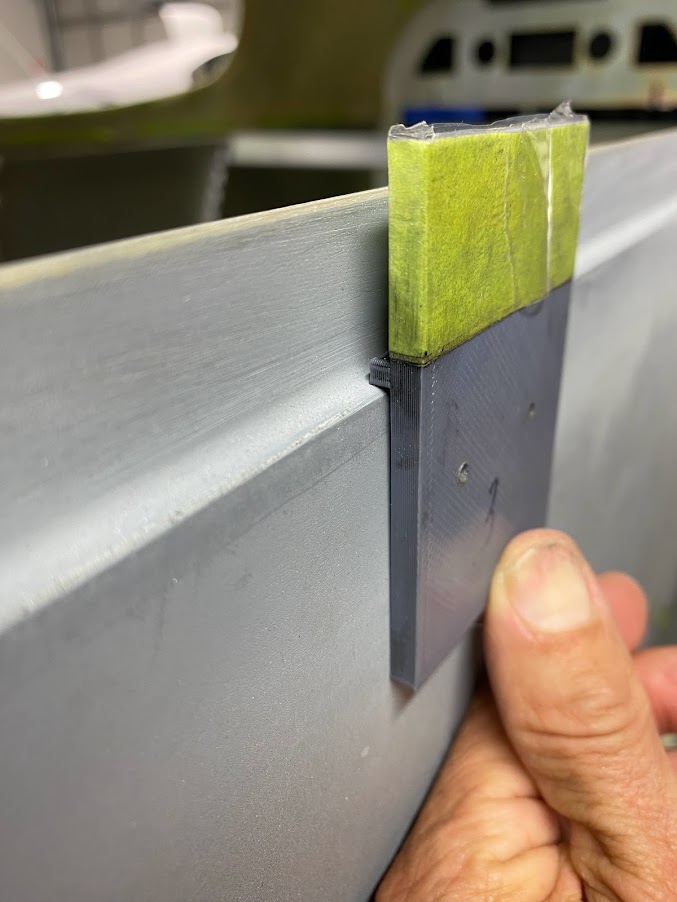
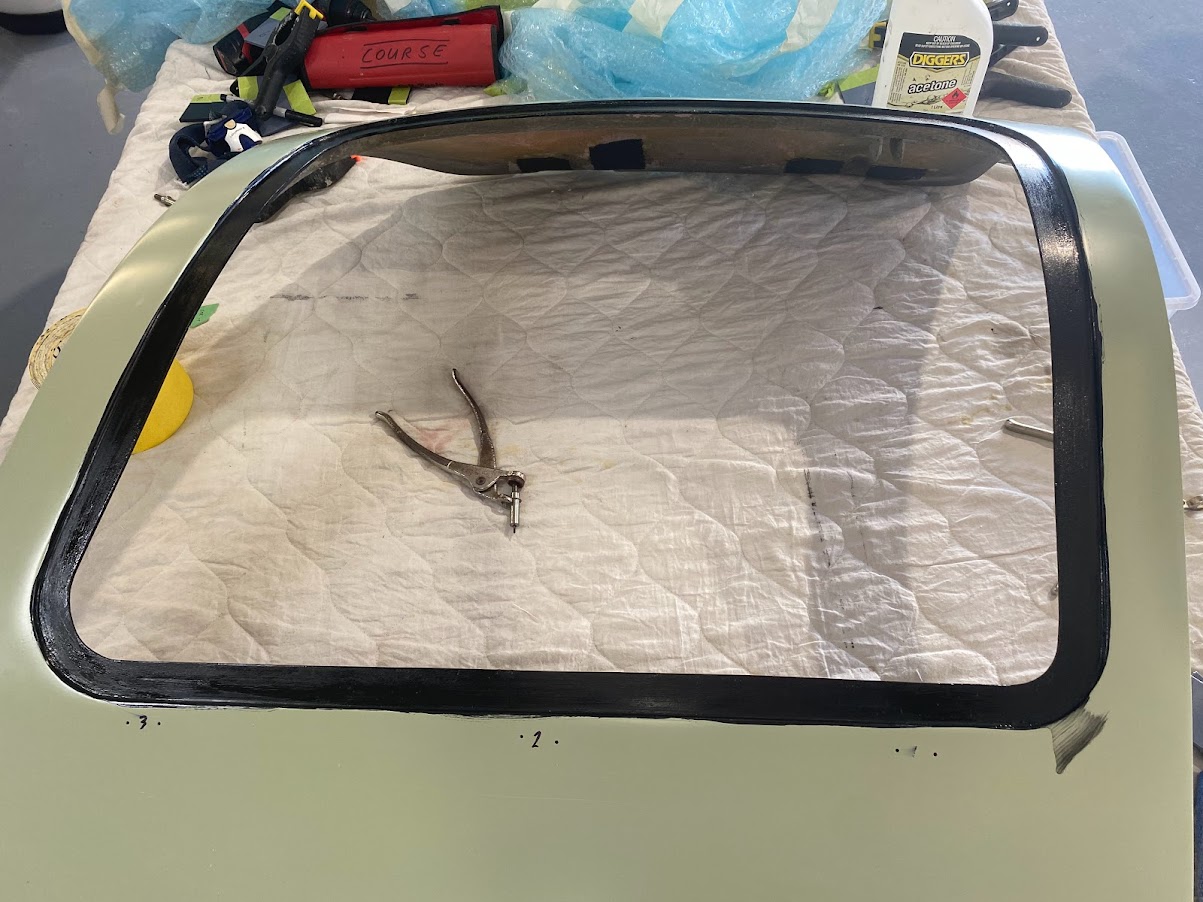
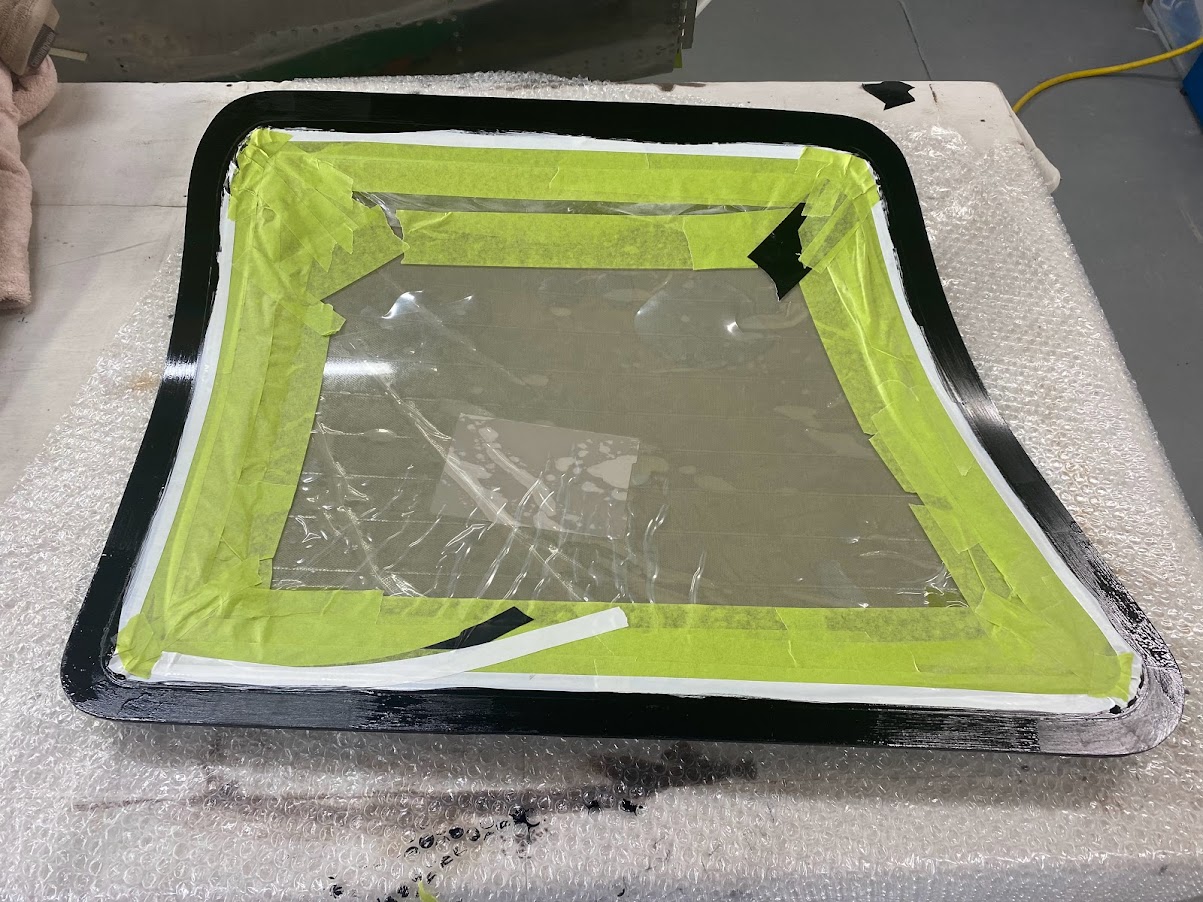
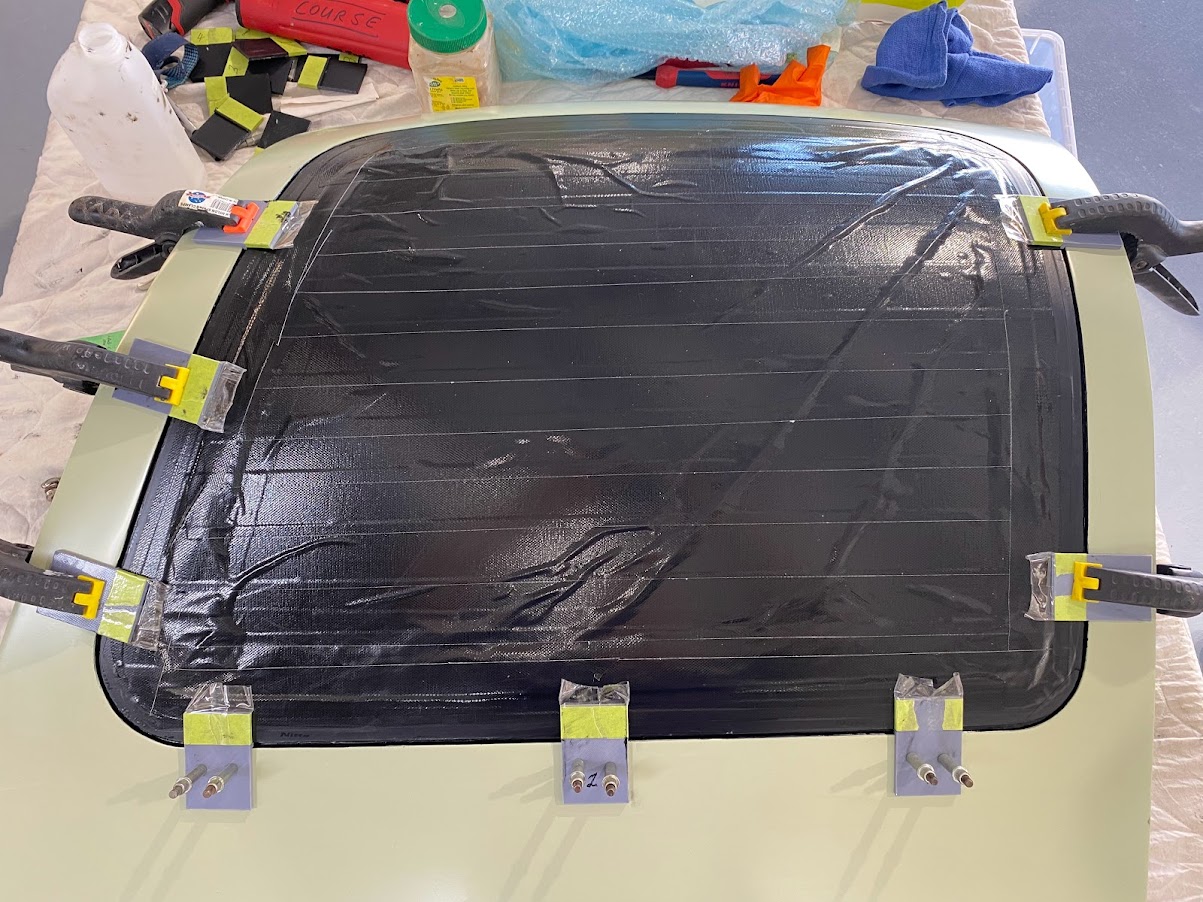
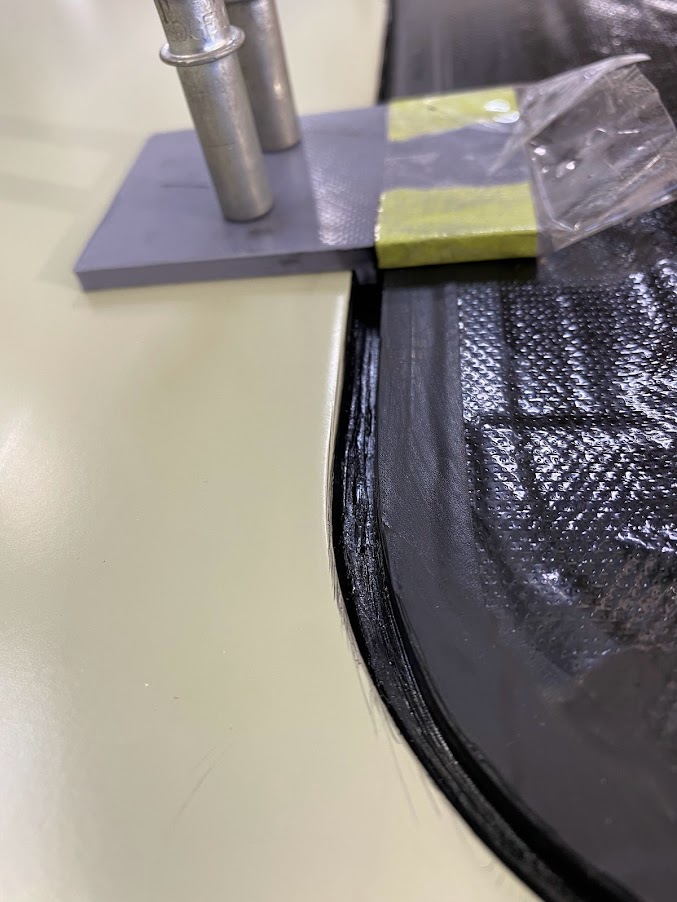
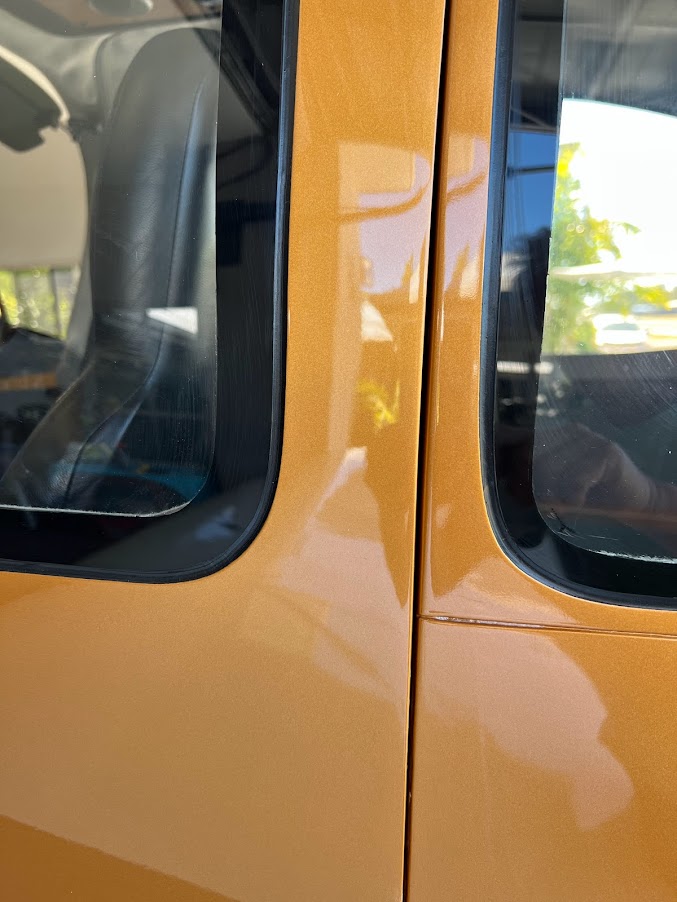
I fitted my windows and want to give a shout out to Cee Bailey for their excellent product. Out of the box, all of the windows fit within the frames very well. I have a 0.030" average inset on the door and side windows, and roughly a 0.040" inset on the windshield with about 0.015" gap around all of them. It looks like adding wet-sand finish the window edges, not much is needed to make them fit.

To follow the Sikaflex instructions, I'd have to trim a lot of the acrylic down, and then have them all sit proud of the cabin - which doesn't make sense.

For those that have used Sikaflex, what dimensions did you use for both edge gap and frame spacing?

Now that I have the windows fitted on the cabin, the Van's instructions showing 0.010" inset and 0-1/16" gap make more sense when using Weld-On 10.

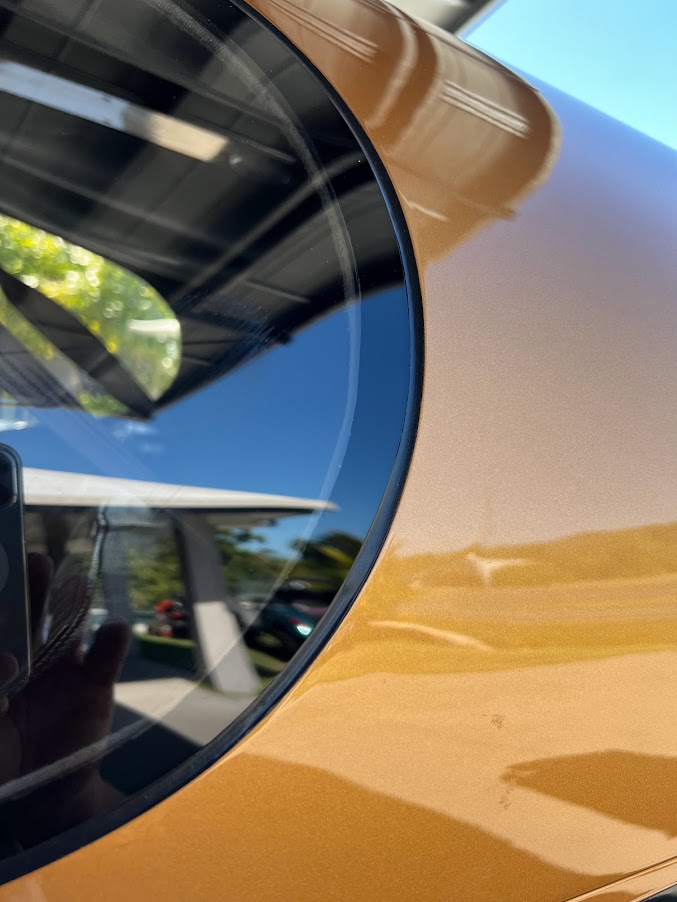
I have read the many threads discussing paint cracking at the window edge, attributed to the different expansion rates of acrylic and fiberglass. If I chose to use Weld-On, would it make sense to finish off the window edge gap with epoxy/filler and then paint the surround black, expecting the edge to crack anyway?

If I cover the surround with fiberglass and then paint it with the rest of the cabin top, should I then expect it to crack in time anyway? What are the long term experiences for this?
 
295 user here. I probably had 1/4 - 3/8" between the edge and frame, can't really remember. I super glued -3 washers to the frame as spacers. Can't remember if I used singles or doubles but made sure that with the spacer the window was flush with the top. I drilled through the acrylic and frame at each spacer location and used clecos for holding during cure. I had to push down a bit between spacers to squeeze out adhesive to make the window sit flush.

Larry
 
Glue

I wouldn't use Weldon. I used Lord adhesive. It was fairly easy to work with and remains somewhat flexible. A negative is that it cures to an off white.

If I did it again, I might try the Sikaflex route.
 
295 user here. I probably had 1/4 - 3/8" between the edge and frame, can't really remember. I super glued -3 washers to the frame as spacers. Can't remember if I used singles or doubles but made sure that with the spacer the window was flush with the top. I drilled through the acrylic and frame at each spacer location and used clecos for holding during cure. I had to push down a bit between spacers to squeeze out adhesive to make the window sit flush.

Larry

Larry, noting that a -3 washer is 0.032" thick, that would make a perfect spacer, but well under the 3/16" (0.188") Sikaflex calls for. I'm assuming you've not had any adhesion issues - right?

For the gap surround, I'm thinking a fillet of Sika and then leave it bare. How did you finish out the gap? Also, I already trimmed my window flanges to 3/4", so cutting the windows back to a 3/8" gap would only leave 3/8" of flange-window seating - is that what you have?

A standard -3 washer is .063” thick. The thin version is .032. I called sika and they told me 1/16” is fine but the minimum. No adhesion issues and windows have seen -20 to 110*

I believe that my flanges were closer to an inch, but can’t really recall. I would have to look at them, pretty sure that i had a 1/2” of adhesion width

I finished the gap with a flexible fairing compound then painted. It failed ( paint cracked) the first time That ambients went below 0. Wished i had finished with the sika.

Larry
 
Last edited:
Thanks for the info Larry - knowing you can go down to 1/16" with Sikaflex film is very useful.

It's off topic, but you've drawn me in.... an AN960-3 (NAS1149FN332P) washer is 0.032" thick. I don't know if you can still buy AN960-3L washers, but the spec for them is 0.016". It's not until you get to AN960-10 washers that the standard thickness is 0.063" and -10L are 0.032".
 
i would not use weld-on or the lord adhesive and use the method detailed in the instructions.

there is NOTHING worse than having a brand new plane with a $25k paint job and having it crack around the windows. My first flight was less than 3 years ago and its cracked already.

in my opinion its a terrible way to finish the windows. i'd use the silpruf method.

my $0.02 - your mileage may vary
 
I won’t debate which method is the best, because like most EAB topics, they tend to be more opinion than fact. The other variable is that all of us have different experiences and abilities. There is no way to tell via the Internet if any particular failure was caused by a product failure or a bad application during install.

I can share that about 15 years ago, I used Lord adhesive with two layers of fiberglass over the joints. After 10 years of flying I’ve experienced no issues whatsoever. No paint cracking yet either.
 
I used the Sikaflex adhesive for all the windows. I did the same as Larry did with the -3 washers. I used a single layer of glass around all windows. It has been 10 years and 1400 hours with no issues other than some cracking around the rear window rear areas. I have no cracking around the doors or the Windscreen. The cracking appeared on the first 95 degree day. The Sikaflex adhesive is made to flex, so you can expect it to eventually crack, even with a layer of glass.

Most who have used the Lord Adhesive have not seen cracking, as long as two layers of glass are used around the perimeter

If I were to do it all over, I would use Silpruf method. It will allow you to change out the window if it breaks.

I have always professed, that the installation of the window from the outside is just wrong and a very poor design.


Yep, the joggle should have been reversed and the windows installed from the inside. Obviously, the windscreen would still need to be installed from the outside. Also, the door openings should be 3/8” narrower to allow the cabin top to be installed without removing most of the jambs…
 
I used the Sikaflex adhesive for all the windows. I did the same as Larry did with the -3 washers. I used a single layer of glass around all windows. It has been 10 years and 1400 hours with no issues other than some cracking around the rear window rear areas. I have no cracking around the doors or the Windscreen. The cracking appeared on the first 95 degree day. The Sikaflex adhesive is made to flex, so you can expect it to eventually crack, even with a layer of glass.

Most who have used the Lord Adhesive have not seen cracking, as long as two layers of glass are used around the perimeter

If I were to do it all over, I would use Silpruf method. It will allow you to change out the window if it breaks.

I have always professed, that the installation of the window from the outside is just wrong and a very poor design.

IMHO, the sika is great, as it has a huge amount of flex potential and will never let go. The problem is that paint can't deal with that much movement. My initial plan was to use the method that Jan in AU used, which is to paint the top first then install the windows and use the sika to fill in the gap. This leaves a nice looking clean black window border and will never have cracking. In my case, I had the old green top and the windows lines at the edge of the joggle were very wavy (looked like a 5 year old cut out the mold) and the edges were riddled with craters from air bubbles in the resin. I just didn't want to take the time to clean it up enough to withstand the visual contrast from white to black. Like many similar time saving decisions, I regret it.

I was going to do the lord adhesive (less flex than sika, but not as rigid as the weldon) but my friends in Ohio would only order a case at a time and had a 3 month lead time to re-stock. I didn't have 3 months to wait and couldn't find an alternate source, at least not with the slower activator.

I strongly recommend that NO ONE use the weld on 10. It is just TOO rigid for that application. I had even called weld on to discuss it and they said NO WAY should you use weld on 10 for that application and recommended a different weld on product that had more flex. Somewhat surprised that Van's hasn't modified this recommendation.

Larry
 
Last edited:
Expansion rates and more

After having built a few metal airplanes, at this point, I did not envision spending this much time contemplating adhesive for acrylic and fiberglass. But it is a little too late to reconsider building a -10 at this point...;)

Taking into account the average expansion rates of acrylic and fiberglass, ignoring geometric and length variances, and then rounding off, it's roughly 2.5mm linear growth for acrylic vs 1.3mm for fiberglass from 15º to 50ºC, leaving roughly 1.2mm differential growth rates over that temperature range. For those of us that have our lives standardized on two systems (my amazing, articulate, wife is from Europe, and I are an Engineer, born and trained in 'merica), that's roughly 0.050" reduction in gap around the window from a cool 60ºF summer morning to about 122ºF, or a little less than a 1/16" movement between the window edge and the frame. Hence the concave sika surround in the morning and convex in the afternoon.

Adding in my imperfect building skills and variances in the material, 1/4" provides enough support for me to use Larry's 1/4" gap suggestion with some margin for error - still much less than Sika's 3/8" gap requirement though.

That would still leave me 1/2" of contact area (seal width) on the flange, but the glass would still be a touch proud of the cabin top with a 1/16" spacing (seal depth) - MUCH less than the 3/16" Sika has in their documentation.

I appreciate all of the described methods that have been successful for others, but in many cases, and apparently all methods, I should still expect that it is possible, if not likely, that cracking around the window will occur and should just plan for it.

BTW, I too called Sika and IPS Adhesives over the last couple weeks. Sika tech support told me that while some folks may have had success with less boundary material, they would only recommend sticking to the instructions (well instructed by their legal department, I'm assuming...).

IPS Adhesives, maker of Weld-On, tech support (nice folks BTW) told me that #10 is their recommended product for structural joints of acrylic and fiberglass, and while their product was designed for structural sign installations, would recommend this product for this application - with a key point of "don't overdo it". Their advice was to apply the adhesive to the fixed substrate and then lightly press the moving substrate onto it and only tape in place. Because Weld-on is less of an adhesive and more of a welding (melted bond) method, the bond thickness is thin, expecting less than 0.020" bond thickness. Too much product causes a mess that will require a physical removal method, such as grinding, to clean up and too much pressure will cause stress in the material once the bond has cured. That all makes sense to me and is a likely reason some folks have seen crazing in the glass.

Convinced the good folks at Van's did their homework when they chose Weld-On 10, I decided to research further and went over to TAP Plastics in Pleasant Hill a couple weeks ago. They were kind enough to spend some time with me explaining some of their processes and showed me how they apply Weld-On and discussing the different methods and uses; we of course discussed airplane windows. I do understand why Van's chose Weld-On #10; once properly applied, the glass literally becomes part of the frame and is not coming away from it. I left TAP Plastics with a different perspective on the Weld-On product.

The conclusion I've come to is that the expansion rate differential will exist, regardless of the product used, and there is no way to eliminate movement at the window-frame joint. It's going to happen. My options are to use something like SikaFlex to allow more unrestricted movement of the window, Weld-On - which as Larry pointed out, becomes a rigid joint (I'll add "very solid"), or some of the other in-between options of Lord Adhesive or Hysol - and I'm sure there are others.

Whether I went with Sika or Weld-On (or Lord or Hysol), there remains the issue of how to design the joint surround in regard to paint cracking as a result of the inevitable movement. It appears to fall to two options: make a surround that has some flexible coverage, such as lightweight fiberglass cloth, or just plan to have cracks and make the surround a separate color with a defined crack line to start with.

This all leads me to my unanswered question from my first post, which is "If I chose to use Weld-On, would it make sense to finish off the window edge gap with epoxy/filler and then paint the surround black, expecting the edge to crack anyway?"
 
This all leads me to my unanswered question from my first post, which is "If I chose to use Weld-On, would it make sense to finish off the window edge gap with epoxy/filler and then paint the surround black, expecting the edge to crack anyway?"

If you fill the gap with sika it will go from concave to convex with the temp swings as the acrylic grows and shrinks. I have observed this and it is not a small change at the extremes. If you fill that gap with epoxy the window CANNOT expand. That means the acylic is either going to bulge or build up a lot of stress. I WOULD NOT fill that gap with a rock hard substance like epoxy

It is my speculation that when people put a couple layers of fiberglass OVER the joint, that the bond between the acrylic and epoxy is weak and shears and after this the acrylic slides horizontally under the tape and prevents paint cracking as the paint is over the tape and the tape is not moving, just the acrylic under the tape. This just a guess, but based upon observation that epoxy does not bond well to acrylic, especially in shear. Unfortunately that won't work if the gap is filled with sika, as when it goes convex it will push the tape up and cause cracking where the tape fairs into the top.

This spring I plan to address my paint cracking. I plan to make a 1.5" or so vynal trim around the window seams. I am hoping that it will stretch and move much more than the paint and effectively hide the paint crack. I am thinking that a black trim will look kind of cool. Unfortunately my top is painted white so the crack with black sika under it has a lot of contrast and stands out like a sore thumb. Even if the black vynal cracks it will be MUCH less visible.

I find it odd that you and I got such different opinions from the weld on tech folks. I tend to trust mine more, as I have seen several posts here from folk that have had the 10 window de-bond with the weld on. Though it is very possible that it was simply due to poor prep or bad procedure. I will say that NO ONE in the marine industry uses rigid adhesive like weld on for adhering acrylic to fiberglass structures. It is all stuff like sika and silpruf. Most boats have lots of acrylic bonded to fiberglass and tend to trust what they use as they have way more experience with it.

Same thing with glass in high rises. I remember when the CNA building was shattering panels left and right and killing people on the sidewalks. The ultimate answer was they used too rigid of an adhesive. 30 years after installation someone had the wise idea to put reflective film on the inside of the windows and didn't bother to get an engineers opinion. It raised the glass temp just enough to cause expansion beyond what the adhesive could stretch to and it was shatter city. I am guessing that the structure swaying in the wind didn't help either.

Larry
 
Last edited:
If you fill the gap with sika it will go from concave to convex with the temp swings as the acrylic grows and shrinks.

I do like the idea of filling the gap and finishing out the window surround with Sika. I'll end up with a black boarder around the window, but that should look good against the blue paint I'm planning to use.
 
I do like the idea of filling the gap and finishing out the window surround with Sika. I'll end up with a black boarder around the window, but that should look good against the blue paint I'm planning to use.

This is similar to what we did. The windows are bonded in with Sika, using washers as spacers as needed to flush the window. A consistent gap was left around the perimeter which had some squeeze out. I trimmed the squeeze out back slightly below flush, which the Evoke painters will fill with their gloss black sealant. They have agreed to paint a black "border" around the perimeter of the window - partially for aesthetics and also to protect the Sika from UV.

No fiberglass was used anywhere on the windows.

Like others have said, the installation would be better and more secure if the joggle was on the inside.
 
Below are a couple of photos of my original plan using Sika. The activator is applied to the window in a uniform amount thus showing a nice black border when observed from the outside of the window. My original intention was to paint the plane and then fill in the outer border with proseal. Just like the Cirrus aircraft do. At the last minute I decide that I did not want the black border and filled in the gap with sika and then one layer of glass and painted the outside of the window the same as the fuselage color. The cracks I have are only around the back window frame at the rear curve and the front curve. The door windows are not cracking.

Looking back on it, I should have stuck with my original plan! The black border would have looked fine, and the replacement of the window would be easier if required.

BTW, I made test coupons during the installation of the windows. It's virtually impossible to separate the material without breaking the window material or the fiberglass.

Larry, let me know how the vinyl works out. I was thinking of the same thing.
 

Attachments

  • IMG_1511.jpg
    IMG_1511.jpg
    178.1 KB · Views: 179
  • IMG_1512.jpg
    IMG_1512.jpg
    214.5 KB · Views: 189
They have agreed to paint a black "border" around the perimeter of the window - partially for aesthetics and also to protect the Sika from UV.

Sounds like a good plan. FYI, the Sika 295UV is very UV resistant by design and needs no top coat. It is made to adhere acrylic to fiberglass in the marine industry. It is designed to sit in the sun for decades and not break down. It is the gold standard for marine windows, so believe it it quite effective in surviving under intense UV exposure.

Larry
 
Silpruf

A couple of earlier posters referenced Silpruf as alternative method. I installed all the glass on Tom Chapman’s -10 using this method and they turned out wonderful. Glastar guys have been installing their windows this way for years. The process also provides for a gap around the window which will allow for contraction and expansion. They also use a technique which provides for the required spacing between the glass and cabin top joggle and makes for quick and easy leveling. I recommend taking a look at the below links. The videos are quite lengthy but very detailed. The installation process, I suspect, could also be applied to Sika as well. Also, Silpruf comes in various color options if black isn’t your thing.

https://glasair-owners.com/glastar-...an/glastar-and-sportsman-window-installation/

https://youtu.be/A336SG-fsiI
 
So glad I found the Silpruf videos before I reached that step!

Rick, I'd chime in with an "amen" regarding Silpruf, but Ron literally told us in the first line of the first post that he is not looking for the best method.

What can one add after that opener? :p

Ok, so I did chime in. Ron, I beg you, at least look at the Silpruf videos before you launch into this phase of your build. Whatever you decide is your sole province, but at least consider what many believe is the best way.

Have you settled on a primer yet?
 
Oops!

Rick, I'd chime in with an "amen" regarding Silpruf, but Ron literally told us in the first line of the first post that he is not looking for the best method.

What can one add after that opener? :p

Ok, so I did chime in. Ron, I beg you, at least look at the Silpruf videos before you launch into this phase of your build. Whatever you decide is your sole province, but at least consider what many believe is the best way.

Have you settled on a primer yet?

Well, at least I’m in good company when it comes to ignoring an OP’s original question.
 
Last edited:
Both Sika and Silpruf look to be great products for installation; the main issue I have with both is the bond layer thickness. Sika calls for a minimum of 3/16" layer and Silpruf calls for 1/4". The window frame depths on my door and rear windows have an average depth of about 3/16" with some pretty shallow areas - notably at the leading edge of the rear window frames where it only measures 5/32". Considering the window is 1/8" thick, that's not a lot of film thickness available...

Others here say that Sika told them a minimum of 1/16" is acceptable, but when I called Sika, they said that the minimum is 3/16" is required to accommodate thermal expansion and contraction and they would not approve an alternate installation; this agrees with their installation instructions. Silpruf's instructions say something similar, but call for 6mm (1/4") minimum. But even a 1/16" minimum cannot be achieved without having the window extending above the frame top surface; drawing 45-08, Fig 2, calls for "flush to -0.010" low".

Ron, I beg you, at least look at the Silpruf videos before you launch into this phase of your build. Whatever you decide is your sole province, but at least consider what many believe is the best way.
I watched the 5 video Silpruf series by Fibertech Composites; it's obvious you need good stand-offs, his minimum was 1/8".

Lord Adhesives allows 0.010-0.040" bond layer thickness, so that is a viable option, but, of course, it needs UV protection and doesn't come in black.

The tech support folks at IPS Adhesives said bond layer of 0.020" would work well with no need to go beyond that. Although folks have called the Weld-On a rigid installation (which it very much is compared to sika or silpruf), I found it interesting IPS support told me that the bond does have elastomers in it and is designed to interact with the thermal expansion variances of two different substrates. They also told me that it is designed to be a used in direct sunlight with no additional UV protection...and of course it only comes in white ;)

So no perfect solutions. I agree it would be nice if Van's would invert the joggles to provide internal window mounting, and with a deeper joggle.

Noting the number of folks advocating Sikaflex and Silpruf for the RV-10, and assuming my window frames came off the same production line, I'm guessing a lot of folks had the same experience and went with the "grip and rip it" method and used a very thin bonding layer, much thinner than the manufacturer spec... if not, how did you accommodate for the thicker bonding layer requirement?
 
Last edited:
It's been about 4 years, but...

I recall grinding the inside joggle material a little thinner in places to allow fitting the proper depth of spacer under the transparency. Also pretty sure a lot of my sliced Silpruf spacers were much less than 1/4" thick, if even any of them were that beefy.

The sealant bed depth may be off-spec, but nobody I know of has lost a window using the GlasStar method, and certainly none of them are experiencing paint cracks.
 
Zach

It might be worth your time to contact Zach Chase and get his input regarding the thickness of the standoffs. He certainly has a lot of experience installing Glastar windows. I do recall my standoffs varied in depth throughout each installation. In no case was there not at least a 1/16” gap, usually greater.

http://www.fibertechcomposites.com/
 
I recall grinding the inside joggle material a little thinner in places to allow fitting the proper depth of spacer under the transparency. Also pretty sure a lot of my sliced Silpruf spacers were much less than 1/4" thick, if even any of them were that beefy.

Thanks for your details on this Bill; it is what I expected. Unfortunately, the frame thickness around the rear windows, at least mine, are only 0.097" thick to begin with, so not a lot to grind out. For me to obtain a minimum 1/16" thick bond layer (1/4 of the manufacture spec of 1/4"), I would have to have my window protrude from the cabin about 1/32" vice inset 0.010". Knowing the thickness of my frame material and depth and the window thickness, I can only conclude there are some very thin bond layers out there at about 0.030" or less.

This is of course experimental aviation, but I have a hard time ignoring manufacturer instructions and design criteria. While I'm happy folks have had success with significantly reduced bond layers, I'm not sure I can convince myself to do that.

I've checked into using Silpruf at length, including inspecting existing Sportsman and Glastar installations. I don't know anyone locally that has Silpruf on an RV-10, but would be happy to see that installation as well if someone wants to volunteer to show me. With what I know, I would consider using Sika or Silpruf, but then use screws in key locations as a backup, al a RV-12, at least on the side windows.

While I don't have any information regarding Glastar windows coming out, good or bad, it's a different joggle and is significantly deeper which allows a much thicker bond layer than for an RV-10 Van's provided cabin cover. The problem I have reducing the depth of the bond layer well below the manufacturer's spec is the loss of elasticity and overall bond strength. An example of this is a rubber band. Take one and stretch it, then cut in down to 1/3 of it's original length and stretch it with the same force; it might still work, but not as designed - and will most likely snap.

...and certainly none of them are experiencing paint cracks.

That very much makes sense considering the Silpruf SCS2000 line is silicone and is not paintable. I would imagine no one is painting it, thus no cracking. But it is available in 13 colors, so matching is great.
 
Last edited:
I have only used Sika 295UV

I have only used Sika 295UV on all my projects. I really do not know anything about Silpruf.

Just a few comments.
The first RV7A build was in 2005 and the Sika is still holding up extremely well.
About two years ago I had to replace the windscreen on a 7A tip-up that I have built. It had a bird strike. Boy it was a battle and a half to remove the broken one. The sika really held on tight.

BAck to RV10s. I see a lot of talk about spacers. What I have done is to apply a bead of uniform thickness to the plexi. Then push the windows into place. Squeeze out the Sika until the plexi is more or less level with the fiber glass. Finally kept it in place with a few clecoes. I found this way the Sika thickness is good. The #40 holes are filled with Sika afterwards.

I prefer not covering the side four windows with glass or anything as it tends to crack. Only paint up to the sika. Except on the windscreen where one or two layers of glass should be applied. I m attaching a few pictures from different builds that should make it clear.
 

Attachments

  • DSCN1795.JPG
    DSCN1795.JPG
    517.2 KB · Views: 253
  • DSCN1796.JPG
    DSCN1796.JPG
    489.9 KB · Views: 236
  • DSCN1833.JPG
    DSCN1833.JPG
    485.7 KB · Views: 330
  • DSCN2542.JPG
    DSCN2542.JPG
    527.5 KB · Views: 209
  • DSC01361L.JPG
    DSC01361L.JPG
    192.2 KB · Views: 301
  • DSC01356L.JPG
    DSC01356L.JPG
    155 KB · Views: 282
  • DSCN1800.JPG
    DSCN1800.JPG
    534.3 KB · Views: 333
I did the Sportsman Silpruf window install. Flew the plane for over a year unpainted, so the joggle was not filled in yet. Been over four years post painting with joggle filled in, and all is good. The benefit of Silpruf is its flexibility (perfect for a Sportsman window type install), it is 100 percent UV resistant, and if window replacement is required, comes out like a car windshield. Personally I would not use Silpruf if going the glass over method. To much movement between the fiberglass and lexan with Silpruf. I like the look of my install and if I ever need to replace a window (hopefully never), it will not require cutting out and redoing the fiberglass around the window.

Sika has UV resistance, but for marine installation they recommend a UV band (Sika highly recommends the application of an opaque perimeter band around the exterior window perimeter for long term UV resistance. Use a UV resistant paint that is suitable for use on plastic surfaces). This is why it would be nice if the joggle had been designed for interior window installs (as Bill mentioned) and how Cirrus windows are installed, with Sika, with no UV exposure since that material is protected by the window flange. With that said, our planes are usually either in a hanger or covered and not exposed to an outside marine environment for years, so I don’t see a UV band necessary in our application.
 
Last edited:
I have what is likely a dumb idea/suggestion. But sometimes that's just what we're here for.

I plan on the SilPruf method, but those who are concerned about the adhesive thickness being too thin.... Would it be possible to router a very slight depression/channel into the window joggle, versus sanding the whole joggle down, to at least give a 'bead' of thicker sealant that is (or is much closer), to spec thickness? Would this allow some safety margin or cause more risk of failure?

Consider this a 'cross section' of the window joggle.... Good idea?/Bad idea?/Not necessary?/Go home you're drunk?/
 

Attachments

  • cabin top window router channel.jpg
    cabin top window router channel.jpg
    14.3 KB · Views: 178
Last edited:
BAck to RV10s. I see a lot of talk about spacers. What I have done is to apply a bead of uniform thickness to the plexi. Then push the windows into place. Squeeze out the Sika until the plexi is more or less level with the fiber glass. Finally kept it in place with a few clecoes. I found this way the Sika thickness is good. The #40 holes are filled with Sika afterwards.

I prefer not covering the side four windows with glass or anything as it tends to crack. Only paint up to the sika. Except on the windscreen where one or two layers of glass should be applied. I m attaching a few pictures from different builds that should make it clear.

Jan, this is very helpful; the photos provide a lot of information - thank you! Knowing you've had time in service for 17 years with no additional protection and has held up well is good to know.

Sika advised that 209D be used on the acrylic, but 209G+P for the fiberglass frames. Noting the ridiculous price of the little can, are you using 209D on both frame and window?

One other thing, I noticed you have a thin gap around your windows; it appears to be about 1/8" - maybe even less, which is obviously sufficient. Is that about right for your installations?
 
Last edited:
Brad, I think that any cracks would occur at the initial left-most part of the thinner section. I would not consider doing that at all.

Dave
 
Brad no need to. Look at the pictures Jan posted. You put a thin layer on the window and let it set up on the windows first. Then when setting the windows you spread a layer on the window flange, then set the window. You use wing nut Clecos with tabs to hold the windows in place. You just tighten the wing nut on the clecos just enough to hold the window in place. A little Silpruf (or Sika) should squeeze out around the edge, which gets clean up. The window should end up flush with the cabin top window edge. Once the material has cured, it’s not going anywhere.
 
My opinion as well, Rich.

FWIW, I'm only a few months post-paint, but 2 years in to flying the -10. I have yet to add the final bead of Silpruf in the gap around the windows, and will do so once I'm done with cut-and-buff and the requisite touch up with the air brush in places where I sanded or polished too deep on the color coat :eek:

Very happy with the degree of flush-ness achieved between the plexiglass pieces and the cabin frame exterior. I'll probably pick up half a knot from filling in all the grooves.
 
Last edited:
Sika Engineering

I received a callback today from Sika technical support. I thought after asking the forum these questions, and then talking with their customer service rep on the phone the other day and comparing to the experiences here, I needed more info, so I left a phone message with their technical support line yesterday - and want to report back on what I learned about their product.

First off, their bond layer is designed around the elasticity of joint and retention based on weight of the substrate being held - in our case the weight of our windows. The stated 3/16" bond is intended for large, heavy windows, such as 3/8" thick, 100 pound marine use windows that could be exposed to large compression and shear forces (think rain storm at sea).

For our thin, light windows, a thinner layer is adequate. In case you haven't measured them, the rear windows from Cee Bailey are just over 2lbs and the door windows are about 3lbs. The windshield is much heavier, but it is also mounted much more durably with different forces than the side windows.

Here's some data I got from him for lightweight PMMA sheet windows (which both Cee Bailey and Van's windows are):
- 1mm x 15mm bond layer is a minimum. Recommended 1mm thick nylon or silicone material around the edge for spacing, to be removed and backfilled once the initial adhesive is set.
- 2mm gap on each side for a window up to 600mm is adequate. (the formula Cee Baily uses for expansion is 0.00004"/ Inch / ºF, so you can calculate as needed. For the door window, it works out to 0.059" total expansion from 60 to 120ºF, so 2mm on all edges has some safety margin built in).
- Pressure just sufficient to squeeze the adhesive bead to the bond edge is needed. Sika uses durable tape to hold while curing.
- 206G+P primer should not be used on acrylic.
- 209D primer is required for acrylic, but will also work on fiberglass, so it is the only primer needed for our application.
- UV protection is not needed, but recommended with clear acrylic for the 295UV bond layer for optimal life. If desired, use 209D primer and then acrylic paint.

My take away, Sikaflex 295UV is a great solution for an RV-10. Of course many folks already knew that. But for me, knowing is one thing - knowing why is another.

It just occurred to me that someone else might want to know how many tubes are needed. Based on a 1x15mm bond layer, about 24 ounces by volume is needed. Three cartridges of 295UV will do the job on an RV-10.

Sika has updated names of their cleaners and primers, so here is their updated Pre-Treatment Chart for your quick reference.

Shopping list:
- 3x 10.3oz tubes Sikaflex 295UV (or 4 if you're like me and hate to run out...)
- 1 can Aktivator 100
- 1 can 209D primer

And here's a plug for the best price I've found... Jamestown Distributors
 
Last edited:
295UV and 209D primer

Hi Ron,
Thanks for digging in and providing the "WHY" as to why this works so well.

Adding to Jan's post I have adopted this method and I am most pleased with the results.

Do yourself a favor and find a friend with a 3D printer and make some of these,

AL9nZEUOo2NM0GFxsA8F2nxpkuSJK0JN6iaH48cxRxLs4WTgTjt_hUbR5LO0K3_VO7xH8SR4R2jKeDjUZLduSXVC7cg4_hV1uY7z0RV349fzABfz7xXSLp3qjyvte8vsUa7sNvi1bJD36IhxNXAjecUpSVsXpA=w677-h902

AL9nZEU7k8Rvh_3k4Jks1Cr89O-a7wi8F0ehZ1U30-VE_diZfebdlTIJ9OLVUuHjNYPb1dN7zC4IHa4egio8oWUbzwZ9AAAEZiUX3VGGx40ioFIJpOJEdOCYf0cPwOoGnkSuY-IpTsjV4x3ULWFsvlxd6tAD4Q=w1203-h902


I had 20 made.

If you are still building, increase the joggle width to 7/8", this allows for the 1/8" gap you will have using the 3D printed clamps.

Use the primer on both surfaces making sure you rough up the plexiglass with at least 80grit paper.
AL9nZEWZrY8UDXE7Z8DSvSO3PK268iwQGiF5Uwh66wEvDkfxVZjNGRs9TgatPMd8WjOQZdLyoxwz9Ee2gmTWNkJmzMBp0A9VKPxajNdCRNy6d_yMPA11hM3IDiD8esc6FLEw9m7F-igsIfOypnfa5J1JRx-Iuw=w1203-h902


AL9nZEXCg19XxgzD2OpaJwLnWvu5qxbs0CvCIrk2GASBBxv24F75pq5RfCApalTxZkXhg6DgPMKw6iKFYyx0gzH2ILoXpoizruFPC8iLU6VPRZP-ftBK6O8pJVdCHnTETJUAkfexIvcTNWBB_W-z5YrohtZdNA=w1203-h902


As Jan mentioned, no standoffs are required because after you have layed down and spread an even coat of sika, the window when installed will only sit down flush with the door and the excess sika will squeeze out.

Now with the 3D clamps on a new construction, I add tape to the door side to simulate paint thickness, so your windows on a new build will be slightly proud until painted.

The 3D clamps don't so much clamp the window in as much as "set the level" of how high the window sits.

AL9nZEXEaqlIaVp0R1xAuFgFra_AyALgS4pqIU5wbH_DZHOQBOWXxbu_jcb-GKpwCgd25PJtrmFMj24dzAxUt6ihRDTPR5FXCcszwR1WWfE7Y5sbrmazABqnfEgEjxFdtfXyr0H2_igluYSzji4WXhxHS_9LXA=w1203-h902


Dig out the excess sika from the 1/8 channel, this will be filled after paint.

AL9nZEXT17_gcL00dX5sRGFeNQ44uaKkZNgc_WFBPuHEsOeXFBgVv4yJj2uSkEHM4t2OrH0VeaR4lhDJwDRXslaz7RZii3Bra8eIcvVNmTPsXiQU8AWQxhYhKv-4QGC26KoLDOeqYczZM1OM7i8_jaSvN_riBw=w677-h902


Paint your aircraft, mask off and fill the 1/8" gap and enjoy.

AL9nZEU4uMPIa-csG5Hl2SotOfVKotmrUjzbSJ6IfG9BOW2hEGHf1SlYn30XM2t_068oVtXnJaOwheuNx96nOSbVrk_AoV0RspoI4VTHhqgTcv3Xfxgu5vFSpawVjaUQ6jsw13wmiJ6htMmc0P37bFBa66qsWQ=w677-h902


AL9nZEUQ2zdSWWtZTdlwJ49A83vTHy7SPRsZCNbKM9ZucH0B8TWncodvKu-qBrm8hDgcTiJ-yciNpGVTRfQJvh1_VwQ1CX_1EFCSRhnutVyqMqXx2YkEQKZCvR2f6UmaYHOKTa5az4x7e0GxfIdVCPj-OGfARQ=w677-h902


AL9nZEXl9_n7Y55vDGaDtSz7pPwkwUzQZMMcPobadSAjyIz-aIUL5qFY3zuPtWw5VjmZPoeNLorzOXM4dnw3RshyYhRD6byQwMCYECBVOOLxpWB7-rvyiiM0OsyPPj8Xtew80GvG8gdNGQtm0UOlMhFCOJEVOQ=w1203-h902


*** If you are reading this thread, the collective knowledge expressed here is the results of 100's of hrs of research and trial and error all coming from VAF users, so if you have not donated to keep this amazing resource alive and heathy then please do so.
 
THE POWER OF VAF

THE POWER OF VAF

Excellent pictures Ashley :) and a very pleasing final result. There were some questions aimed at me but I see that they got answered.

In summary - use a few clecoes through the plexi or use Ashley's method. Both are good.

Remember that Sika is paintable and also sands smooth very well.

That brings me to another point not really covered here. I have used a lot of Sika to build up where the windscreen sits on the fuselage. You can easily shape it by sanding it and when happy apply a few layers of fiber glass.

Note that for the side windows I found it easier to apply the Sika to the plexi, but for the windscreen it was easier to apply the Sika to the airframe. Picture 1837 is after I have built up with Sika and picture 1885 is after the layers of glass has been put on.
 

Attachments

  • DSCN1833.JPG
    DSCN1833.JPG
    485.7 KB · Views: 234
  • DSCN1837.JPG
    DSCN1837.JPG
    477.5 KB · Views: 235
  • DSCN1885.JPG
    DSCN1885.JPG
    497.6 KB · Views: 244
  • DSCN1888.JPG
    DSCN1888.JPG
    502 KB · Views: 255
  • DSCN1915.JPG
    DSCN1915.JPG
    487.6 KB · Views: 240
- 1mm x 15mm bond layer is a minimum. Recommended 1mm thick nylon or silicone material around the edge for spacing, to be removed and backfilled once the initial adhesive is set.
- 2mm gap on each side for a window up to 600mm is adequate. (the formula Cee Baily uses for expansion is 0.00004"/ Inch / ºF, so you can calculate as needed. For the door window, it works out to 0.059" total expansion from 60 to 120ºF, so 2mm on all edges has some safety margin built in).
The bond layer is experiencing the entire shear across its thickness. The outer surface moves against the inner surface by the amount of expansion. If it's 1 mm thin and the expansion is 1 mm, the shear angle in the material will be 45 degrees and it will have to stretch by 41%. If you make it 2 mm thick, it only bends over 27 degrees for a 1 mm expansion and only has to stretch 12%. So, I don't buy that the thickness only has to do with weight. It has to do with how much you can stretch the material before it shears.
 
Last edited:
The bond layer is experiencing the entire shear across its thickness. The outer surface moves against the inner surface by the amount of expansion. If it's 1 mm thin and the expansion is 1 mm, the shear angle in the material will be 45 degrees and it will have to stretch by 41%. If you make it 2 mm thick, it only bends over 27 degrees for a 1 mm expansion and only has to stretch 12%. So, I don't buy that the thickness only has to do with weight. It has to do with how much you can stretch the material before it shears.

Sika data sheets mention an elongation specification of 300% IIRC. Stretching to 41% seems well within it's capabilities. Weight is relevant as that has to do with how much force is applied beyond the shear forces due to the expansion / contraction of the plexi. A light window is just easier to hold on in any condition. Therefore, as the adhesive's strength decreases due to elongation, the weight of the window plays a part in determining the critical point where the reduced strength due to elongation reaches the point of exceeding the strength required to hold on to the plexi and results in failure. The lighter the window, the less force is required to hold it into place. The recommendation logic from Sika makes a lot of sense to me.
 
Last edited:
Ref Jan and Ashley.

I have done Sika on 3 RV installs now - never use spacers, just lay on an even bed and end up with a 1/8" layer - ish.

When Safelite come to put a new windshield in your car, they use a very similar product and don't use spacers.

Interesting comment from Weld-On saying don't use the product for that application.

Time for a re think and an update from The Mothership - there is now sufficient evidence that the rigid fixing is not beneficial and that a product with some give is to be preferred.
 
...and

If a rethink is here, the window joggle should be inverted such that the window are installed from the inside, eliminating paint cracking and loss of windows in flight.

While they are at it, the cabin top door openings (and doors) need to be 3/8" narrower to allow for fabrication that is described in the plans. There should be no reason to need to grind the door jamb to almost nothing to make the cabin top fit in the fuselage...
 
Joggle on the outside preferred

Hi Bob,
Window installation with the Joggle as is would be my preference.
it is easy to install as per discussed in this post with Sika and Primer.
No cracking if installed as discussed above.
The same way as Cirrus does it .

A side note would also be that Sika is available cheap and easy anywhere in the world where as Weld-On is treated as a dangerous goods export with Hugh costs involved.

Now fixing that annoying flat spot on the B pillar near the rear window and making the joggle a uniform depth. They would be on my punch list with any cabin top upgrade from Vans.
 
But

Hi Bob,
Window installation with the Joggle as is would be my preference.
it is easy to install as per discussed in this post with Sika and Primer.
No cracking if installed as discussed above.
The same way as Cirrus does it .

A side note would also be that Sika is available cheap and easy anywhere in the world where as Weld-On is treated as a dangerous goods export with Hugh costs involved.

Now fixing that annoying flat spot on the B pillar near the rear window and making the joggle a uniform depth. They would be on my punch list with any cabin top upgrade from Vans.

While I agree with the. b pillar and jiggle depth comment, I still think an inverters joggle would yield a more refined finished product. Couple that with virtually eliminating the potential for a lost window in flight and I think it would be a worthwhile change.

Unfortunately, it isn’t likely to happen; too much work and too small of a market…

In my opinion the biggest risk for inflight loss will be the four side windows. I cannot see that it will take a lot of work and expense to change the two door molds and the cabin top to incorporate that.

I am happy with the windscreen where it is a totally different scenario with the plexi resting on the top skin etc.

Well that makes me think - which can be dangerous ;) What if one do a scarf joint around all four windows and then use a router to create an inside joggle.

I would like to hear from other. I can see a much more secure window and a nice looking finish?
 
It would be very difficult to mold the joggle for the wind screen and rear windows on the inside of the cabin top because the mold surface for the part is the outside. The inside surface shape by default ends up being whatever the specified layup schedule produces.
It could possibly be done for the doors since the inside is a separately molded piece but as already suggested, the cost vs the actual benefit makes that unlikely to happen.
 
You're welcome.

I also want to make a pitch for Jan's process of bedding the windshield in Sikaflex. It made for a very nice installation using it to make the fillet on the outside instead of the microballoon build up. And then on the inside, I made a nice fillet as well that prevents the deep crevice between the glare shield and windshield to help minimize the guck that can build up there over time.

Once that cured, I applied another coat of Sika primer to the outside of the windshield from the tape line on the acrylic out on to the aluminum cowl, and then laid my windshield fairing fiberglass on that.

It makes for a very good bond.
 
Back
Top