Van's Air Force

The definitive Van's Aircraft support community! Buying, building or flying an RV? Join our exclusive family of mentors and enthusiasts!

What are you guys using as a guide for how deep to counter sink spars for the skin?

Fenderbean

Well Known Member
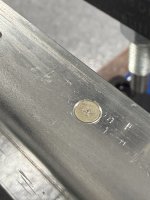
Just curious normally I use the rivet but when a dimpled skin goes on top whats a good tech to set your countersink took for the depth of the dimple?
prob a newb question I know, I thought about using the dimple dye till is just sits flush or just dimple a scap and use that?
 
In my experience, the underlying structure should be machine countersunk to allow a rivet to sit perfectly flush, and a well formed dimple should then fit perfectly in that machine countersunk hole. If you over countersink the structure then the skin will be pulled into the structure too much... and it will show on the top surface after the rivet is fully set.
Make some practice pieces, and prove it to your satisfaction.
This is how I did the spar counter sink and it works perfectly, I just didnt know if the dimpled being a thickness of its own would still work in this manner.
 
Read Section 5 to be certain. If memory serves, Vans is pretty specific about depth and generally advises against using a dimpled token.
 
Page 05-07, 0.007”
Well thats helpful, I read this section but I will look again. That seems to fit my thoughts on it since the rivet sitting flush doesnt account for the the thickness of the metal so going .007 more helps. Its just a pain since the I dont have an zero index on my counter sink tool which I found odd compared to my other which does. Guess I will swap to that one.
 
It’s kind of long, but this thread contains a lot of information on the subject and a few posts made by me that explain and show with photos why the .007 “ increase in depth was chosen.


By the way, every countersink cage I have ever used has the adjustment index in .001” increments so if you start with it, adjusted to produce a flush fit of a rivet and then go seven clicks deeper you should have the recommended depth.
 
I splurged and bought two nice Teflon countersink tools. One for flush and one for the 0.007” depth.
But OCD me, I still check them for the correct depth on scrap before using them, three times for anything on a spar.
 
I have used a 120 * countersink to accommodate dimpled sheet metal. It addresses the difference in slope of the underside of the dimple
 
The slope angle of a 120 degree countersink is shallower than the slope angle of a 100 degree countersink, so the fit interference would be even worse unless the depth was set even deeper.
I would not recommend using a 120 degree countersink with 100 degree dimples.
The cross section photos in the thread I linked above do a good job of showing why that wouldn’t be an improvement.
 
Last edited:
I have a bit of OCD so I use the back an of my callipers to measure .007" below using a rivet in the hole to set my cage.
 
I look forward to trying the rivet flush plus 7 clicks approach.

I make a simple in extra material and test to fit. I need to label my samples.

I've just reordered some E-1007 parts due to carelessness. I went too far and also had some wallowing. Perhaps on my third build my technique and systems will be improved.
 
I have a bit of OCD so I use the back an of my callipers to measure .007" below using a rivet in the hole to set my cage.
Yup. That is how I adjust the depth as well. I sleep well knowing my skins won’t peel off like a sunburned Dad’s skin of the 60’s at high speeds…
 
I splurged and bought two nice Teflon countersink tools. One for flush and one for the 0.007” depth.
But OCD me, I still check them for the correct depth on scrap before using them, three times for anything on a spar.
Always check a countersink cutter before use. There's a Tool Gnome that visits at night and readjust all the tools! I have three cutters and no matter how precise I set them, they are always wrong when it's time to use one.
 
I bought multiple CSK cages (from The Yard Store) for different sized CSKs (3/32, 1/8, #8, etc) so once they were dialed in and set I never touched them again.
 
It’s kind of long, but this thread contains a lot of information on the subject and a few posts made by me that explain and show with photos why the .007 “ increase in depth was chosen.


By the way, every countersink cage I have ever used has the adjustment index in .001” increments so if you start with it, adjusted to produce a flush fit of a rivet and then go seven clicks deeper you should have the recommended depth.

This.
 
Always check a countersink cutter before use. There's a Tool Gnome that visits at night and readjust all the tools! I have three cutters and no matter how precise I set them, they are always wrong when it's time to use one.
Sage advice. This has been my experience, too.
 
Okay so I did the .007 and the metal sheet that’s dimples seems to be high. The surround flat metal doesn’t sit on the part being counter sunk. Based on pictures of the A.C it shows counter sinking enough so the two surfaces are touching, not above. Is this correct? I’m well past .007 on the tool and it’s not as I mentioned.
 
Okay so I did the .007 and the metal sheet that’s dimples seems to be high. The surround flat metal doesn’t sit on the part being counter sunk. Based on pictures of the A.C it shows counter sinking enough so the two surfaces are touching, not above. Is this correct? I’m well past .007 on the tool and it’s not as I mentioned.
This is correct. You are trying to get great contact between the dimple sides and the material in the countersunk hole. Because the edge of the countersink is a very sharp angle, but the dimple profile is rounded, you cant get both great contact and no gap. Vans testing has shown that optimizing the contact inside the dimple is the strongest joint. The gap will close up a bit under riveting.

Edit: see this thread

 
Last edited:
Thank you guys, these are simple things if shown but reading and understanding it sometimes can give doubt. And yes I am ocd like most but trying to not be since it will never get done!✅
 
Its very counterintuitive and thus comes up often. It just looks wrong until you know what you're trying to achieve.
 
The .007 seems not deep enough by quite a bit. Is this kind of a start point based on what you gents have seen. Going to grab a depth gauge just to make sure I’m not wrong 😏
 
Yeah understand it will pull some when riveting. Guess I will just set .007 a go first rivet tell the tell.
For the benefit of your ocd-ness….. have you looked at the details in this post?

 
Trust me, most like myself do read and use the search function but so much unrelated things come up it’s tough to narrow down a specific thing. Then throw in interpretation and doubt and it’s makes you poll the masses. I have an aviation maintenance background some but certain things calculate differently in the brain.
Below is my .007
 

Attachments

  • IMG_2628.jpeg
    IMG_2628.jpeg
    1.3 MB · Views: 34
Looks close. Measure it with the calipers and if its close, buck a few rivets and see what you get. P.S. Van's alieron practice kit is the best for this sort of testing.
 
Trust me, most like myself do read and use the search function but so much unrelated things come up it’s tough to narrow down a specific thing. Then throw in interpretation and doubt and it’s makes you poll the masses. I have an aviation maintenance background some but certain things calculate differently in the brain.
Below is my .007
You didn't really answer my question.

The reason that I was asking, is because links to the specific info that provides answers to all of the why questions you have posted, have been posted here in this thread that you started.
This was done in an effort to help you understand why Van's Aircraft publishes very specific recommendations for this process.

The reason for my question, was it seemed by additional posts you have made, that you either hadn't seen the info, or maybe that you had but believe it to not be correct so you are still searching for an answer that better aligns with your thought.
 
Last edited:
I used the test coupon method for my wing spars. After all was said and done, wings up to the quick build stage, I learned it was supposed to be 0.007" beyond flush. I involved Van's Support for advice. Long story short, I had to replace both wing spars because I used the test coupon method.

Please learn from my expensive and time consuming mistake. Read chapter 5, and countersink as per the Builder's Manual.
I did, i set for .007 but even then some measure higher and lower. The horizontal spars are thin and not a nice flat surface.
 
I did, i set for .007 but even then some measure higher and lower. The horizontal spars are thin and not a nice flat surface.
I'm sure a couple rivets at 0.010 is fine. We're not building a grand piano, it's an airplane.

In my experience, the test coupon method produced counter-sinks significantly deeper than spec. Not just 3 or 5 or even 10 thousands too many.
 
I'm sure a couple rivets at 0.010 is fine. We're not building a grand piano, it's an airplane.

In my experience, the test coupon method produced counter-sinks significantly deeper than spec. Not just 3 or 5 or even 10 thousands too many.
I think my variations is due to being on a small surface like the two spars in the horizontal. The hole locations make them close to the curved side of the beams.
 
@rvbuilder2002

Thanks for your participation in this forum...

I took an EAA sheetmetal class and thought I understood this process fairly well. I read through section five before building and must have missed the .007 past flush comments, certainly missed the importance of it.

My process had been to practice on scrap, get close, then take a dimpled skin sample and test for fit, mainly flushness. Kind of like the video I just watched on the EAA site.
 
Last edited:
@rvbuilder2002

Thanks for your participation in this forum...

I took an EAA sheetmetal class and thought I understood this process fairly well. I read through section five before building and must have missed the .007 past flush comments, certainly missed the importance of it.

My process had been to practice on scrap, get close, then take a dimpled skin sample and test for fit, mainly flushness. Kind of like the video I just watched on the EAA site.
I did this setting on my countersink tool it never worked out, SO I set to flush and then did one tooth at a time till I go close. I checked depth and it showed .007 and checked as I went and you would still see .005 to .011. I just finished attaching the skin to the front spar and everything looks great, so I guess I did something right.
 
Here's a chart I made for -3 and -4 rivets for machine countersink diameters with various sheet aluminum thicknesses. IP1 and IP2 are theoretical intersection points. Before using this on your project, please verify with some test parts.
1777300136144.png
1777300165931.png
 
Last edited:
Back
Top