

I've been following the plans and Darwin's helpful article on wingtip mounting, but I came up with an easy variation I haven't seen before.
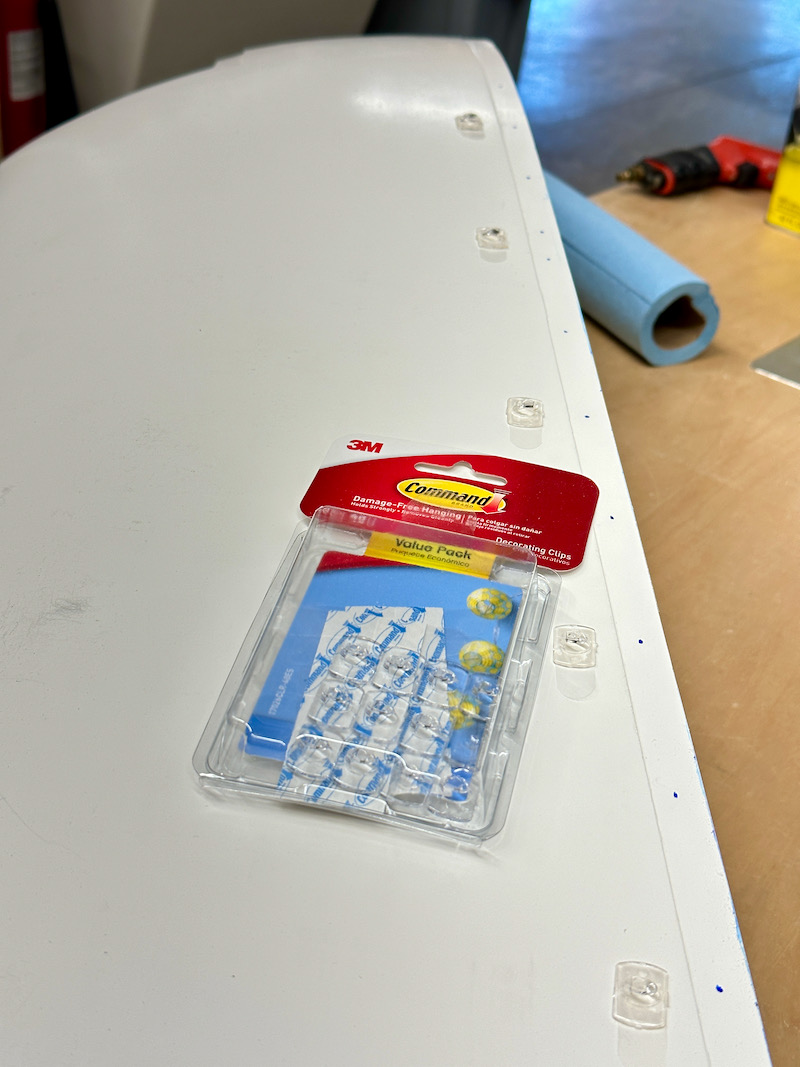
Once you get to the point where you're ready to drill the initial holes that will attach the wingtip to the wing skin overhang, ideally you want some way to force the floppy fiberglass flanges to be flush with the skin while you drill. I didn't have the materials handy to make the temporary foam rib suggested by Darwin's guide, but I did have a whole pack of little 3M Command clips.
We have these things all over our house, and my reasoning was that if they don't pull the paint off my drywall they probably won't pull the gelcoat off my fiberglass either. So after doing some testing on a cut-off piece with favorable results, I proceeded to stick a clip next to every second fastener hole:
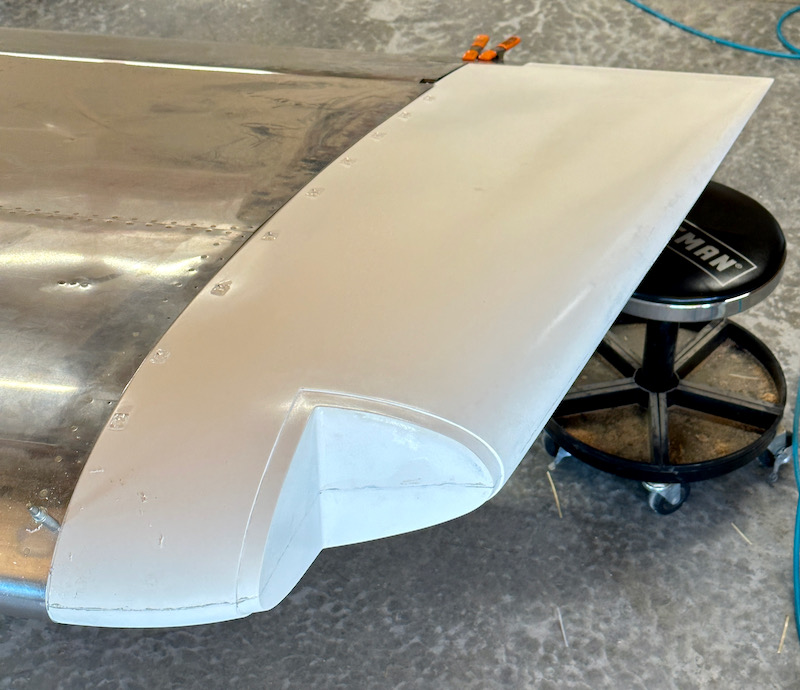
I locked the trailing edge of the wingtip to the aileron, double checked the alignment, then drilled and clecoed the first hole at the forward end:
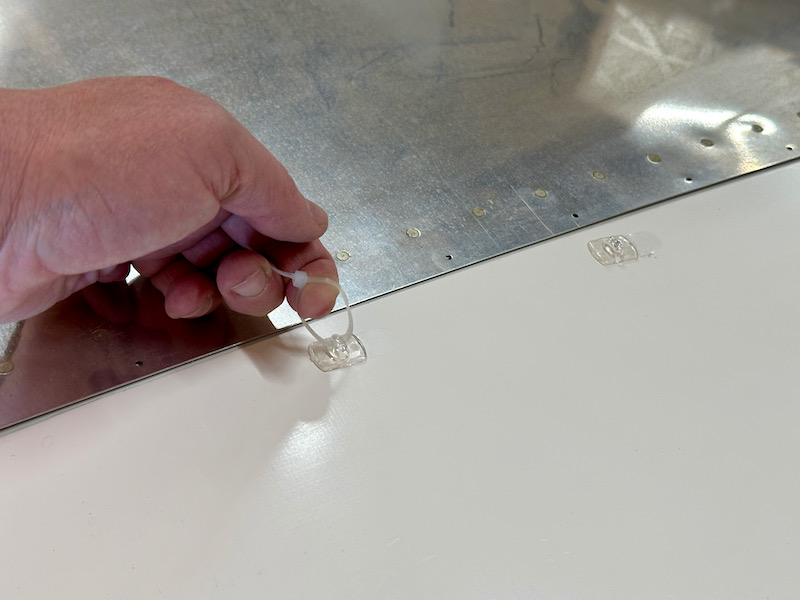
Now here's where the stick-on tabs come into play. Working from front to back, and alternating from top to bottom, I drilled and clecoed every fourth hole, using the adjacent tab to pull the fiberglass flush with the wing skin. A looped zip tie made this easy – I wouldn't suggest using pliers here, as you only want to apply about a pound of force while you carefully drill through:
Then I went back and did every second hole, and finally drilled and clecoed all the remaining holes. After I was done, I was able to easily remove the tabs without any damage to the gelcoat whatsoever. I'm very happy with the resulting fit:

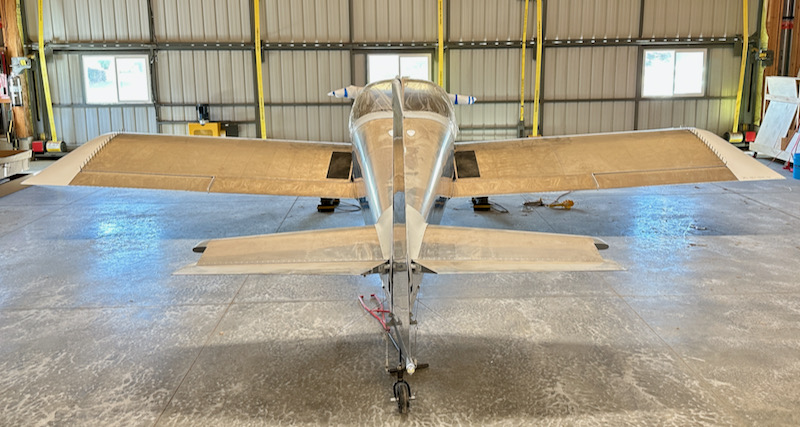
Obligatory hero shot featuring some well-fitting wingtips:
More pictures and full details here.
Once you get to the point where you're ready to drill the initial holes that will attach the wingtip to the wing skin overhang, ideally you want some way to force the floppy fiberglass flanges to be flush with the skin while you drill. I didn't have the materials handy to make the temporary foam rib suggested by Darwin's guide, but I did have a whole pack of little 3M Command clips.
We have these things all over our house, and my reasoning was that if they don't pull the paint off my drywall they probably won't pull the gelcoat off my fiberglass either. So after doing some testing on a cut-off piece with favorable results, I proceeded to stick a clip next to every second fastener hole:
I locked the trailing edge of the wingtip to the aileron, double checked the alignment, then drilled and clecoed the first hole at the forward end:
Now here's where the stick-on tabs come into play. Working from front to back, and alternating from top to bottom, I drilled and clecoed every fourth hole, using the adjacent tab to pull the fiberglass flush with the wing skin. A looped zip tie made this easy – I wouldn't suggest using pliers here, as you only want to apply about a pound of force while you carefully drill through:
Then I went back and did every second hole, and finally drilled and clecoed all the remaining holes. After I was done, I was able to easily remove the tabs without any damage to the gelcoat whatsoever. I'm very happy with the resulting fit:
Obligatory hero shot featuring some well-fitting wingtips:
More pictures and full details here.

