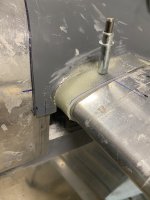
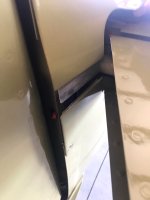
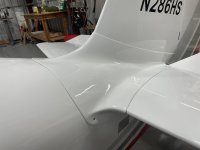
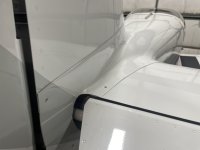
Whats the best way to deal with this 1/8” gap between leading edge and fairing? Just on the right side.
Used a heat gun and have it all trimmed up and looks great except for this little area.
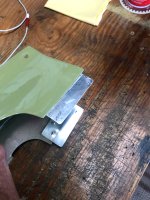
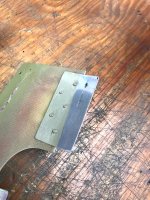
Just want to build a little hook to capture the fairing.
Thanks guys
Arnie
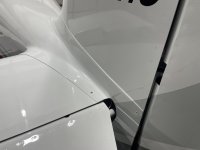
Used a heat gun and have it all trimmed up and looks great except for this little area.
Just want to build a little hook to capture the fairing.
Thanks guys
Arnie