Van's Air Force

The definitive Van's Aircraft support community! Buying, building or flying an RV? Join our exclusive family of mentors and enthusiasts!

Step installation

tims88

Well Known Member
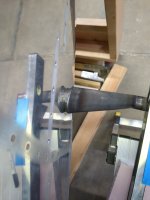
Is this what the plans mean in step 1 of page 30-3 when it says "Adjust the spanwise position of the WD-1007-L Step so the weld at the top of the step is flush with the F-1079-L Mid Side Skin as shown in Figure 1"? The figure doesn't really show a real weld so I want to make sure this is right before I drill it. It seems like the hole in the skin could be opened up a little to get the front edge of the step a little more flush with the skin. I could also see that turning out really badly if the hole is enlarged too much.

I can't remember what I've seen in other RV10s and can't find any pictures online that show this area well enough to see what others have done.

Thanks
 

Attachments

  • 17494241657605151757604762705560.jpg
    17494241657605151757604762705560.jpg
    970.6 KB · Views: 67
I’d say you’re on the right track. I didn’t enlarge the hole at all. Just pushed the step in as far as it would go - which is where the leading edge of the weld hits the skin. I guess you could enlarge the hole but I’m not sure what that would look like in practice or what benefit it would give.
This is the only photo I can find - because I put them back in after paint a few months ago.

IMG_4310.jpeg
 
Thanks for the responses! I'm happy to hear that this is how it's supposed to look so that I can just drill the steps and move on.

Be sure to seal the crack around the step after paint. It's a great water intrusion space
I actually wasn't sure if people were sealing around the step or not so thanks for mentioning that!
 
Back
Top