What's new
Van's Air Force

Don't miss anything! Register now for full access to the definitive RV support community.

Show us the status of your RV-3 project!

Panel: [ there's no "show us your Panel" thread for the RV-3 ;) ]
RV3_Panel_May15.jpg

(will be a mini-tablet/smartphone GPS to right of D-180)

Cockpit:
RV3_Cockpit_May15.jpg

(VHF & Xpdr: space for them on Centre Pedestal above Map Box)
 
N66GB gets Panel Upgrade

My 30+ yr old RV-3 got a panel upgrade! I labored over the decision to get an engine monitor which would have required a lot of work, probably a new back panel all together. I opted instead for new engine instruments from Electronics International, they fit in the same holes and I only needed to make some dress-up rings to trim them out. Having flown with them a couple times now...very happy. I swapped out EGT/CHT, Fuel Pressure, Fuel Quantity, Amp/Volts, and Oil temp/Pressure. I put in a dimmer for the LED's, and also added light rings to my 3 1/8" instruments so I can fly N-VFR. EI was great to work with, very helpful.

http://tinypic.com/r/atvfwo/8
 
Last edited:
If all goes well, flying within a week or 2?

RV3Weigh.jpg


Spec: IO-320, VP Prop, Full Inverted Oil/Fuel, Day VFR, priority lightweight :D
RV3WB.jpg

Optimistic that painted <750lb Basic Weight ;)
 
Wow Andy - you really kicked the project into high gear! Looking forward to seeing how you like it!
 
Thanks Paul - it's been a long time, but lots else on ;) Probably a day's solid work to prep for flight, but no spare diary time for some days.

Most RV-3's are around 800 lbs, where did you save the most? Did you use primer?
Yes - all interior primed with Zinc Chromate Etch. I have a list of where I think the savings were made, using a few (2 in particular) well documented RV-3 builds on here. There is no single item that "saves a lot", it is just thinking weight at every point / decision. The panel above shows the idea - the easiest way to save weight is not to put something in at all.

Easiest tip is avoid avionics that start with a G ;) Whilst high quality, they are heavy, and that's not just on the wallet.

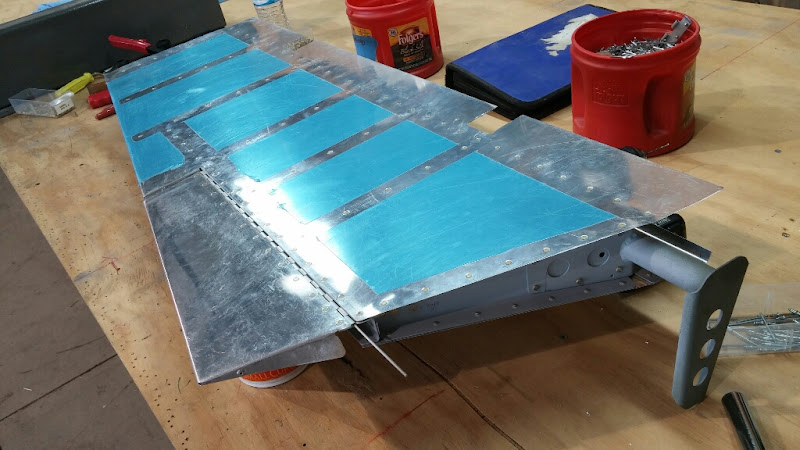
It still needs a VHF & Xpdr, albeit Dittel VHF arrives next day or 2 (360g, 0.75lb), and I'll take bets on how much the blue film weighs (the canopy plastic and masking tape was >8oz).
I used blocks of Minicel foam to do the seat - quite easy, and <2lbs for both 'cushions'.

Engine is narrow deck, small (SD-8) Alternator, Sky Dynamics sump / exhaust / intake / flywheel, XLT starter, no relays.

Beringer wheels/brakes.

It would not be right to compare it directly to specific other RV-3s - some on here are full IFR cruising aircraft, with comforts and redundancy I will not have.

More photos as I get time, hopefully a flying video before too long ;)
 
Looks very good.

Andy

Will have to fly down or you fly up and meet up once you are airborne.
I'm near Tibenham.

All the best
Rob
RV3 G-BVDC
 
I'll take bets on how much the blue film weighs (the canopy plastic and masking tape was >8oz).
Andy,
I'll bet it weighs almost exactly as much as a vinyl wrap (instead of paint) from the guys at Aircraft Wraps (http://www.aircraftwraps.com).

I'd also bet that the transport costs to get the plane to them (or them to you) would blow right through your budget..... :D

It's looking good! Best of luck with first flight and phase 1.
 
Lookin good, Andy! Congrats on the light weight. If TBII comes in weighing less than Tsam, I'll be happy... Heck I'll be happy enough when it's all in one piece again! ;)
 
I'll take bets on how much the blue film weighs (the canopy plastic and masking tape was >8oz).
The answer is just over 3lbs :D So now below 730lbs and could shed another 1lb 4oz by changing Bell Fork + std Vans TW for Vans Fork + Vans Lightweight TW - but that is more CG control to me ;)
 
New to RV3 Forum

I dropped out of sight of the Van's forum a couple of years ago when it became apparent that building an airplane under my current circumstances was impractical. Since then, I've bought a farm with a 30' x 40' barn with a nice, smooth cement floor that looks perfect for an airplane factory. I've ordered the preview plans for the RV-3 (as opposed to the -8) since this sort of flying is an individual effort. My wife sat in the back seat of an -8 and when the canopy touched her head she freaked. So she'll fly in the Diamond...

I'm going toward my instrument rating and look forward to reading more about the progress others are making toward turning metal parts into flying machines.

I'll try not to be a lurker and will work to get re-engaged with the Tennessee Valley RV Builder's Group as I live in Athens, AL. I look forward to seeing positive progress on these projects.
 
Welcome aboard, Jay.

If you're interested in the kit one serial number from mine, it's in Loveland, CO, unopened since it was delivered in 2012. PM me and I'll send you the owner's contact info; he's advertised it on VAF a few times.

Dave
You can read about mine here.
 
Another Small Victory

My first attempt at a trim tab fits!
And it's not ugly! :D

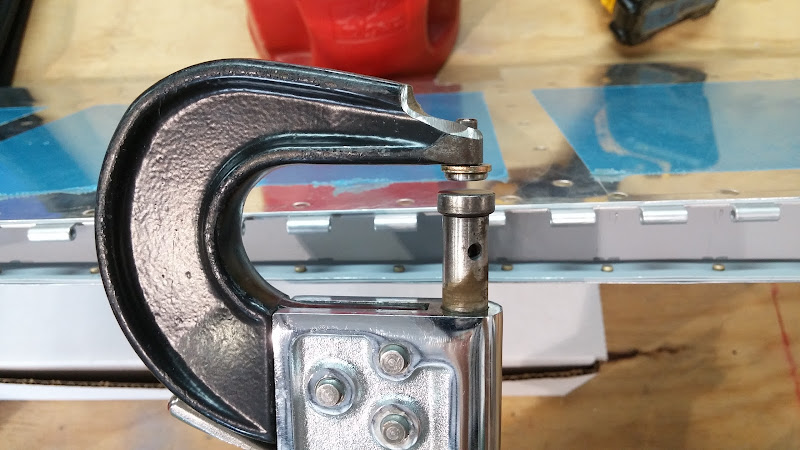
The tools and materials list for this tiny project is amazing:

  • Posterboard for making the pattern
  • Steel straightedge
  • Extra-dense particle board and double-sided tape for form blocks
  • Band saw and belt sander for cutting out wood form blocks
  • Dremel or pneumatic grinder cutoff wheel for cutting out trim tab skin (distorts skin less than snips)
  • To bend the closeout tabs over the blocks: Ball peen hammer, small bucking bar, 5/16" punch, hand seamer, duckbill pliers padded with electrical tape
  • 3-in-1 Brake/Shear/Roller from Northern Tool-- not "necessary," but... yeah, it was totally necessary! Came in handy for bending the long flange on the trim tab skin and making a new trim tab spar (I lost the original somewhere)
  • Homemade trailing edge bender per Van's instructions
  • Clecos AND Cleco-Clamps
  • Assorted hand files
  • Electric drill with drill bits and deburring tool
  • Pneumatic grinder with Scotchbrite barrel
  • Dimple dies
  • Machine countersink bit and cage
  • Pop Riveter
  • Avery "Economy" Squeezer (I had to grind down the yoke to fit inside the confines of the trim tab spar on the elevator.)
  • Bench grinder for modifying the squeezer
  • Extra-low-profile flat squeezer die

I'm just happy it's done! Still have to make the control horn and roll the leading edges of both elevators, but that can wait. Now back to the canopy. :cool:

upload_-1.jpg


0919151221a.jpg
 
Katie, looks like the ram shaft of your squeezer is crying out for a drop of light oil! (Looks like a bit of rust from here.) Nice report, thanks for sharing in such detail. - Roger
 
Fast Back RV-3

Picture of my fuselage after riveting bottom and sides. Was wondering about fabricating a fast back mod, and doing a Spitfire paint scheme? Know RV-4 do this mod, what about an RV-3?

2ytybyu.jpg


Yes, I have sat in the cockpit and made airplane noises!
 
Last edited:
RV-3 Fastback/Razorback parts.

Got in touch with people at Harmon Rocket, ordered bulkhead mods to make my 3 a razorback. Was considering a slider canopy but John Harmon said you would not have enough room for cockpit egress. Guess I will make it a tip over.

Thank you guys for good information.
 
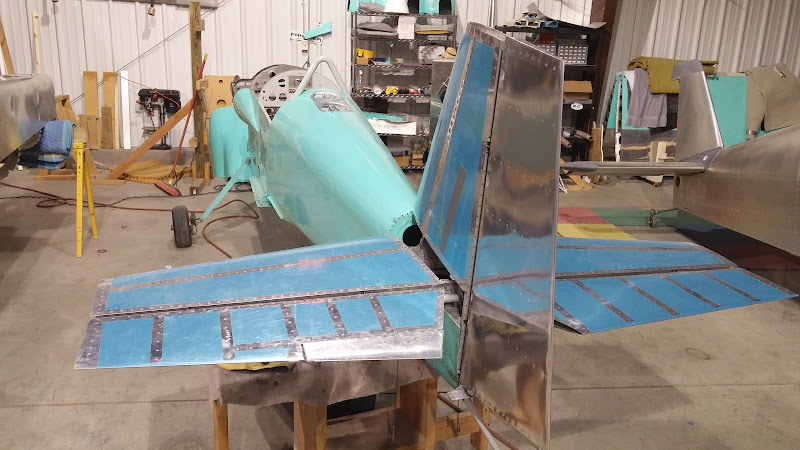
Tail's on! Temporarily, of course. Still a lot of work to do with control surface rigging, trim tab cable routing (grrr), and fiberglass.
SquirtTail.jpg
 
Trim Tab Cable?

Tail's on! Temporarily, of course. Still a lot of work to do with control surface rigging, trim tab cable routing (grrr), and fiberglass.
SquirtTail.jpg

Have you considered going the electric trim route? I re-did my old "3A" binding trim cable with an electric based on Randy's site. Worked great and was really pretty easy to do.

Doug Lomheim
RV-3A sold
RV-9A Mazda 13B/FWF
 
New project

Yes!

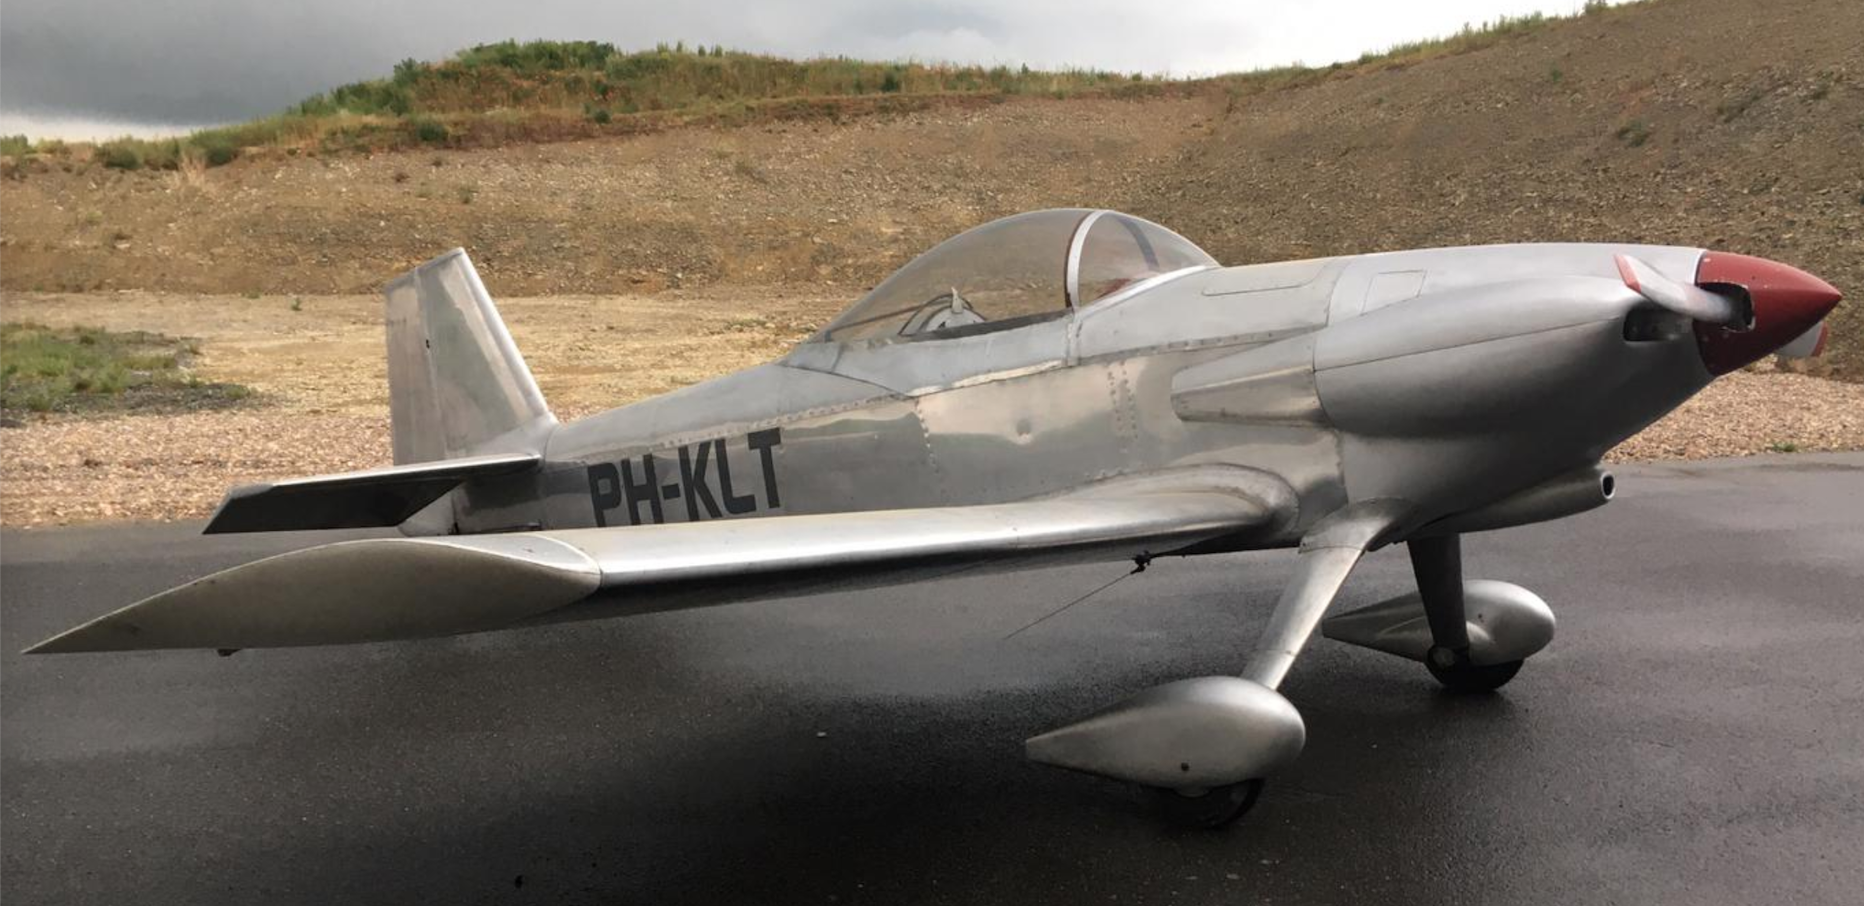
I am picking up this new to me -3 next weekend.

She's flying, but it's really a 50-foot aircraft. So after playing around with it for a couple of days, I plan to take her apart and bring her to my workshop (which unfortunately is not on an airport)

The plan:
* Polish all the corrosion out
* Fix crooked tailwheel
* Make new righthand elevator (some gorilla has tried to use molten lead or something on a dent, only to make things worse. And more flutter-prone)
* Smoothen all fiberglass wing/tailplane tips
* Try to get some dents out of the turtledeck (very carefully)
* Do a complete rewiring job
* Do a new panel
* Do a new canopy skirt
* Do a new windscreen frame
* Make the engine cowling presentable
* Pull all of the aluminum tape off the fiberglass and paint it
* Put 8.5:1 pistons in engine
* Do an EFI conversion on the engine
* Catto prop
* New spinner
* New lightweight starter
* Ditch the generator in favour of an alternator

On the plus side: she's light! 750 lbs with an O-320. And it's a -3B with new(ish) quick-built wing.

Can't wait to get started!!!

PH-KLT.png
 
Congratulations!

A good automotive bump-out expert can do a great job on most of the dents. So good that you'll never be able to remember where they were.

Dave
 
The bump-out expert won't be able to help with those, since it's the rivet pulling the skin in. This is what happens when the bulkheads aren't shimmed to fit.

Your choices for these appear limited - either re-rivet with shims or fill them. Or you can leave it the way they are, as proof that RV-3Bs are indeed individually made.

When I was building my fuselage, I set the bulkheads so that they'd all fair, rather than setting them exactly where the plans suggested. I could get the sides and bottom to fair but had to shim the top. It all took some tweaking.

Dave
 
It's three rivets in total. I think I'll be shimming... (And polishing. So filling is not an option).

Thanks!
 
Dimples like what your picture shows are often caused by riveting from the outside and not putting enough pressure on the bucking bar on the inside.
The pressure bucks the rivet but also dimples in the skin.
this can usually be fixed by tapping the shop head from the inside to push the skin back out.
If you try that, put a bucking bar, or something similar, on the shop head and hit/tap the bar. Do not try to use a hammer on the shop head or you will most likely dent the skin.
Don't over do it. A little at a time is the best way.
If the skin is puckered off of the bulkhead, between the rivets, it will not work and would require shims. Its hard to tell from the photo.
Good luck.
 
dowel

Another way to tap out the dents around the rivets (from the inside) is to use a length of half inch wooden dowel that has a hole drilled in the end, say 5/32", so that you are tapping on the dented flange/skin just around the rivet, rather than on the rivet shop head. This helps to avoid potentially damaging or loosening the rivet. A few gentle taps on the dowel with a small hammer should improve the finish.

Note this method is only relevant if the cause of the dents is over driven, or inadequately bucked, rivets. If however there was a gap between the flange and the skin before riveting then it won't help...
 
Last edited:
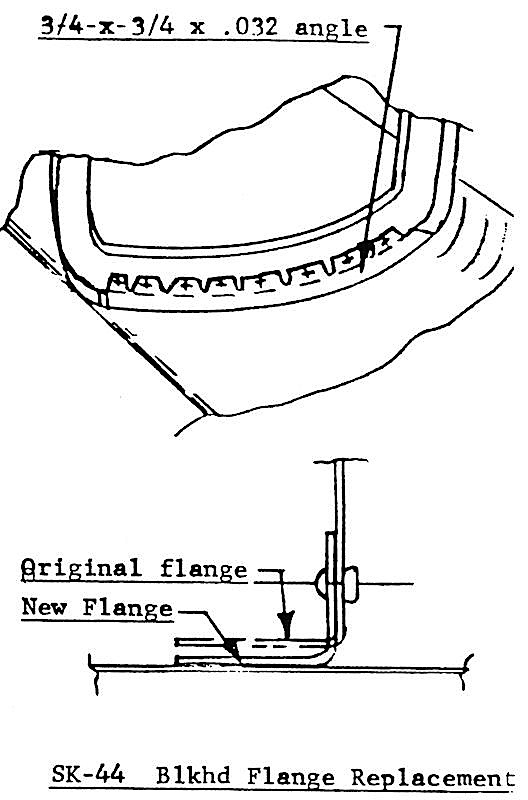
More than likely, even shimming won't fill the gap in some places. You'll probably need to do this, as described in SK 44:

3Ed3ZUu.jpg


On my fuselage, I had several instances where I needed to do that. Here are the replacement flanges for the F-307 bulkhead.

4UF7qDJ.jpg


Dave
 
Lots of useful info. Thanks guys!

First, I'll ferry the aircraft over from Germany. Planned for this Friday. After that, I'll see what I have to work with...

Thanks!
 
Ailerons not quite balanced

Next question:

Last week when taking my wings off in order to take the plane home, I noticed that despite the wings being quick-built ones, the ailerons were not quite balanced. Just by feel, I'd say the balancing is about 3/4 there.

What's the word on this? Need 100% balancing, or are most of them off by some margin anyway?

And if more balancing needed, then how to go about? Stuff the balancing tubes with some lead shot (or slide in some metal rod) and then cap off the ends, something like that?

Thanks!
 
Rv3 project

I like the location of your slip ball. Such a basic instrument but so useful. One day I will find a spot to put one in my ship.
Keep pushing on ; you will have a serious RV GRIN then.

Steve Lenne

Rv3B built and flying it for ever.
 
Panel upgrade

I purchased my first RV and it is a 3. Handsome things I was not happy with so decided to go ahead and do the things I want. The panel is getting a complete make over.

Still have a few things to do, it happy with it so far.
 

Attachments

  • EB35C182-0C6C-4EE3-AC30-78D323A20DE0.jpg
    EB35C182-0C6C-4EE3-AC30-78D323A20DE0.jpg
    418.1 KB · Views: 419
On my -4, I put the (early model) GPS under the panel. Hated the location, but I was out of room.

Given the choice, I'd put as much as I could on the main panel so you don't have to bend down to see it. And it's much easier to work on things there, too, after you take off the fuselage panel.
 
EAA Chapter 19 - Jon's Restore RV-3

Local chapter following our builders. RV-3 restore project.

Click Here to watch on YouTube.
 
Last edited:
Back
Top