Thank you Jeff!
I'm mostly illiterate when it comes to 3D printing, can anyone educate me on good choices for materials if I were to have this printed?
BTW, someone mentioned in another thread that the Van's part appears to have been printed with selective laser sintering. I ran quotes for that part and process through one of the online printing places and they quoted $99 so perhaps Van's part isn't so overpriced for what you get. But there has to be a cheaper but still adequate process/material, right?
As Paul Harvey said, "enquiring minds want to know".
")
Dave


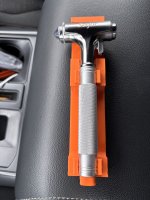
![15faf59b20c59bd7[1].jpeg](https://vansairforce.net/data/attachments/93/93811-5e84e1cdef7643b4760d43ae0e24aa09.jpg?hash=8PZ9ZM2GCQ "15faf59b20c59bd7[1].jpeg")