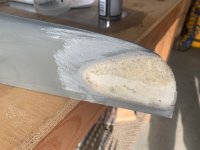
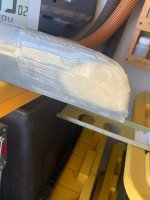
Looking for tips on how to remove the light cutout on a 14/10 bottom rudder fairing where no tail light is planned.
I'm okay (amature hour) with fiberglass work and just grinding it off, filling, and shaping it seems to be the only way I know how to do it and am concerned about adding unecessary weight. Then there's the trailing edge itself, not certain how to ensure it's integrity.
Looking for suggestions on how to tackle this, thanks in advance!