What's new
Van's Air Force

Don't miss anything! Register now for full access to the definitive RV support community.

RV-8 Rear Battery Access Door Pictures!

Ironflight

VAF Moderator / Line Boy
Mentor
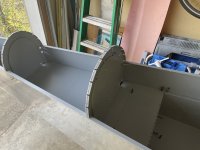
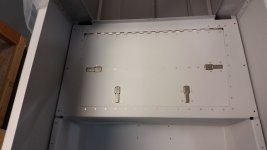
Twenty years ago when I built my -8, I sort of pioneered an access door for my rear mounted batter in the “hat shelf” of the baggage compartment. It’s too small becasue I built it with “scrap on hand”. I am now building a Rocket with essentially the same baggage configuration and rear mounted battery, and would love to see pictures of everyone’s battery access doors so I can steal….uh….learn from what others have done! All to avoid removing ten #8 screws to access the bellcrank/battery/pitch servo….

And my scrap box is huge these days, so materials are no limitation!

Paul
 
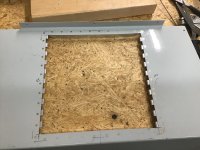
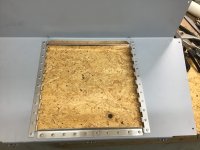
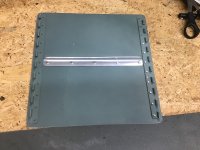
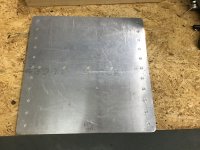
”stolen” from here…………
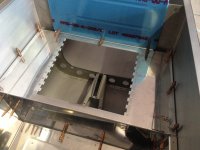
i think it is perfect.

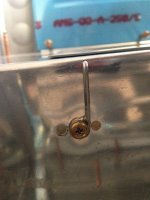
i formed a loop at the end of the pin, put in a nutplate and secure the entire thing with a screw.
Remove 2 screws, pull the pins out, remove hatch. 30 seconds, full access.
 

Attachments

  • IMG_0638.jpeg
    IMG_0638.jpeg
    1.4 MB · Views: 320
  • IMG_0639.jpeg
    IMG_0639.jpeg
    2.7 MB · Views: 320
  • IMG_0394.png
    IMG_0394.png
    1 MB · Views: 307
  • IMG_0395.png
    IMG_0395.png
    1.1 MB · Views: 318
Last edited:
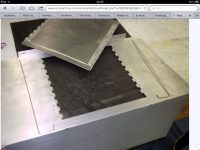
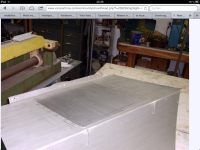
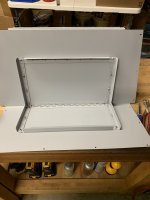
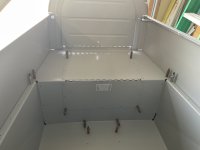
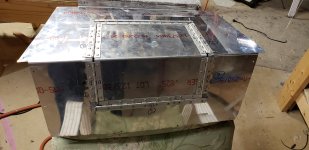
I can access the front or top of the rear shelf or take the panel out. The frame around the opening is angle to make the shelf stronger. In hindsight, I should have used camlocks. The bulkhead is a door with camlocks that lays down so I can fit something long or light items.
 

Attachments

  • IMG_5929.jpeg
    IMG_5929.jpeg
    1 MB · Views: 161
  • IMG_1238.jpeg
    IMG_1238.jpeg
    3.8 MB · Views: 166
  • IMG_1239.jpeg
    IMG_1239.jpeg
    3.5 MB · Views: 159
Twenty years ago when I built my -8, I sort of pioneered an access door for my rear mounted batter in the “hat shelf” of the baggage compartment. It’s too small becasue I built it with “scrap on hand”. I am now building a Rocket with essentially the same baggage configuration and rear mounted battery, and would love to see pictures of everyone’s battery access doors so I can steal….uh….learn from what others have done! All to avoid removing ten #8 screws to access the bellcrank/battery/pitch servo….

And my scrap box is huge these days, so materials are no limitation!

Paul
Got this idea from Dan Horton:
 

Attachments

  • IMG_1569.jpeg
    IMG_1569.jpeg
    1.1 MB · Views: 103
  • IMG_1568.jpeg
    IMG_1568.jpeg
    1.4 MB · Views: 100
  • IMG_1567.jpeg
    IMG_1567.jpeg
    1.3 MB · Views: 98
  • IMG_1566.jpeg
    IMG_1566.jpeg
    1.3 MB · Views: 97
  • IMG_1565.jpeg
    IMG_1565.jpeg
    1.5 MB · Views: 100
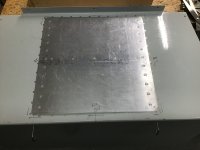
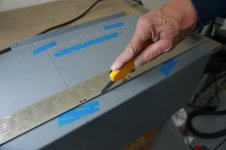
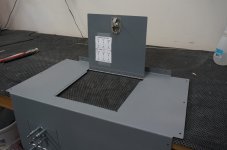
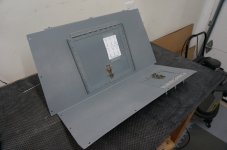
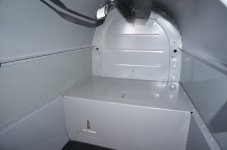
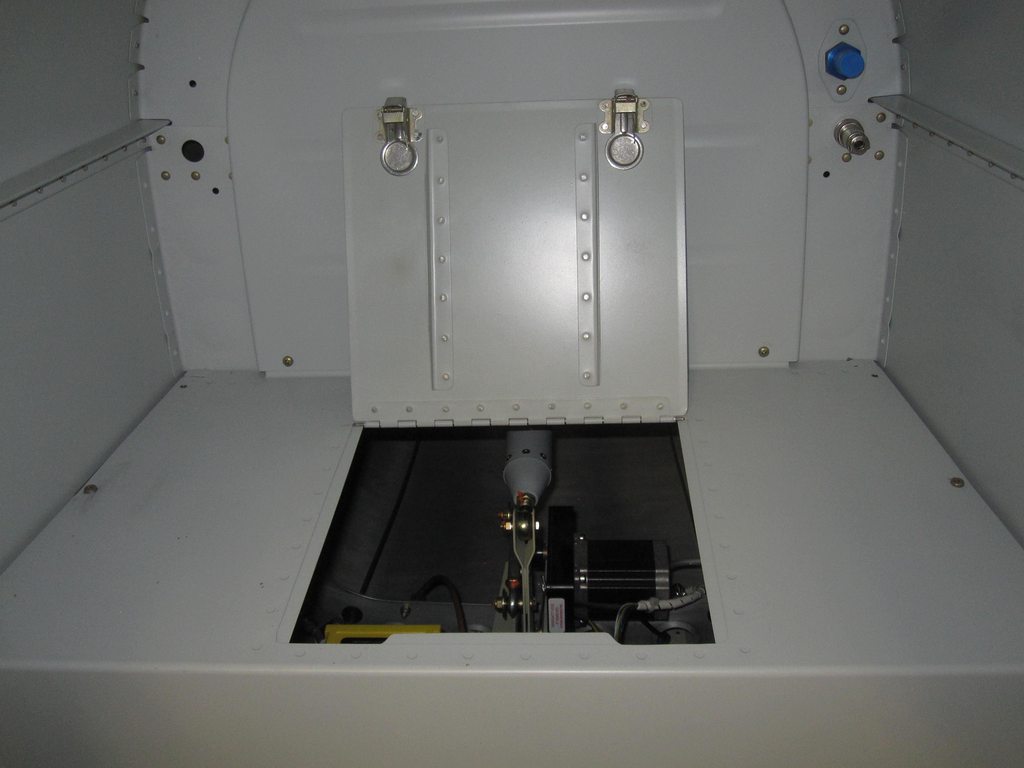
I used a laminate cutting blade in a utility knife to cut the access doors for battery and ELT access in the baggage shelf by making multiple straight scoring cuts in the aluminum. This allowed me to use the cutouts as the doors so I didn't have to make them from scrap pieces. Plus they fit perfectly. I used scrap aluminum to make support flanges and rolled one edge of the two longer battery hatch flanges to add stiffness. Added piano hinges and Hartwell latches that I bought used.
 

Attachments

  • LKRV8-F1373.JPG
    LKRV8-F1373.JPG
    3.3 MB · Views: 186
  • LKRV8-F1386.JPG
    LKRV8-F1386.JPG
    2.3 MB · Views: 177
  • LKRV8-F1387.JPG
    LKRV8-F1387.JPG
    2.8 MB · Views: 184
  • LKRV8-F2225.JPG
    LKRV8-F2225.JPG
    1.6 MB · Views: 189
Last edited:
Here is mine.
There is a stiffener angle below left and right of the access door.

IGM4FOHh.jpg


5zzJJT5m.png

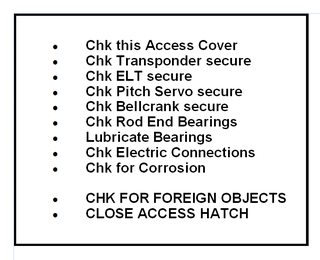
Meanwhile I put a checklist on the inside of the door.
 
I would like to do something like this to make the battery easier to get to, but I'm concerned with structural weakness.
 
I used a laminate cutting blade in a utility knife to cut the access doors for battery and ELT access in the baggage shelf by making multiple straight scoring cuts in the aluminum. This allowed me to use the cutouts as the doors so I didn't have to make them from scrap pieces. Plus they fit perfectly. I used scrap aluminum to make support flanges and rolled one edge of the two longer battery hatch flanges to add stiffness. Added piano hinges and Hartwell latches that I bought used.

I’m trying to find some of those latches but I’m feeling dumb. What are they called?
 
Twenty years ago when I built my -8…
…we did not have the incredible battery technology we have today. I’d recommend you abandon the rear mounted battery and the compounding issues of bigger, longer, heavier battery cable and move a new tech battery well forward. The main battery for my Rocket is a PC 525 mounted on the bulkhead just fwd of the fuel selector valve. You may have to add a small amount of weight at the tailwheel in the end, but you are likely to net 20 plus pounds saved. And in a Rocket, every ounce counts.
 
Hi Carl,

I studied your pictures carefully. I take it that the structural support that the un-modified baggage shelf provides is for and aft and now side to side?
You will need to ask Van’s, but my understanding is the baggage shelf is considered structural.

Carl
 
You will need to ask Van’s, but my understanding is the baggage shelf is considered structural.

Carl
Check with Van's, but it can't be carrying any significant structural loads. It's installed with AN515-8R8 screws on about 6" spacing. I'd guess its function is just to prevent baggage getting into the tailcone. If so, the simple door shown in post #8 is probably all that is needed.
 
You will need to ask Van’s, but my understanding is the baggage shelf is considered structural.

Carl
That's my understanding too. Which is why I am trying to figure out which direction the structural support is provided.
 
Last edited:
That's my understanding too. Which is why I am tryign to figure out which direction the structural support is provided.
In the side-by-sides, the rear baggage bulkhead is providing torsional stiffness to the fuselage and is very important. I hav never seen a direct statement from Van’s regarding the “hat shelf” that we’re talking about in the -8, but can imagine that it also adds torsional stiffness…but I have no idea if that is critical (required) torsional stiffness or not.
 
Here is what I have just completed. I just used a cutoff wheel to make the cut so that I could use the original metal as the door itself. It is secured with a few number 8 screws and is just as strong as the original hat shelf.


IMG_6837.jpeg
 

Attachments

  • IMG_6836.jpeg
    IMG_6836.jpeg
    1.6 MB · Views: 24
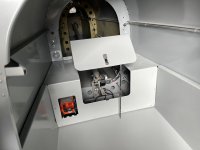
I simply hinged the front wall of the battery compartment cover. Use another piece of hinge in lieu of the screws if you like and you'd not even need tools to get in there.

battery%20comp.JPG
 
Here is how I did mine. The cover panel is secured with flush 1/4 turn fasteners. The old ELT shown has since been upgraded with a new 406 unit.
 
Back
Top