What's new
Van's Air Force

Don't miss anything! Register now for full access to the definitive RV support community.

RV-7 #74017

rmartingt

Well Known Member
A little late to the party on the build thread, but better late than never, I guess :)

I started my RV-7 project in 2013, purchasing a completed empennage and immediately ordering the wings. At the end of 2014, I paused the build to put up a workshop in my back yard (the one-car garage had gotten too small); moved the airplane project out there in October and finished up the wings.
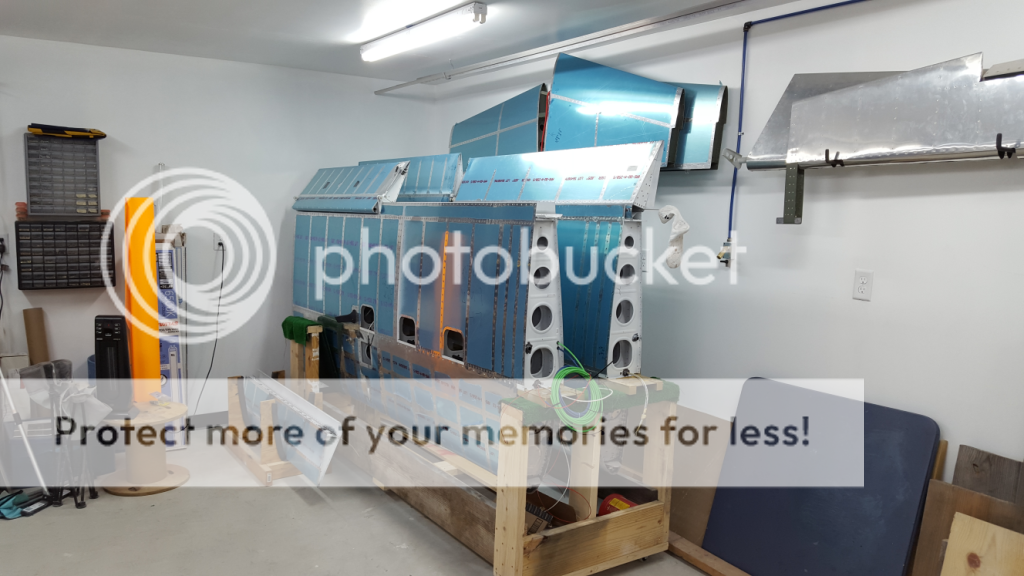
status%201-18-16.png

The flaps have yet to be mounted, since I'm shy on edge distance and I need the larger hinge. I'll pick that up at Spruce next time we're in PTC. Otherwise, just the wingtips left. Fuselage arrived 1/20/16. And yes, this is a repost from the -7 project thread.

Updates will be sporadic and when I feel like it :p

Reply 1 will list the current thinking for the end result (paint, panel, etc) and get edited if/when things change. Further progress updates after that.
 
Last edited:
Current project plan

This post describes my current vision for the project at the end--that is, what I want the airplane to be and look like.

Overall, it's a taildragger slider. That's what Dad's -6 is, and I like it. This is now set in stone with the fuselage here.

On the wings, I added outboard fuel tanks similar to Mr. Tuckey's ones, but only holding 12 gal or so each. Total fuel capacity should be about 66 gal. The idea isn't so much to go for long nonstop flights, as to be able to "tanker" fuel for out-and-back without refueling or go further before having to fill up with avgas (I'm planning to run mogas whenever I can). I also added a trim tab to the left aileron and I'm using a heated Piper blade pitot. Hopefully the old static port on that will work for AOA.

In the fuselage, I'll be running a hard line for smoke (might as well do it now) and quite possibly building a narrow center console to hold the throttle, armrest, and engine/fuel switches and knobs. The console isn't set in stone. Other minor mods would possibly be a light/long extension of the baggage area like some guys use for fishing poles.

Engine-wise, a 180hp parallel-valve with electronic fuel injection and a constant-speed prop. Electronic injection means redundant electrical power, so I'll be tweaking the Nuckolls Z14.

Avionics are baselined as Skyview, but I'm considering AFS also. But I'm not investing too much in planning this right now--much will likely change between now and when I'm ready to buy. And if anyone has experience using lighted pushbutton switches (like the NKK UB series) I'm all ears. I'd really like to have the Korry switches like the heavy iron does, but not at $100 each...

Paint: The wife and I are both Georgia Tech alums, so white and gold was the obvious choice. Inside the cockpit will be a light tan and black. The registration is just a placeholder.
JnZiJe6C38_yqU8HxDznJ3EOvzgx4dl0SJPVqwbX5mPkCl8RhJFblQodwzk8eGXa9yDjDyClSVQjzCCmdzbbRtSawCtb43dRgWPS5IVJLn7xsH-X6HTVLmcEAfK-O0gp_rlS64R1-O14Y2aVctDp6zV3Idp2bOmykBhd6pqhds0p9QDLnin5xRVpUu4SDDkU8gwLbzUeY-62Vd3XVmTTPrhehHPff0o8KtgU5MVxRQrSlOtyl7ZhWjgZQkJgTXJZvthWxorH4ItotOIgGAbBB6dKk-pdoct4BRcbiEnJvTeZnuabCmb8g_HFVTNJHyteSjK-Ja28jkSwLRcqSwDf_nja5gHqgJ_OYyzXeM8cq7yYsqyh_0sVknvKdD1Dn3lq47tMl8m1w6Uh3hrPTW4NqpzOUklVeyPLpcu3nrlSToudXLA_1cz0GnuVFtWYcdcp0LWfLFfKrQSwiUSDHf1oOpcEkRbnPkcAJ49DiF2VkJUEMAWQ1hB3jBDNPq7dB_RoDnk87T0fzdk_Qh70wLBIyxPy4JByyp64g5rNlCJZWqFT9IhN_HemxeEKkPEszgRMzpOL_85gJj91-bdWTGaknM0IqjN9jrpRTBdnfy0tu5DqG7rUqkSIJcEDlYZjNBpKrKPiNa4yxJtuhaljk7FXJqot_0JqvEgPZyIuogulTMloa2MHy-eNKvJ_FrOzsxE5vqQk8KQJeL_qxoajV3qERl9wLWNX4EYJl0hdLBnrnZncqu4=w944-h401-no

5KBweJXaMC53S3szX9PFouS-yt_TdeOP4uqeRWAOGjxUkSYQ6AIPU6WVuImUL7kCxyPBf0CrbbUcaZorZXcBsGsfpdjIPgWmepeEMByXlCqDsvOJoyxpkZIUAoSzNCOTDS5H3zYKVAr0o4ufT6wYDxJoPTf0ut_gclukSxfxIw74MjnDy3rrO98V7zf8KW9DHQ0iKy4CtFfQREdtb2osl4C4Lp2wRQKB8NZjgAjSPHTMIpZqCQUdzM1lAoR-oFVu_scLo9A9ZwNPQbM_WipS4srMqlQdDQ7NTI1UnqL7oOlmkjsoLZ7lKyJ2G8k20d6l7URwpmZ7bN4m6ipA5diV2f5qCJojQLuAHVBqQEyvimZx0jZmjKa-6ci4e64aKKjJI3utvAnWBayO_tA4VzfaJQcEk0LAd2uejxcKXioY4XXG4jSOt1TZ4_J4s0SNa0XyOW2w-LGwgLtZv9u9Z2NxMzgk4b2qX1JOUe5AqcQppObBFhzBPFp0zbBj9OmVq01o_aWwBMs3z6V2GCM-_xxg4x6fbPgETA7V78o6zcAafZ2sY5IbopsZ5ntf41UcRAvzOLH4QZrQb1W4uEw4UK2cTFgTDCoBn4D20qOF9OriEKHu0gPBfNs_dpxN6_7TIjgSZtKMJy0AiCUt7gVHgLipXxbDdkdYx0kuDHB4uWEWvqU_eUMx0ZC4vrYlZxlx9jL9iSG0MK83o7xtQvnobvqkVg12Es63EkIAKaHmXhqy3g31bb8=w747-h912-no
 
Last edited:
Details on the mods

This is the trim tab on the left aileron:
trimtab.png


And here are the fuel tanks for the left wing. On the outboard, fuel is in the area that is riveted. I also put non-locking SPRL caps on all four tanks.
tank%20comparison.png


Started riveting the firewall this afternoon.
 
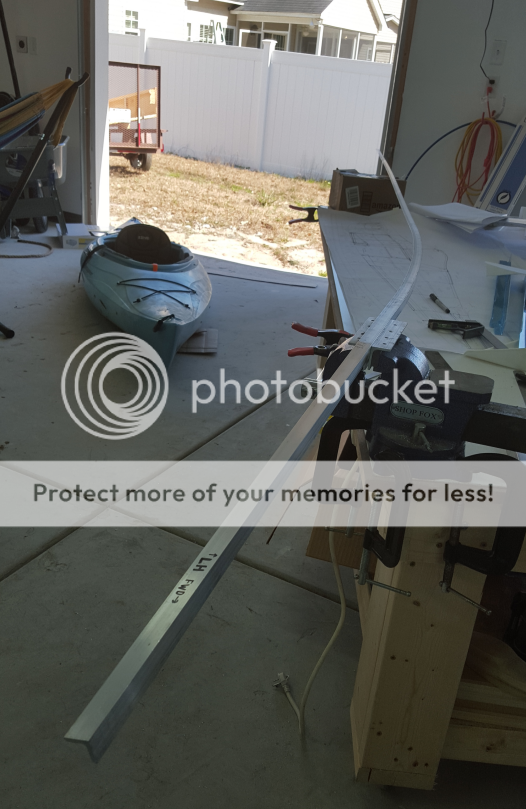
I'm not quite ready to start installing them yet, but since Raymo was kind enough to loan me his longeron dies, I went ahead and bent the longerons. I don't know what trying to bend them "by hand" is like, but with the dies it was pretty simple. The second one I bent almost perfectly on the first pass (unintentionally!); about 1/4 to 3/8 of a turn on the vise handle after I felt resistance was enough. Took about 90 minutes to do both.

longeron.png


Now, back to the fuselage frames (currently drilling and deburring the baggage bulkhead), then painting them.

Also squeezed in a flight review in a CFI friend's A22 Valor LSA on Saturday. I wasn't as far behind the airplane as I was the last time I flew it but it's still very different from the RV. I'm used to being able to drop the -6 in from a close pattern, but even with a hard slip and flaps this thing just doesn't come down. And the little wheel isn't where I'm used to...
 
If you start with what will become the top surfaces of the longerons clamped together, you can put the long curve in both longerons at the same time, and you don't need a hammer or dies, just a vise. Having the longerons clamped back to back prevents the out of plane bending problem you get when using the hammer method.
 
Work has progressed slowly since the last update. I've painted and assembled the bulkheads and started clecoing the tailcone together.
progress%205-3.jpg


Why the delay, you ask?

Well, I got a new build partner :D

aLp6clDCPmmo-N9RiVa6CbYYMZX5DC4OvghicLQoRDfF5ZN013feba7xizU_qhc5Az4Q2Hwrj8t6QgK9pb5nka9R37KSOoptdkyjQ6Stq0Mtyk1olF92YtP_Qs9u-s6p9SeYTaIovvHvEcRSjDVsYYCIjuMss_-g0h4onJJqIQKYPNvxaHwdHY2qU_-7eGFO0wSgU6kHIPHaxQvZMFppq4hmwRKCH7aUY-7Sw_3OVx1JA7qwJbO7vhHJpVdBnN5Zr_WFQh4-Am-XnHFyeeWOk3NLjn0YzPekcRGu2T6akYEUUCiNA_QMSzDFWVyRyDpSNfdNNdhwqB5HPvpx-1iHAcOAtx7J0vqFNmj2VIhLxuY9ZqFIpsznAeoEJHbEMPlvFdZbvwRIxixjVfITvnyFgG4O0XxQP6l66_YfGmSrmBbvAV7AO-Pp-RxIG6Ha8U_eq9CY-3lrvR68DC7bG3tRK1s3sMLwKzZNdD0URPSzvdx7oSdn-kRjUm5rRxnEiYZB_Pk7nXuwcA5l-31NFNCpDtlbMnUbQLOEeycyOgQoEtjdFSKwNWnNbU5m5qbkBLu5PYtrqUx4CYgkmHLU-e2QmBdyBjdMrNwoYIsKiNTVxf6nCpeP9T0Ma5eTyBJveHYCdbq3n3Q-tfBHYLX4xH4XBk2FB-_0jXZgqL4o09tSs8XZezylw6rZ3g=w329-h584-no

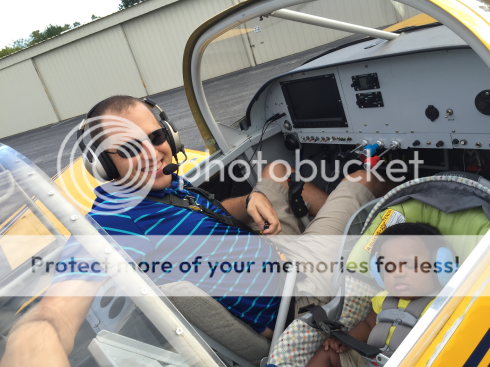
His name is Joshua, he's two months old, and he was a complete surprise. My wife and I have been trying to adopt for a few years, and on the afternoon of March 4th we got a phone call. We took Joshua home the next day.

Things are finally settling down enough that I can get back to working on the airplane, so hopefully somewhat more regular updates will resume.
 
Last edited:
Congratulations! Better teach him how to hold a bucking bar so he can get into all those hard-to-reach places!

Jim Bower - St. Louis, MO
RV-6A N143DJ
Flying since 2011
 
Congratulations to both of you!! Building a plane is fun, but nothing compared to the wonderful experience of parenting and being a family!
 
Congratulations on your new building partner. Mine is 20 years old and in his second year at GT. I like your "Buzz." I'll need to email a copy of your paint scheme to my son. FWIW, although my son was very accommodating, he was never too excited to help me buck rivets!
 
Congrats on the addition to the family!

What to learn after after "Mama" and "Daddy" are in hand?

You might start with "airplane" if Joshua likes being "flown" around the nursery in your arms. (Does EAA sell onesies?)

As for vocabulary... "Cleco" comes to mind:)
 
Thanks everyone! He'll graduate to clecoing and riveting soon enough--though with some luck and funding, I may be close to finished by then! I have a set of Sonex plans waiting for him, too. I also took him up to Ridgeland a few days ago and showed him around, and once he's a little older I'll take him up in Dad's -6.

Pretty much all of his toys and books to this point are airplanes or spacecraft :) Though I think his first word may well wind up being "kitty"--he's absolutely fascinated by our two cats.
 
Excruciatingly slow progress since late August; lots of work, finalizing the adoption, and a much-needed weekend trip with the wife. But the aft fuselage is riveted up to the middle j-stringer except for a couple of troublesome rivets under the tailwheel spring mount. Finished drilling up the center section lower skin and disassembled it today to start the deburr/dimple/prime routine. Man, I am so ready to be done with the major portion of structural assembly and get to the fun part--all the systems! Tubing, wiring, etc. :D

10-1%20progress.png


But over Labor Day weekend, I borrowed Dad's -6 and took Joshua for his first flight:
first%20flight.png

He slept through the whole thing, till I opened the canopy on taxi in.
 
Wow, so I've been a bit of a slacker at updating the thread... but in my defense, we've had a heck of a year or two. A few of the guys at FFC have probably heard some of this...

Starting in 2017, my wife started going to Emory in Atlanta for her epilepsy. After lots of testing, and far from just getting the second opinion we were looking for, the doctors up there decided that she was a candidate for surgery! Apparently they evaluate a couple thousand people a year and only one or two hundred are viable candidates. That was unexpected news, to say the least--we hadn't even considered that as an option, much less any hope that she could be "cured".

In January of this year, she had probes inserted to nail down where the seizures were originating, and then on April 19th she went in for surgery to have that part of her brain removed (sounds scary, doesn't it?).

You know how they always tell you before surgery that "there's a small risk of (serious thing)"? Well, she caught that risk. During the surgery she suffered a stroke in the part of her brain that primarily controls motor function, and when she first came out of surgery she couldn't move anything on her left side. Those first couple days were probably the scariest of my life.

Fast forward four months.

Two weeks of intense inpatient therapy had her walking out of the hospital, unsupported. A couple more months of outpatient therapy back home has her running around kicking a soccer ball with our son. We're hitting the gym four days a week and she's back up to (or exceeding!) where she was before her surgery. I think her progress has exceeded even the best expectations of any of her doctors or therapists--so much so that as of yesterday she's done with all of her therapy.


And over the past couple of weeks, she's been coming out to the shop to rivet with me :D Her therapists consider it a good therapy exercise and she's enjoying it, and with her help I'm ready to flip the canoe as soon as I get the cowl exit heat shield riveted on. I'll have some pictures up after the flip.

Oh, and just before her surgery, I also picked up an engine core, so to speak--an O-360-A1A, disassembled and tagged minus cylinders. An experienced local A&P will be helping me assemble it when the time comes.

But the best part of all this? Still no seizures :) She has at least a couple more months to go before we can start working on getting her driving again, but the longer she goes the less likely it is she'll ever have one again.
 
Fantastic news, Bob! You guys are hitting it out of the park.
Looking forward to further updates.

Doug
Seattle area
 
Such things are a blessing!

Great news on your wife and being able to continue the build with her!
 
Thanks everyone! Things are progressing nicely and the fuselage is now ready to flip. I just need a cradle to set it in... so I'll work on drawing that up and work on fabricating it this week.

Now if we could only beat some sense into the insurance company so they'll stop dithering and pay the rest of the bills...:mad:
 
_HUfQ5nS8IMPMai5MwDjH9oteXVi4mjSUJ6BNNRiogvGL8gRBE4kfQ-_0n_ffO1S6HdYydZLfLDgiXEUEalPKD_q_dFrAnGUBPDRnROUqDc7JT5W7vnd2bWm8I5SopXpP46Cs5LVKBqMDYEuTXDo95lloEZwHbKJFgffKlWEZRCOAUzuxu27t9-tkSsZ8LbKC4uBhiNSu9kipfLWx8F4UqYp_rJK9B_p9ponSlQW6ZBuMyms5XKwqhPqo2njO613_mqXBm7VRq0mVw-Dqt72JhZl71zU_pZl1iHtkD8r45WULTubVmj9_-XxzD6Zg1UmZwpo1AVtqcgqsoYll-EeR6Ou3BvJ5feFxyJ7ajmkI3SWebHH3xPbrgUHBkFL7oUtC-cjnBOZ0220kZyjmPEefVDtjdrHTBSj5nDFJJTNUE9WFStMCPQQhpHDESbeZlu4jz80RiEpG_QHcObrCHfOHlGDYHkqgJ4XFXlu37EBsVyW52NojBmo0lH_oJDLmyDq7QMf4fCSP9blpoql3Fwe70oE4nHehkG8Afgxm6cI3GNOvYPRKWm3TUulU97-Sg4QuM02pdIt6hfbqnU_l1cCvG7bLofLpacutiUt0pgohQcSDBwfR4zxMZnwtHmEruL4L99lF96mW_xQ0R45h0xaSe1JCF-hoNR_2l-o3n8KlA2bicsPA1OGr-0m1q-fAuMyHib1dlKt73XYPzSBTw=w950-h534-no


Got some coworkers over with promises of beer, and we mounted the wings last week.

Today I checked rigging.

Incidence is a hair high (bubble is touching the forward mark) but it's even on both sides, all the way out (no twist).

Edge distances are good.

Triangulation is dead on to 1/32".

Both wings are swept forward 3/8" at the tip.

The flaps touch the bottom skin perfectly.

Close enough for government work!

Now there's a couple days' break for Thanksgiving and for my aft bolt drilling tools to arrive. Going to crack a cold one...


(And yes, that's our old stove back there... perfect for baking parts post-painting...)
 
You do realize with those forward-swept wings you're going to need a fly-by-wire control system to keep that twitchy airframe from departing straight-and-level, right? :p

:D
 
Forward swept wings ... need to trim the rear spar.

Hello

I had also forward swept wings, but not that much.

Mostly it comes from the rear spar, that is not trimmed enough like it is in the plans. The spar is touching the fuselage side skin. This pushes the wing forward.

Maybe you want to check the rear spar and fix it before you build on.
 
Hello

I had also forward swept wings, but not that much.

Mostly it comes from the rear spar, that is not trimmed enough like it is in the plans. The spar is touching the fuselage side skin. This pushes the wing forward.

Maybe you want to check the rear spar and fix it before you build on.

The tolerance for sweep per the Mothership is 1/2in. I'm within tolerance, so I'm not going through this exercise again. Tolerances exist for a reason.
 
You do realize with those forward-swept wings you're going to need a fly-by-wire control system to keep that twitchy airframe from departing straight-and-level, right? :p

:D

Well, technically forward-swept wings don?t automatically make for an unstable airframe, from the pilot-controllability standpoint at least. That?s a function of change in pitching moment with respect to change in AOA and all that. The Hansa Jet had mild forward sweep, and (as far as I can tell) had conventional natural stability characteristics.

Now, forward-swept wings typically are unstable aeroelastically and are much more prone to a phenomenon known as ?divergence?. Essentially, as the wing generates more lift, it wants to twist nose-up. Twisting more nose-up menas it generates more lift, which makes it want to twist even more nose-up... and very quickly your wing twists itself up and off the airplane. You deal with that by making your wing really, really stiff (which is what the X-29 did using tailored composites).

At least, that?s what I remember from aeroelasticity class ;)
 
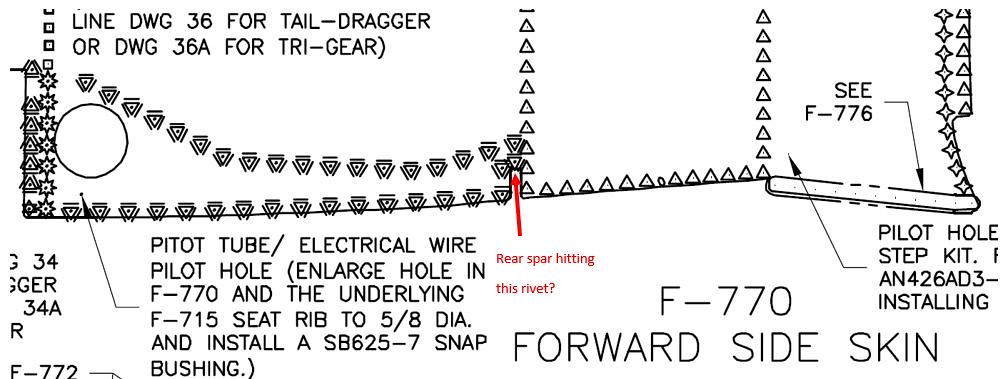
I definitely agree with you, 3/8" sweep would not worry me in the slightest. Just out of curiosity though are your rear spars hitting the rivet pointed out in this picture? I put flush rivets here (someone said there may be interference here) to avoid this but I'm wondering if it was necessary.

rear spar rivet by Jereme Carne, on Flickr
 
I definitely agree with you, 3/8" sweep would not worry me in the slightest. Just out of curiosity though are your rear spars hitting the rivet pointed out in this picture? I put flush rivets here (someone said there may be interference here) to avoid this but I'm wondering if it was necessary.

The left side is; I'll trim it when the wings come off to eliminate contact but I'm not messing with it just to fix something that's within tolerance.
 
The left side is; I'll trim it when the wings come off to eliminate contact but I'm not messing with it just to fix something that's within tolerance.

Ya I wouldn't mess with it either, just wondering for curiosities sake.
 
Guess it's time for another update...

Wings are back off. Empennage fitted and removed, flaps and ailerons rigged, rudder and elevators fitted and removed. With luck the wings won't need to go back on till I'm at the airport and a few weeks from flying.

Fuel line routing to the selector is complete. Somehow I managed it with pretty much no preload but those lines right at the selector can't come out unless I cut them out.

This setup does fit under the stock selector enclosure (though the lines out to the pump don't) and more importantly it avoids hard 90s on the suction side.
b0bsabJG_RwZXoDiI9TckM7yw7i28XvSawYExJB7_crLEIq19pWqn4kJWBub849FKRHOKDTUHjP-6bIXeCMQ7XT_d5s2IPluelTTvo_N8Dl3HMH6rXdrrvow1eYMFV7CMlIxe8bsa4GkpALagoMlbQbDmKNUfFSBaHgv0RMhIfCMZsjTIBsmj1axHvLvJTNkA0BlKVDLSLXSKSjMlmSQ8cf8Pm_sjmQ5b9KmmZMQ8UCJMEs39pJPCU2U0cHZTt9uYxtDpgXWbOf0ZkFVgVPu6yt0t-fPsVGlF-AITrjYVRu9NKRAXjjizove5vX9JGGdUb749bbLViJ0G-uxeL_zCgpgYbhvNvOki45d9rK9Y1a2xrTNIVu0d2CS0J46wcaxQilF8SsF0Ycy74J7VhCYGHdUcOXGPe7ZaNDxq6p8Kfif5wadrFm6b3eoJW1lshQClGUHrLpOL0wTg4U5nq9FAswm2d-F_Jllq09SqNJ87A9z6pSWlY_Q73np8Nv-hwBkP3bosoWwWNCwIzdSRizR-F8vLNuyqZxzCIysLPDxXKLxvOnW9W850tz4QmZ5kA4OtX_s2WxPDfI_FVaSJKbnwrbYFtbKD2XEv0yN4qdpDhGVxsHldQCXcGbIoySfcNdPwaYNCGpyQXmROsX6g86_mUpPLh9UuxhwN97HIH4RRZRiNBbFp5Yz7l_HuBYnJ9qVdQG6838cNsXw6xjzUQHsoRDM=w814-h458-no


Fuel selector sits a little bit aft of the stock location but on the space forward on that mount plate I can mount something else--switches, an iPad mount, or maybe arms to hold a cupholder (I've abandoned plans for a center console but I still think I'll use a quadrant throttle, just mounted traditionally). A custom cover will eventually run from the fuel selector cover over the pumps and up to the heater box.
YycPvM6lJFaeKgQJa3WO162NGfd4-IG0wyFgAXILMfb0s9pm8Xv8H-fuU2DM8YFJIQbZbFa4hki-SvhXOtNS1P8vRYBkJvybGD50RKiWozhcEjXVX1z0bRNqPw8MsVrNpoIMqGKSMvX-YWxvIb888X3Bc-Az5IShPrsWan2P0Jw0IL52oj6MyLIzGvc4d2zaRoU9F41Tdifa9nYF_5cBMhEpAUuAmFylU_31Y_LsQhN8FxlgNUYrc5oyJWR0fotVjG12wen2tSDiIQh5Dd1k6_6jTB7Gpe39jrpCwdjgXujO1spPAMi8VRfBC9L1WiVvA2x7EoK4PIGX54mwOMgyWWsrKcIsQ039qfB8870_Oi1BLnzJxzQ4qsYfqJYbr2vOuFTI2vKext8tTv9vloQRbhZodcWbBk1CQUFSuprZZLCUsXLioYip2Tv6ZMSm_WLq7gCtsHIekqkos2f03KwBQaCmZ1VApwDWW8ewCSeJTU7B_U26VFuC03OPRrbBlro6jgAPu8sfM6AP04mgTXgz_kwaLQvYY7aIXs1gH9z7f9NEg4IzkiM1CkOl_mTRCQhoP897mfNeSopR8vsT2atL15dQE_6DUXlHdT1Avu8_Nc40eSJ6uL5eCmH-_HabD5RIIoHpAE5ymo-2UsEA7qXwDlfPU66dLlfhs2NwNXzqurtNdKjcyZXZiT1sh27Jmw-U61KUtrm7qK_0Y9vkKaesVknj=w814-h458-no


Also, the engine mount is now on with hardware store bolts for the moment. I wanted to get it on there so I could start planning firewall penetrations. As I'm using EFI my fuel lines just need to go to the top of the engine; they don't need to run down to the intake first. I'd like to keep the lines away from the exit air and exhaust pipes, so I was thinking I could run them up on the back side of the firewall first and have the supply line exit on one side and the return on the other; hoses could follow the engine mount up to the back of the engine and then to the distribution manifold.

I had a whole bunch of 1/4 3003 tubing laying around with no specific use for it, so I decided to mock up a line (visible below) and use it as a template. The final line would probably be stainless 3/8. I think I can keep it tight enough to the firewall that the rudder pedals won't hit it even at full deflection and fully forward mounting. Return linese would basically mirror this on the left side.

The routing in the picture behind the firewall shows about what I'm thinking, though I think I'd have the exit come an inch or two further outboard (where the small sharpie circle is) to avoid the brake reservoir if I decide to stick with that location. The bottom picture shows the proposed exit location from that side; a bulkhead. Line supports would be little brackets with P-clamps, screws facing aft. Thoughts welcome.

bA9yGaGyFHWjY9HOIVPZD8M6RYQM69RMUC4rDCst76uc-yHyHyrYZ9rdNLFqnB7eAqSTLCFgqbJQ0J57io03xnsjYS8Kx_oYxDY2oDnJm0XcG2CgkApyXnO-x1MR5N4iH-ABdmsBtklKsrljCbaREh45ZWB-m2nUg9Km-IlxKxdnOCmvh4UtAHZSTut7eFfMj69LVtwhRah3Uon6eWctj_rtAqc4_N3QTAM1uJ8uR2OX78b65kD42EHEFd3geRH0Ui2AGjFPt4UAZEOVP1pQZA4N_h9Vfo1DvNi3gX-XJHpoWjWXGejQ-eEXGeIC_0cMKOxXj9jtskyUz2xFS7mpPQyE-aYLG2pCYajJXPM2XmqFhf01ERd3RXpM6hkZY9ZZxug4cGGPSTFhmHYaxDjzoBxZNjboVfh5vrg3kOjYzFcHpMENh6jLiNLbtNxvj72NvqvVi2rOIe9nu5jZBHdEkJZQdYOfaNbMwkBDZtBKhnrenc_EqZZWY1IxxTkcnWhgs-fUHAPz5DpsqU7bR195tLkEGG3vR27id1bRRXKeKvx1bfBD_Hm_6UPIIt47WmhGHMzCOzSNUepUndUC1pwfM51QJyGSFNeDUX4eLBkSjzAnq0fCepSfJKTCqxdZ8XgZALF-YRKx5wwxWaynLfj9_8kqvvyArv63RbfJg81rZ2JGXrmc2_ESYlcveFTiC0H5DO1cywxCTpfGIaXsm6IDYhd7=w814-h458-no

UBNW4bvqc-RAcSux-ghLVCaB-JVzfglYNlPq5yLFYrYk0qp1WOihN4zUQynmGjEZmSX1XcDFCAiI__NaPC-MoRPOtI5xPOf22spOKkC7HWIpKc7IkU4aL3wKVMfVVm-iwCPpAZfkjO0X5_8mcboc01NafS0RcIE6BJq_C-hr5qa0Qn5L_-g2UMguZIz-jKLsZg_z1TQcpCGLxGGmT2X8AWRssR8naVH3Enzqc3Zfyrr3x5gXyjMZM1WH4TehVrAkRiKVlUZELu8Ml3kmwCw7EYT8j-PrW5L_74WHInS4a3S8_H379IagTA3UPg8FCOWjmgQjHR0jfA9BELH1MZaeXlFPOkTKCpsI9CbMkCKZtYTI9ImAQoaZ1_EB7xxZd9fc9S-q1yleomdz0QYHgoc_DG_EJMisfYdIdbfGQ4fOCKzdxuNHaqIOuNvZ92KKaIavJDBjLzMiijCNmysKc6cnCuxZJtUq8Fh3bYy8uqsLIDqwt6560oA5hXeGXHxvV1-UKjZ2mRgZAGaCeuuKjObGLsk6rcR_yFsgAAX-v0gcIlPeV7d6KQ22aVhFqJRQE5PORqpi4gRZh5nPXyS0PN7utrxnMoB_u1lHLMvYOBnLNN_8ur9Wj_Y0aShl8qVuieAPIYyCf5P3co8Z314mi1Ybj7ufmVpP-FnXSBvZm6LneKUwZ3LSLbtgPSFH1HomKEiAbOuvWlevBxHQf7znh3k6kxku=w814-h458-no


As I get this done and the bank account recovers a bit more, I'll be doing a final inventory of the engine and figure out what I need to order, then do so. An A&P coworker with lots of Lycoming experience will be helping me build it up sometime this fall, then I'll preserve it.

Also looking to start a bit of the electrical installation, at least on the power supply side. Switching and component wiring will wait. I've also decided on Dynon (HDX vs Legacy Skyview is still TBD) but I've taken the 3d models and made simplified "printable" ones to run on my 3D printer. I'll use them for running wires till I get the real parts in.
 
A note on my last two pictures?reposting them for comment in their own topic has brought me a lot of good information. Apparently there are things that run through this area I didn?t know about, and there?s more room in back of the engine than I?d thought. I?ll likely be discarding this approach altogether and going to routing from a more traditional location.
 
Consider what you will have to do to inspect those inline fuel filters before you decide to put them in that location...
 
Consider what you will have to do to inspect those inline fuel filters before you decide to put them in that location...

Fuel selector off
Pull covers
Break safety wire onthe ball valves and close them
Put absorbent stuff down
Pull filters


No, that's not an ideal location for access, but I couldn't fit them in the wing roots like I'd originally tried without using hard 90s somewhere. This way if one filter is blocked, it only blocks one side.

Besides, after the first couple flights I should only be pulling them at annual time, and those covers will be off anyway.
 
Small update... plans to acquire the rest of the engine parts are on temporary hold as my employer has announced layoffs... I think I'm going to be okay but just be sure, I'm holding off on making purchases.

In the meantime, I've decided it's a good time to fabricate my center fuel pump/fuel line/wiring cover:

LCQXq1o8jaOlrcx8HVveQ_7BP5zPZLVHwisaYeboX67VZ7S6nBhVKrjPlCfMR9WawCYyVyJpw8QQaN58wOU7EmNYm4nliZav61AtrWj7ZFbu7LfloZzk8OrGcb-EagZWcbf7uss7yWw9z39PgGgKojMLFtsg-3LvFvMPdh6D5CDz1Z8uViAyaEFjfgJ8QDw5cirB-2drsuASPAr88Bc6YiGcjXRauy5dAg0F8FCC-M9Xjo9-Dg3sAVeJsBHOgeLa__v_Hwf-1cD9WpffUreZNXS9MfgB76IKCZrZVIxpGRNOAxQM4jskDzG35pMLrrtoysj_QMxidVQOlePhZPYbOK6D6gt_sD0mreb4Qx8dbuD8i24XQtouKce9UpobHm8V7fzNlTSVvzXsQyUEo0PunEFO2LGzlSf2vdFEx9zI0DZI4pHaeVOJIYzFNGII4czGVX0EqUu1_u4vjfv1ihnLCcrXyT2vW8hASkYfEbeB1IFSU8GWY5qA8U1nXgBR-8znP1fmnDjZcAm3VKicwD2gig3IZl1gISgBX7--LJiSPosNFaXyTJJfrIzxyHmz0UwFLPaOvQANkbGuLSNRcVW9IrcGnreqB4cjQDxs7roC3nY5khPmwjh1dx0jhU4lEDPu1yNAc-B0Ep8m62N1L_21dDTVw9gHy-JVGNCMwQvOOLbZxua5j_P0ZEE9gwPjcKzG4FAd1z8qJWeJe2lQHp19gRz2VwigX93UfUCPc7fT1EEnXSg=w811-h456-no


Base is secured with pullable hinge pins. Nothing runs under the floor cover because the stiffeners for the fuel pump module block everything. This cover will provide plenty of room for all the systems routing and also give me a place to mount some cupholders or something.
 
Interesting idea to be sure! I like it. I have return lines as well and noticed your inline filters, what micron are those? 40?
 
Like the fuel pump cover....what thickness metal did you use on it and where are you putting your fuel flow transponder?

Allen
 
40 sounds right on the filters; I?d have to go back and look to be sure.

Cover is .020, same as the rest of the closeouts. Bending it was a trick; used the cutoff leg of an angle extrusion as my radius bock, clamped it all to the table, and slowly beat it to shape with a mallet. I wish I had a deadblow hammer... otherwise just careful marking and trimming. The selector closeout got modified to open up a larger hole and tie it to the center cover, and I still have to modify the forward end near the firewall. Trying to figure out the best way to attach it that won?t be a pain to remove in service.

No fuel flow transducer on this; I don?t want the flow restriction. I?ll use the fuel flow output from the ECU.
 
Engine build!

Last week I started building my engine under the supervision of an A&P friend from work. Got to the oil pump buildup and realized I didn't have the oil pump drive shaft--it's not shown in the IPC! Or more specifically, it's not called out for an O-360-A1A, which is what my engine started life as. (note to future builders: Figure 10, Item 4... should list 61174 as the part number per service instruction 1164B). So while that's coming in today, I've been checking ring gaps and prepping cylinders for installation.

In the meantime, some pictures:

0JaTD1DWkBOdg7cvZHq7LvlFJYO_w0EP11MT_arTIke5wNdf44QC3Dlh7dcGWMm0WZWIH5YNRtmB2bXxN9lOz9k6oq_UIG0G3GdLo3BSXiIfwbM0MSGVKStS_t9rBUgkY-CkHiSPzKP8c1sBo77ZR7g92zpEQYLRT3vRJRZBQe6_S5QVjBiODKv2P8Yllemu2zzQV5R8AyZyWtO5S7vKu-xzMxYcbz1TTJigSdG3-MI3wXSOkW-JqeRjCQuPvBHdwSX-PXcCdH45GfpFpr4Bywu8aVcomQvX_NniOYEPLwalliZwTKGrGfdd_SVsAlod0lzBkNJDYCN7X0oyM_QSBsAEuP6-4n4sa01R_BIEVHdNhjG2dvnGx4ThfJBva__ULbnKGjhfFlQHqpMro6FA4jS0Am7cmULizr5nIMu1hCCJHOOahIeymOZgqqlPai9sH5uf0RSLm5LliDikC5zTsbFl1xXuvo73RzaQhJEsbfGzj6TmGHP6je63h6bxo6s5c6QQsvZSkxZVK8uleTH3cM7N718IjbWdYmTx14e3D6LYkdqlehCukfZF6Y2ssBKN0A_FLdWAipRNmm2lqNLypeFU_gdHrektZ2GpFvm5Gd6QxL-cRFrA5N8HE5RCvztahZhcN_F6e8AuZSdzqF0W3ZZ3Zt67_La03N897dGBBHfn1j_Khb_lxnL_v2avSBYO5OM2lG0K0XN80oI2iX5p67c49qxF2hOywfsFQAIXaDCn4hnD=w347-h462-no

rCI83Jpbzru75vdXvK6TPrL_zheMxfQbJrmJEoP2mWZYbh7ciIyfzRdLu0pVE-jJOVb0vtb5fma4giRhzLRhqQ0rL8vWFm6hVrR5w4BA1plamFs-WE-yX9Jbr9VW_2lGtF9AEn3xYQL-PLVcYlnJTLgGb3qPS0Qs-SbNWb1ZOYKWNDTCtovTMlOfJqFKclYqMsTN7uSzXz_dZjKFrAGBSpZkvJFaVwP8KumhRKtooLDEFqpf7CoNYBsBOUgyu7mwRc6GrVV1AOpmIkxV8MNLA1Md-LGLwrLGa4Xf_2nzwtVqEoCvz7XScP46rUAxWWQFAmsgXnZ3WkjCXepceQw0vNYLHAsrVoYEjc-jraB6TTnVUt7P1KLTVmRsJfy1sYfV9eIDCe3Te1t2KaK1z9m6ako_-zEIVffVZzPtc_381flmxdPt1qE6U9iWje-TYYQGmO7rEqE3GNxZ87Bz1Cx5n_HeFbfJdgS7ZS1U3wek7xd1kYcNvVFbCJGqUaUSRZHNjTZYal-xj935aWFUldo4oehyyYzE2_Mfru03v8m7JJqTsTXwQxAGSXDBiF0CXvQO1XVDlfwlvSW1U9DYIjwaVvx8B_Kx4XxvpPhZBlcsv5it6rbDQs-7QPns57-cbmLaPjMY-Dq1KPOTF4er51Bwd7OO-LLVeTKl4oyEfiAM-ze3jUY7JfVyyDZMibqXIrbggdKGnsNshQcYzQ8FHNdIoWuPwdupogvuu0Txrx33L6wyvWvs=w580-h773-no
 
Last edited by a moderator:
So the engine is more or less built, minus a couple of accessories. Slightly older picture:
D0kTqQ5a9ijlnZ0MVHtvw7W7T0DCzUyht-2wqnTAGzQA7SrIr83uBOpz-D2yE9S21QyscbKbOs4mJLxrdkDTQnf7uMcCmIkpGaDfxF0i4lFEmw4ogXZQrJveTxAK5OCuLuFqEuvbJD82_vxe9hBmVgvP1KZ4ljt2uwWzFr7ajia9h2iYLX5Yojqz1xGEfEcTuA6NiW6VdoVywfj-6yHympJl10C79gFhz0CCMFbTtfD775x90qDQe5nP7j0ZLlVfvyMsNOhyKAQvmDUPv1PKjloszl8nN5HhTttd-LdSWHqzh6fHNXCwJZIiKFAiZUYFzUUl0J5bTHkdmqtt4j2Bg0mgik3nio8Fw1oRbJoRTm2-enFDiFjUUSEF4e_-MyaNmMtgGCE5lBgxlWSi8xs9M6mmVtlY3uLNH4UG6KEAI76IUtDb4wi8cwpRhXNpGACXkXI7wNAUoyXlDOb-YUIA9EDfCA8JNnvLJpUrMGqflRRvCw65QWM0MAvu3ub_LAcnjKoo_7VY_p7HA-_1fOgfJ9OlhHIH_-lh9jlR6lDeOTh059TaqbvET3_CUw3MuXjyN4-aFEmdW_oyOPO9wOcMgonSi8ZAsE7Pks3JYORlk5g-lNi_Fu3qot6jo_Sb7y2GDVmCNn87CGCwu5jMv9sqqodSyYCJKlAmcOHCV6BZk4YqqlHaRP3mx8oobXp0GSkCWmD2YcwY-O8pduKJxu_jm_b1MLezrl21bUxFNohaUFN3ib5JNVT4v2E=w1235-h926-no


I've decided to start fitting the baffles (at least to the engine, I know I can't trim the cowl side yet and they need to be off for cowl fitting) while access is easy, and started on some of the accessory work while I get the shop cleaned up. I'll probably go ahead and paint/assemble them (again while access is easy) and that way I can fit them quickly later. It's also just nice to be working with sheetmetal again for a bit.

One order of business is running the fuel lines to the SDS fuel block on top; I made a blockoff plate for the mechanical pump with a flange and stainless bulkhead fittings. I ran lines to the block last night and today as templates; once I have an opportunity to visit Spruce again I'll pick up some CRES line and make the flight hardware. But I had a bunch of aluminum tube left over and it's easy to bend, so it's a good trial.
Getting the oil cooler hose/fitting out from between the fuel lines and the oil filter will be tricky but I think it can be done--and that's more fittings to buy next time I'm at Spruce.
A good passthrough in the baffle and a clamp partway down to tie the lines together should hold us.
AntasUhl_u1jyeeyVxzDniGp75Gc6q54qJ-G_FqhEaWoXYY4BohQHvwmTxIzWKa9_rRpX19RjO20BhMowjcF4NGLqomOAjg3XkHrFn3RRe2jtf7Pg7hgk-RbGcWYiX_iCuUsH634OXSgNJGD-0StvKyeFw5m13bzIhYL5t1nky_dJwjmaceuVBUeH3d4XRrE8dfqEocCqa4PuOVCezhm9De19RXXK1nPjlaqoQzitBcAPoy3x2hjr6eC1CN4_PFPNQzeOU40q3up8c8G0Yuz450-avpZFXAEOtvJYaQXfawPmVNx2wawc_PtoGKihuRZQlqa-1tjGi4efMEb-FWnUf8VO20zmi5p9CqRqw3vpWrx4XWfz-Omlv2qcMnZuao_q2NZCxlUUvNhJ9lxhLqCM-sCXu300OU_BDCbK9gpfu6HStgSwHSBzaKM1xDXLKSkGxMDP4FQmmrgW7gJfvULsueX4dLaWYqhUiLMVGgjats4bVtBo1h7FCx2g38Vs-6KuMqFqSVFJBusOIsbAXSbdh7x6qKv3Mvk9sRiqrrozxu_H3nGbXPUIXtbaHG6uloxED4c4L0aLY8mdIqGk5Jm1SLFAHWnMnhPd95beZOsSIQph1IO1jSXeaObiCPvmwbNtHOHUl9DQQQ9pU5zWGT2QLzYPYhcwcd4LNS753PFZkdGNLm0-vtkFbD0SW9XMDCQXWwz9UxbPPkuTTWO1Nhjvby1BfUZW8OwCTWYPLnfHcxlJgnkMaOmJr8=w695-h926-no


Last, I'm also trying to figure out how to mount my non-standard 90's Accord alternator. Did some mockups in CAD then 3D printed a test part to do a fit check. This thing is tricky because the lugs are lopsided and getting the thick lug on the airplane side means reaching a long way around with a support arm.

Once (if?) I'm happy with the fit of everything I'll make steel parts to match.
8K396QunuSktaIH6Lc0n_-_MDzIsU-FJ7ulyqBv749fjIqpN2CW0eJS2rZeXmoKanWeiFw4qIMet4YysPrLffoJzRsz_mfYTdL3gJxKbNCcP0DXw-Tj7xfnw3Z0u7_vBx6TWtaQWs0eH_ajIYll127WYiWGSFuqBlJwfHeZ2Q1vpTIrrWjTAoPFGuW8GAWhPPyHkb9r3xeVdNKjYMPXTEiMRUQR5DgOlunVWYGZXpK1CSWZb26fvH1nlplvK0dmXYLyuMBQWr4VS-y8SpaIfgkSjcwj_Vidb5pV9CQbbXtzr6I6wfpk1sNaZmyZbMRPc0632WMm5JWshAYVe2X04xxHTjRq8ebFnvVutKvNvn_E3Cv2F7KCkQ3-V17-ehh9SmMQF-dqR8Z0njZO9LJ2d6pPLdRxarvxngivc6-Gl80R1nYbSUcFcBepwYQZqmlxEsPrNpwHOtwIJfukZz3Osp-mxGz2Jd2twhVlmJL8EsklHINap59FfjtNQgrf1_FaJ6mlgZy88m5ujTeO4kxNoquj_7GgdnGHSNy6EMADxQLqUemyn4UOT6tmXAtM2-g0-GA6917ICRGvgBLUbTTaKw2BjXhqWYfGWyh_v08TTaJn3PMfEGkIISU54A8Js3qRYyiEjobS35_O-w5YaX4KF9h8pbkn5-ciSpNMN4ODNS89e1A6_UWxqriLTc2698o_nC3ooTf47mVTH5JT_dbkf_5B1hVw65pPx7t5zCxz6fWQG8O1wNZ_51Uw=w695-h926-no


Next I could go ahead and hang the engine and work on some basic FWF and electrical installs. However, part of me is starting to think about getting the canopy done, mainly because I want the giant shipping crate it's hiding in (the 4x8x3 or so finishing kit crate) out of the way. Yes, it might complicate some access, but if I install everything with the forward skin on, I know I'll be able to get to it later. Decisions, decisions...
 
Are those Aluminum fuel lines?

They are, but as I stated in my post, they are just trial fit lines. I have a whole bunch of aluminum tube just sitting around so if I mess up during trial fit I can just bend new ones. The flightworthy ones will be made from CRES and I'll use the aluminum ones as templates. I don't trust myself to get it right the first time with CRES which is harder to work with and much more expensive.

It's like the 3D printed alternator bracket in the last pic--it's not he flight unit, just a trial part until I know I have the right one.
 
Last edited:
Got the engine hung and found out I really did need to make new lines; the first ones went right through the engine mount (facepalm). So, I bent new (stainless) lines and made some supporting brackets. No pics at the moment, sorry.

Next up has been firewall Tetris. The following is a rough diagram that's close but not exactly to scale. Nothing is set in stone yet except the brake lines and the fuel/return lines. Comments welcome.

ACtC-3fNI7nVgCBLNc8jOworj_i4FZR0Htb3lgBkJlJ7COmzzqL2k9N4jjR57QuN4WW8r-qMivYm68obXOCxwsstsszAXen76um8e7kM_jO1s2cv69m_W2KQFFbWkmL2nSAIxO-XXsqvTPmuQRZzM8MA6CMu=w1080-h760-no


I'm not tickled about the brake reservoir and am considering moving it elsewhere. Also realized I forgot the second alternator feed to M2. The one I'm working on now is trying to squeeze in that fuel pressure regulator and FP sensor.
 
Is that four wire penetrations I see? Depending on how big they are that would be overkill. I only have two and they aren't very used up after running all the wires through them. My brake reservoir is in the same spot and it seems to be okay. How come your not diggin it?
 
Is that four wire penetrations I see? Depending on how big they are that would be overkill. I only have two and they aren't very used up after running all the wires through them. My brake reservoir is in the same spot and it seems to be okay. How come your not diggin it?

Yeah, but they're just placeholdes right now. Exact number and placement is TBD. I'll have more wires with an EFI system, though.

On the reservoir, I'm wary of it being right over my batteries and relays. I'd also prefer a steel penetration rather than the aluminum component right there.
 
Yeah, but they're just placeholdes right now. Exact number and placement is TBD. I'll have more wires with an EFI system, though.

On the reservoir, I'm wary of it being right over my batteries and relays. I'd also prefer a steel penetration rather than the aluminum component right there.

Makes sense. I think I have seen builds where the reservoir goes on the left side of the aircraft but can't seem to remember who. Mike Bullock's name stands out, you might want to search his website.
 
Brake plumbing normally goes from Reservoir -> Passenger pedals -> Pilot pedals -> to brakes, so makes sense to mount it on right side to minimise tubing lengths.

Return line swivel fitting - hope the line is well stabilized between that & engine as there is only an o-ring inside that fitting & wouldn't do well if line vibration is present.

Wiring bundle for SDS systems is about same diameter as EGT/CHT wiring bundle, plus the odd wire for engine sensors. Battery cable penetrations will probably be as big or a bit bigger. Caution on having a penetration above the battery tray, might be tough to get battery in & out.
 
Last edited:
Back
Top