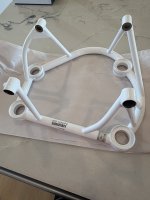
WD-01221-1 Engine mount is showing backordered from Van’s.
Does anyone have recent experience with what “backordered” usually means with Van’s parts? Are we talking days, weeks, or no way to know until they call back?
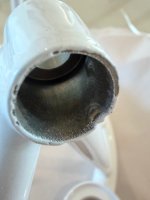
The existing WD-1221 standoff is cracked, so the plane is grounded until the replacement part shows up.
Calling Van’s Monday, but I’m trying to get an idea of what to expect or whether anyone has had luck getting a safety/SB-related part expedited.
Also, if anyone happens to have a WD-01221-1 they would sell, or knows of one sitting in a kit, please message me.
The plane has about 330 hours and has 3-blade prop.
Also curious if anyone has seen the replacement WD-01221-1 crack again after being installed, or if the updated Van’s part seems to have solved the issue.