I final-drilled all the rudder skin holes and stiffener holes with a #40 drill bit, deburred them, then dimpled them with a 3/32 dye.
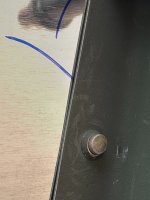
Squeezing the first couple of AN426AD3-3 rivets gave me 9/64 diameter shop heads with what appears to be at least 3/64 height.
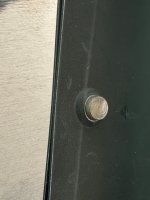
But they do not cover the rim of the dimpled hole. In fact, they almost look like they could very easily just slip out of the holes.
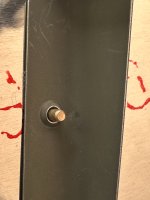
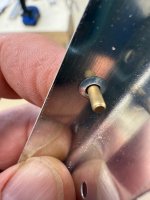
Looking at the holes more closely, I see that the rivets sit quite loosely within the dimpled holes. Should this be the case? (4-diameter rivets do not fit in the holes.)
Is this all normal? As far as I know, I have done everything exactly according to the plans.
Should I try 3.5-length rivets to get a wider shop head? Open them up to 4-diameter holes? Do I need to start over?
Squeezing the first couple of AN426AD3-3 rivets gave me 9/64 diameter shop heads with what appears to be at least 3/64 height.
But they do not cover the rim of the dimpled hole. In fact, they almost look like they could very easily just slip out of the holes.
Looking at the holes more closely, I see that the rivets sit quite loosely within the dimpled holes. Should this be the case? (4-diameter rivets do not fit in the holes.)
Is this all normal? As far as I know, I have done everything exactly according to the plans.
Should I try 3.5-length rivets to get a wider shop head? Open them up to 4-diameter holes? Do I need to start over?