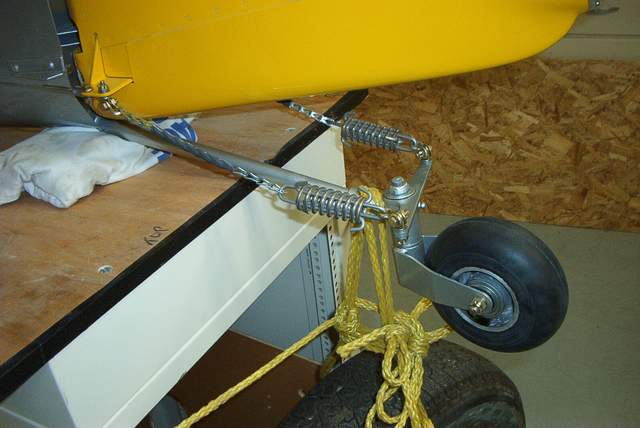
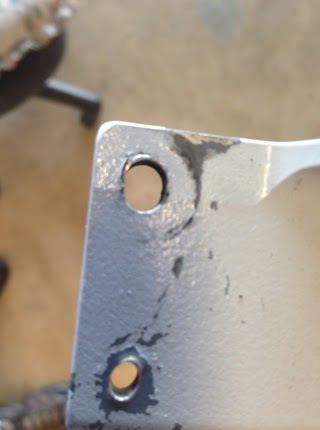
Today's little project was to deal with the progressing wear of the rudder cable attach hole in the rudder horn. This is after about 1400 hours.
First up was to make a drill jig. The final hole in the rudder is going to have to be drilled by hand, and I'm going to "move" the hole in order to preserve what is left of edge distance. That calls for a big heavy piece of steel with a perfect hole. Yeah, we can do that. I can't imagine going back to the dark old days without a milling machine.
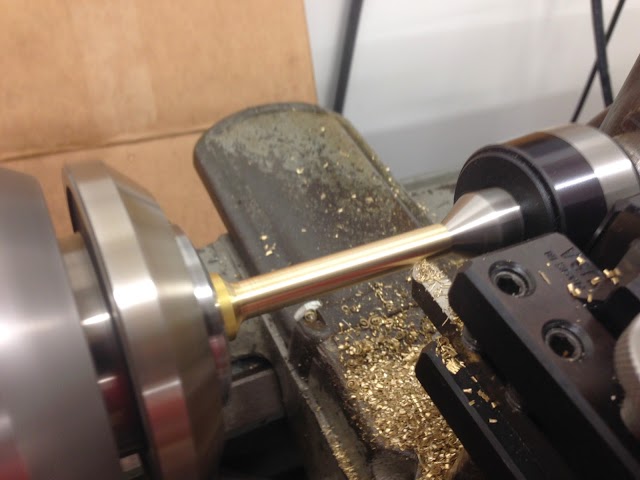
With the drill jig (big piece of steel with a perfect hole in it), I made up a little test piece to prove process and fit before taking the airplane out of service. Little details like, what is the actual final size of a 5/16 hole drilled by hand with THIS jig? That tells me how big to oversize the bushing for a nice low to medium force press fit.
Off to the trusty South Bend lathe with a piece of stock in the collet closer. In a jiffy I had one bushing for my test sample. Pressed in with the arbor press, yep, just the amount of force I was looking for. I cutoff six more bushings for production use. Their OD ended up within .0002 of my target. I continue to be amazed at the accuracy that I'm able to produce with this old school butt ugly machine. I intend to resolve the latter condition some day when there isn't an airplane project in the shop.
It is finally time to head to the airport and take the airplane out of service. It might be for an hour or two, or I might be completely rebuilding the rudder... The rudder was off in moments and up on the bench in the A/C office. I clamped up the drill jig EXACTLY where I wanted the final hole to land. Perfect isn't fast and deciding exactly where to place this hole takes a little soul searching as there is no good location. I use extremely high clamping force here with the "jig".
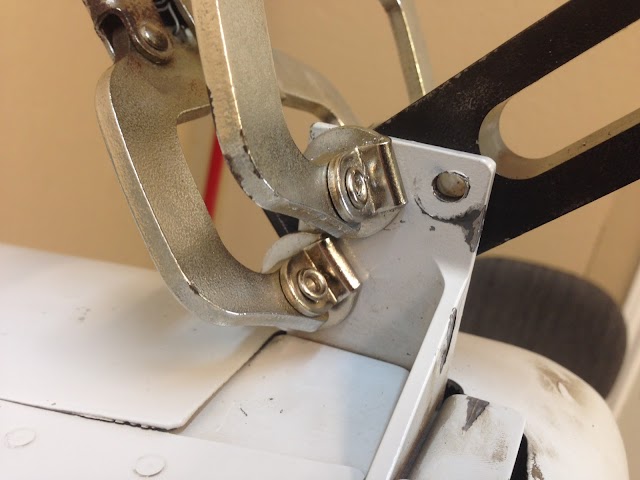
The holes are drilled with a freshly sharpened bit at too high of a speed with too light of pressure so as to keep from walking the jig toward the center of the hole. Slow and steady and you have moved the perfectly round hole. Albeit with a more dull drill bit.
The bushings pressed in exactly the same as the test coupon back in the shop. I touched up the bolt hole with a reamer. I'm very happy with the slight reduction in ID after pressing in. That tells me that I got my materials just as intended and that there is still good strength in the parent part.
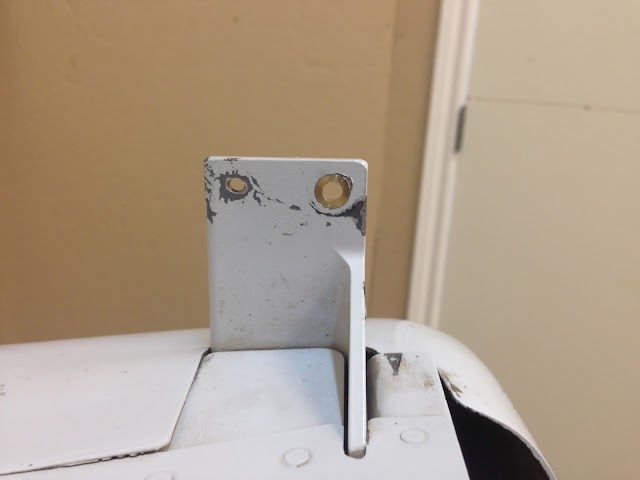
Like I said, this isn't ideal. I wish Vans wouldn't pre-drill these holes and give us much more material to work with. But, this is definitely better than just waiting for the failure. I'll keep an eye on it and if need be, I'll make another horn from scratch with more meat on it. I figure that this bushing is good for another 1000hrs and I already have the replacements made. The rudder is back on the airplane and back in service.
First up was to make a drill jig. The final hole in the rudder is going to have to be drilled by hand, and I'm going to "move" the hole in order to preserve what is left of edge distance. That calls for a big heavy piece of steel with a perfect hole. Yeah, we can do that. I can't imagine going back to the dark old days without a milling machine.
With the drill jig (big piece of steel with a perfect hole in it), I made up a little test piece to prove process and fit before taking the airplane out of service. Little details like, what is the actual final size of a 5/16 hole drilled by hand with THIS jig? That tells me how big to oversize the bushing for a nice low to medium force press fit.
Off to the trusty South Bend lathe with a piece of stock in the collet closer. In a jiffy I had one bushing for my test sample. Pressed in with the arbor press, yep, just the amount of force I was looking for. I cutoff six more bushings for production use. Their OD ended up within .0002 of my target. I continue to be amazed at the accuracy that I'm able to produce with this old school butt ugly machine. I intend to resolve the latter condition some day when there isn't an airplane project in the shop.
It is finally time to head to the airport and take the airplane out of service. It might be for an hour or two, or I might be completely rebuilding the rudder... The rudder was off in moments and up on the bench in the A/C office. I clamped up the drill jig EXACTLY where I wanted the final hole to land. Perfect isn't fast and deciding exactly where to place this hole takes a little soul searching as there is no good location. I use extremely high clamping force here with the "jig".
The holes are drilled with a freshly sharpened bit at too high of a speed with too light of pressure so as to keep from walking the jig toward the center of the hole. Slow and steady and you have moved the perfectly round hole. Albeit with a more dull drill bit.
The bushings pressed in exactly the same as the test coupon back in the shop. I touched up the bolt hole with a reamer. I'm very happy with the slight reduction in ID after pressing in. That tells me that I got my materials just as intended and that there is still good strength in the parent part.
Like I said, this isn't ideal. I wish Vans wouldn't pre-drill these holes and give us much more material to work with. But, this is definitely better than just waiting for the failure. I'll keep an eye on it and if need be, I'll make another horn from scratch with more meat on it. I figure that this bushing is good for another 1000hrs and I already have the replacements made. The rudder is back on the airplane and back in service.
Last edited: