What's new
Van's Air Force

Don't miss anything! Register now for full access to the definitive RV support community.

Rear Window/#40 Bit into Roll Bar

bkc3921

Well Known Member
Getting ready to drill the #40 holes into the roll bar for to mount the rear window...I will use a plexi bit to get through the window itself, but you need to drill into the roll bar as well.

Will the plexi bit handle this rather substantial aluminum in the bar itself, or will it destroy the bit..? When you are doing the canopy sides, a plexi bit will easily go through the frame braces (true)...but this roll bar is much heavier. Did anyone have a problem with this...? If so, I would be happy to take a suggestion.

Also, #40 plexi bits are not the easiest to find... Apparently, Spruce doesn't sell #40. A link to a good source would be appreciated....

Happy Building to all!
 
G

Will the plexi bit handle this rather substantial aluminum in the bar itself, or will it destroy the bit..? When you are doing the canopy sides, a plexi bit will easily go through the frame braces (true)...but this roll bar is much heavier. Did anyone have a problem with this...? If so, I would be happy to take a suggestion.

While I have never tried it, I have my doubts that it will cut through any metal, as all the traditional sharp edges are gone. It would be like giving your wife a pair of those kindergarten scissors to cut fabric for a sewing project. I drilled all my plexi by starting with a standard #40 bit and then a step bit for larger or up to a regular #30 for rivets. It can be done without cracking if the correct amount of care is applied.
 
From one of the many of us who have built their 12s per the KAIs, there is no issue with drilling the canopy and roll bar with the plexiglass bit. The aluminum is soft enough that there is no noticeable dulling of the bit.

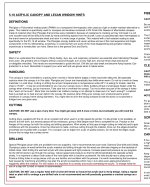
And heed the advice in section 5 warning against using even a plexiglass bit to enlarge holes in plexiglass. You might get lucky and not crack holes, as I know builders have used this approach successfully, but the reamer approach provides added insurance. Use progressively larger reamers for these smaller screw holes. I oversized mine slightly to help insure no binding on the screws. Make sure the part and ambient temperature are warm when drilling or cutting plexiglass. The warmer, the better.
 

Attachments

  • IMG_1029.jpeg
    IMG_1029.jpeg
    1.5 MB · Views: 89
I will add to the suggestions that you manually dull up a standard drill bit for this. I played with a couple different plexiglass bits and they were very aggressive and easy to damage on some test material. I dulled a standard bit by running it on the side of my driveway concrete and drilled the plexiglass and roll bar with no problems.
 
Bits

I buy my numerical bits from the Ace down the street. If thhey don't have on the shelf, they will order. I keep a couple extra #41, 40, 31 & 30.
 
Plexi Bits

I buy my numerical bits from the Ace down the street. If thhey don't have on the shelf, they will order. I keep a couple extra #41, 40, 31 & 30.

You're saying that Ace Hardware sells #40 PLEXIGLASS bits....? I can't even find them on their website. You must have the best ACE Hardware in the country..!
 
I'm also just about to do these steps, but am confused & concerned. If enlarging holes risks cracking even when using plexiglass, why do the KAI specifically say to do that? Section 38 p. 13 (aft window) calls for successively using #40, 36, and 27 bits. Section 39 p. 8 (canopy) calls for successively using #40, 30, and 27 bits.

Does cracking risk depend on how big the holes are? How large an increase is made from one bit to the next?

For those who recommend enlarging using reamers, do you have & use all these sizes of reamers? Do you step up in the same increments specified for drill bits?

Section 5 recommends diamond dust bits or step drills. I haven't found any source for either of these in the sizes specified.
 
Plexi

You're saying that Ace Hardware sells #40 PLEXIGLASS bits....? I can't even find them on their website. You must have the best ACE Hardware in the country..!

Oops. I read it wrong. Nevermind.
Only one hole in my canopy for the latch and I had a set of plexi bits. For the last steps, I used reamers and a step drill.
 
Partial Answer....

I'm also just about to do these steps, but am confused & concerned. If enlarging holes risks cracking even when using plexiglass, why do the KAI specifically say to do that? Section 38 p. 13 (aft window) calls for successively using #40, 36, and 27 bits. Section 39 p. 8 (canopy) calls for successively using #40, 30, and 27 bits.

If I misread (or misunderstood) your post, or the way it was worded, I apologize in advance.

The holes from the TURTLE DECK SKINS to the aft window are #30, and the window is reamed final size to #27.... The holes from the ROLL BAR to the aft window are #40, and the window is reamed final size to #36 (as I understand it...)

Your post made it seem like the #40 holes eventually end up at #27...and I don't think so. I don't have my KAI in front on me, but that it the way I understand it...sorry if I'm wrong.
 
Last edited:
I'm also just about to do these steps, but am confused & concerned. If enlarging holes risks cracking even when using plexiglass, why do the KAI specifically say to do that? Section 38 p. 13 (aft window) calls for successively using #40, 36, and 27 bits. Section 39 p. 8 (canopy) calls for successively using #40, 30, and 27 bits.

For those who recommend enlarging using reamers, do you have & use all these sizes of reamers? Do you step up in the same increments specified for drill bits?

Section 5 recommends diamond dust bits or step drills. I haven't found any source for either of these in the sizes specified.

I too was concerned about the conflicting recommendation in Section 5 regarding the use of reamers vs. the canopy and window KAIs calling out progressively larger plexiglass bits, so, I called Van’s Support. They recommend using reamers as the safer method. As I stated earlier, I know builders that successfully used progressively larger plexiglass bits, but fear from reading the horror stories of cracked plexiglass, chose the safer approach.

Also as stated earlier, I upsized my holes to minimize risk of binding with the screws, so stepped reamers for #6 screws to 37 then 35, and for the #8 screws, 28 to 26.

And I believe the use of a step drill is to enlarge bigger holes, like the one through which the canopy latch tube extends, but reamers for smaller screw holes. And I have no clue what diamond dust bits are either.
 
If I misread (or misunderstood) your post, or the way it was worded, I apologize in advance.

The holes from the TURTLE DECK SKINS to the aft window are #30, and the window is reamed final size to #27.... The holes from the ROLL BAR to the aft window are #40, and the window is reamed final size to #36 (as I understand it...)

Your post made it seem like the #40 holes eventually end up at #27...and I don't think so. I don't have my KAI in front on me, but that it the way I understand it...sorry if I'm wrong.

Hi Brian --
No apologies needed! For the aft window, KAI p. 38-13 Step 7 specifies "Final-Drill #27 all of the holes in the window". For the canopy, p. 39-09 Step 4 specifies "Final-Drill all holes in the canopy using a #27 Plexiglass bit".

The admonition in Section 5 to avoid enlarging holes using a drill bit, even a plexiglass bit, conflicts with these instructions.

I've found a source for small reamers & will order some for these steps.

--Chris
 
I plan to do this step myself this weekend, just waiting on the temperature in the shop to hit 80 deg first.

Here's a big tip--go to your local TAP Plastics store and buy some scrap plexiglass sheets to practice on first. If none are local, you can order these online, as well. I bought 1/8" and 3/16" scraps for $1 (each about 1 sq ft), matching the thickness of the aft window and canopy. I've since drilled dozens of holes practicing multiple methods and techniques for drilling and enlarging the holes--plexibits, reamers and unibits. It gave me a ton of confidence for when I do the real thing.

After all that practice, the method I settled on is to drill the initial holes with Abbeon plexibits (they are fantastic) and then enlarge the holes with reamers. I bought sizes #27, #29 and #36 reamers from Pan American Tools. Reamers just work well and leave a nice clean hole. When I tried enlarging with plexibits, the edges of the bit occasionally caught the plexi and caused it to snap up and down sharply--not good. It didn't crack the plexi scraps, but I won't take that chance with the real thing. This is not an issue with reamers (or unibits).

The unibit works nice, too, but like you pointed out they don't make them in numbered sizes so you'll have to oversize the hole a bit. That's not a big deal and some guys go that path. One word of caution--I bought an Irwin Unibit from Aircraft Spruce and it was mis-sized. Every step was 15% to 20% larger in diameter than they should have been, for example the 1/8" step was 0.148" on my micrometer. I contacted Irwin and they're going to send me a replacement, but I'm glad I tested it on scraps first!

As for your original question, I also tested drilling thru both the plexi and 0.063" aluminum (same as the rollbar) with a plexibit. It worked OK, but wasn't ideal. It took a lot longer to cut thru the aluminum and left a rougher hole. Then I tried what you suggested--plexibit thru the plexi, then standard jobber bit thru the aluminum. That worked really well, so that's the method I'm going to use.

Steve
 
Last edited:
Back
Top