

rvmills
Well Known Member
Two RV Pilots in the hangar, one muses to the other, "15 minutes or less can save you up to 15% at Geico"
"Everybody knows that".
"Oh yeah, well did you know that reading VAF can make your condition inspection take longer, cost more money, include lots of mission creep...and be a LOT more fun and educational?"
So let's see if I can tell the story in 10 "pictures" or less...
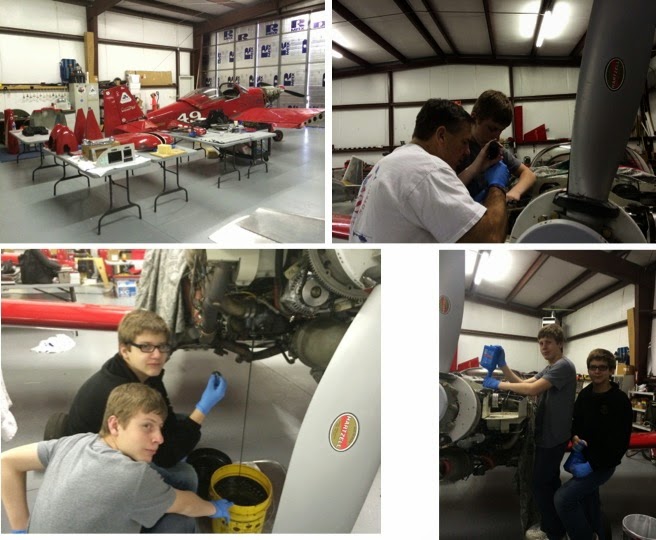
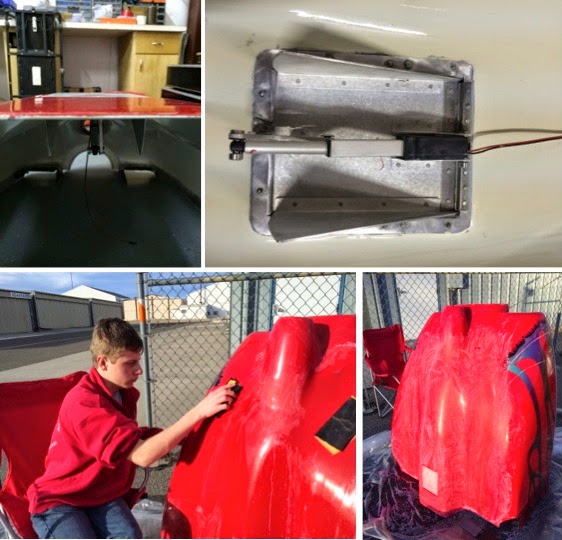
It started out like most condition inspections do...pull panels, take the airplane apart to the degree necessary to fully inspect. Get your kids out to help a bit, and learn about stuff like changing the oil, inspecting mechanical stuff, and torquing plugs, injectors, etc.
You might even do a little repair to a racing induction inlet, and share a comparison pic or two with FB friends.
And then all that great reading at VAF kicks in. This thread is all about the Anti-Splat Aero Vacuum Vent Valve, and potential issues, so an inspection is mandated. It's OK after 42 hours since last inspection, just a little clean-up needed, and the relief valve looks good too.
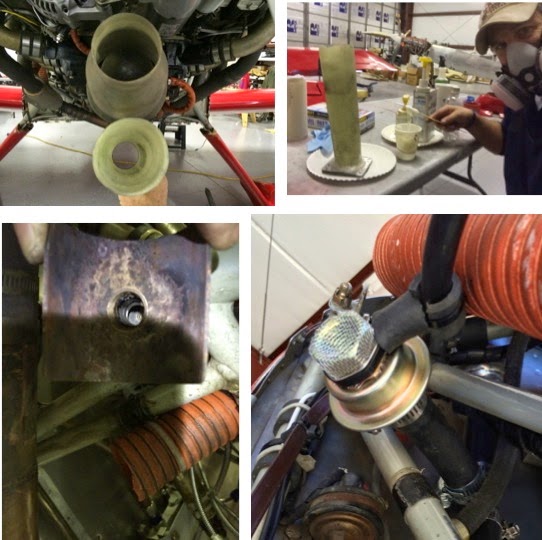
This thread also discusses the oil breather, air-oil separator and crankcase vent valves. In one of those two threads, Dan Horton suggested a test to see if the vent valve is creating negative or positive pressure. A simple tap in the breather system, another in the static system, and we can compare crankcase pressure to ambient. Here's a few pics of how I did that...some tubing (red=hot side of FW, blue=cold side, some push fittings, and a manometer from eBay...and the pitot/static check was passed with all the fittings and plugs in place...less the manometer).(Mixture knob is in only for the pics...no data yet due to weather here in Reno).
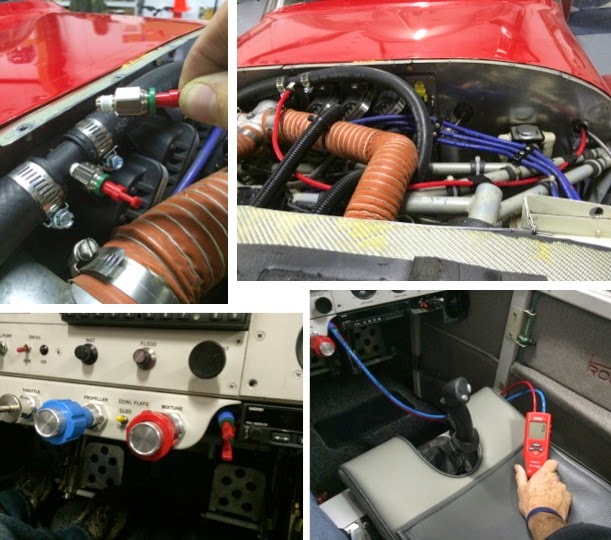
And then there's the VAF Classified Ads! They've been berry, berry good to me, and this time Stein was selling an SL-30 at a great price...gotta git me one of them! That ad's been deleted, so I can't show the link, but you all know how valuable VAF Clssifieds are...to both buyer and seller. But my "condition inspection" just got more pricey! Here is a thread in which an SL-40 to SL-30 swap is discussed, and there are others! Of course, ya gotta add an antenna, and if you're a racer, the doubler has to have nutplates to make the antenna fully removable, puck and all, right!? Hey, but ya gotta inspect the fuselage innards anyway, so how much extra work can it be, right?! (My back still hurts!)
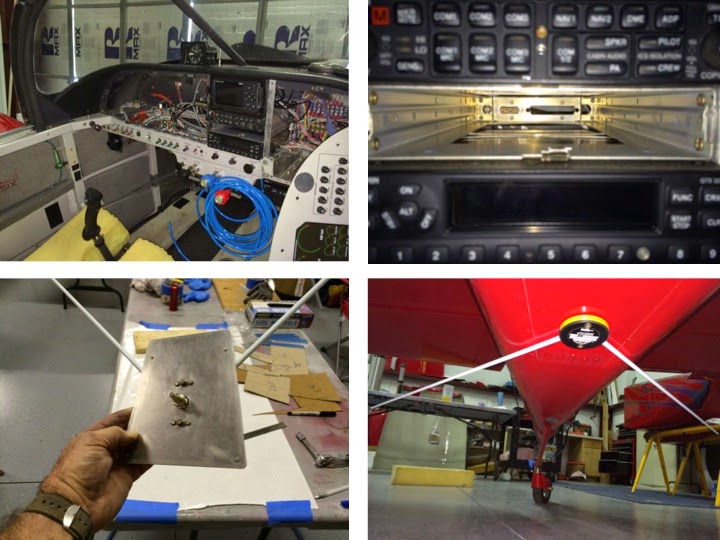
Initial "smoke test" showed no NAV indications, so a quick call to Stein and another to Dynon confirmed that I had to change format to auto, along with baud rate to auto, to make it work (I was halfway there...dooooh!). Happiness is a green needle where it's supposed to be, and a Nav Source switch that actually switches between GPS and VHF Nav!
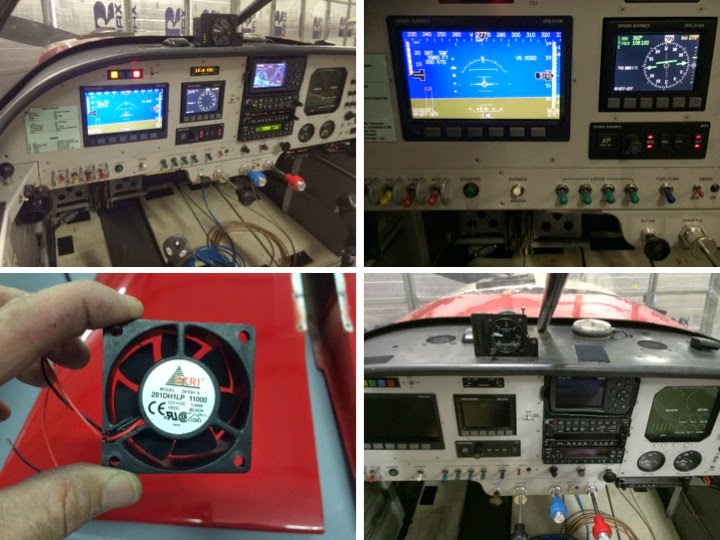
Oh, and while the panel is opened up...sure, why not put in a couple avionics cooling/defrost fans, as described in this thread!
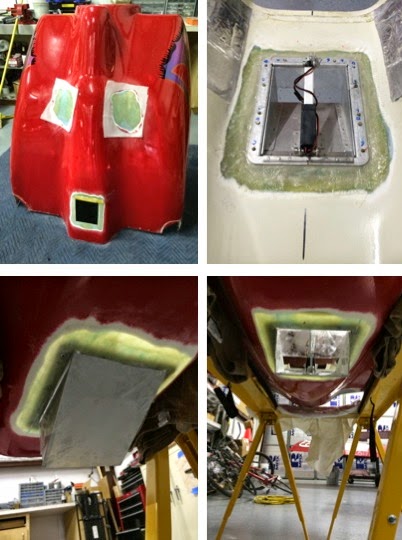
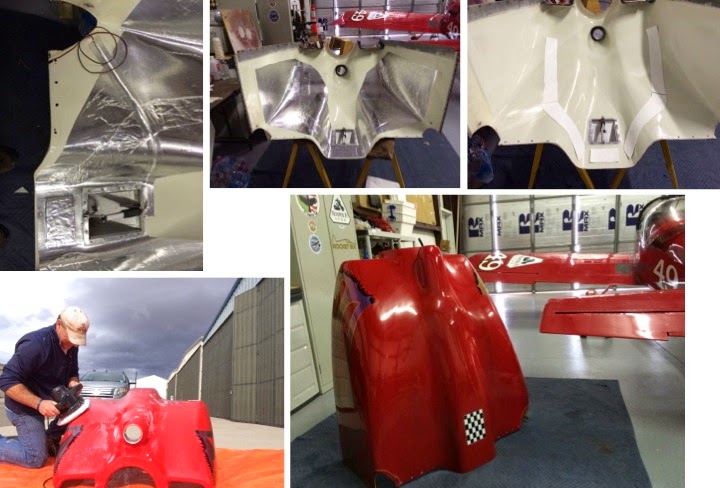
After 3 years of cowl mods (induction and exit, heavily influenced by Dan Horton's Shrinking Exit thread), I figured why not cut into it again, and install an Anti-Splat Aero EZ-Cool Cowl Flap, as described in this VAF thread. First came the cut-and-sand-through-the-paint-to-glass phase (with a couple other minor glass repair spots combined). My cowl appears to be moaning, "we're doing this again?". Then came glassing it into place. Original plan was to use two cowl flaps in the corners of the cowl, and do a test comparison between cowl flaps, louvers and flat plate plugs...but reality stuck its nose in...my exhaust pipe locations were a conflict with that placement, and one flap in the center tunnel had much better clearance. The geometry of the tunnel, end edge distance to the curves had me opt for a glass-in solution, to avoid fatigue cracks around nutplates...so my flap vs. louver test is now out (sorry Dan, I actually bought the louvers...anyone need some louvers!?). But it glassed in quite nicely.
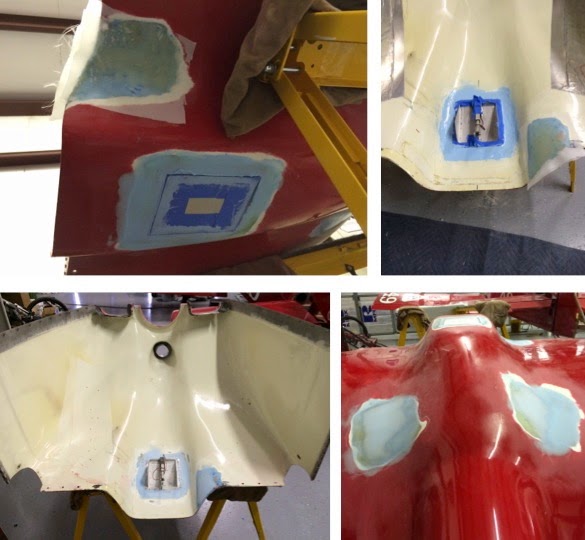
Used a doubler to get the fit close to flush, then a little Superfil to flush it up and smooth.
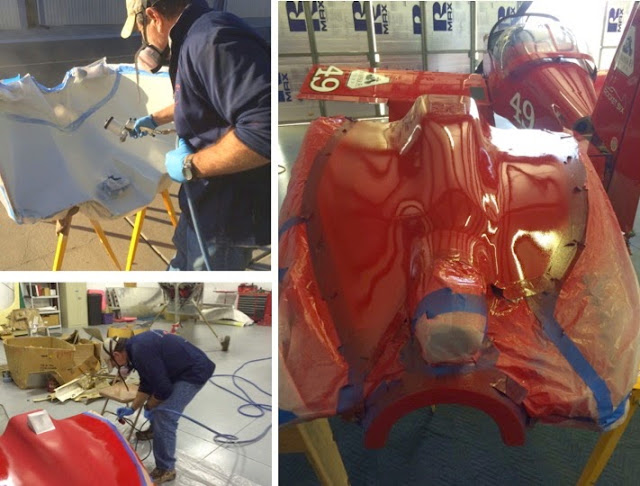
A little paint inside and out, and a little airbrush touch up after the first wet-sanding...
A little more fit and finish work, with helpers...
And some it'llbuffout work, some fiberfrax (thanks Dan), heat tape, and finishing touches...
You know, all I really wanted to do was add a checkerboard, since my buddy Joe Blank at Van's has been after me to do it for years! I just took the long way to get there...thanks to a lot of good reading, written by a lot of good friends...here at VAF. Thanks DR...I think! (Nyuck, Nyuck!)
Cheers,
Bob
"Everybody knows that".
"Oh yeah, well did you know that reading VAF can make your condition inspection take longer, cost more money, include lots of mission creep...and be a LOT more fun and educational?"
So let's see if I can tell the story in 10 "pictures" or less...
It started out like most condition inspections do...pull panels, take the airplane apart to the degree necessary to fully inspect. Get your kids out to help a bit, and learn about stuff like changing the oil, inspecting mechanical stuff, and torquing plugs, injectors, etc.
You might even do a little repair to a racing induction inlet, and share a comparison pic or two with FB friends.
And then all that great reading at VAF kicks in. This thread is all about the Anti-Splat Aero Vacuum Vent Valve, and potential issues, so an inspection is mandated. It's OK after 42 hours since last inspection, just a little clean-up needed, and the relief valve looks good too.
This thread also discusses the oil breather, air-oil separator and crankcase vent valves. In one of those two threads, Dan Horton suggested a test to see if the vent valve is creating negative or positive pressure. A simple tap in the breather system, another in the static system, and we can compare crankcase pressure to ambient. Here's a few pics of how I did that...some tubing (red=hot side of FW, blue=cold side, some push fittings, and a manometer from eBay...and the pitot/static check was passed with all the fittings and plugs in place...less the manometer).(Mixture knob is in only for the pics...no data yet due to weather here in Reno).
And then there's the VAF Classified Ads! They've been berry, berry good to me, and this time Stein was selling an SL-30 at a great price...gotta git me one of them! That ad's been deleted, so I can't show the link, but you all know how valuable VAF Clssifieds are...to both buyer and seller. But my "condition inspection" just got more pricey! Here is a thread in which an SL-40 to SL-30 swap is discussed, and there are others! Of course, ya gotta add an antenna, and if you're a racer, the doubler has to have nutplates to make the antenna fully removable, puck and all, right!? Hey, but ya gotta inspect the fuselage innards anyway, so how much extra work can it be, right?! (My back still hurts!)
Initial "smoke test" showed no NAV indications, so a quick call to Stein and another to Dynon confirmed that I had to change format to auto, along with baud rate to auto, to make it work (I was halfway there...dooooh!). Happiness is a green needle where it's supposed to be, and a Nav Source switch that actually switches between GPS and VHF Nav!
Oh, and while the panel is opened up...sure, why not put in a couple avionics cooling/defrost fans, as described in this thread!
After 3 years of cowl mods (induction and exit, heavily influenced by Dan Horton's Shrinking Exit thread), I figured why not cut into it again, and install an Anti-Splat Aero EZ-Cool Cowl Flap, as described in this VAF thread. First came the cut-and-sand-through-the-paint-to-glass phase (with a couple other minor glass repair spots combined). My cowl appears to be moaning, "we're doing this again?". Then came glassing it into place. Original plan was to use two cowl flaps in the corners of the cowl, and do a test comparison between cowl flaps, louvers and flat plate plugs...but reality stuck its nose in...my exhaust pipe locations were a conflict with that placement, and one flap in the center tunnel had much better clearance. The geometry of the tunnel, end edge distance to the curves had me opt for a glass-in solution, to avoid fatigue cracks around nutplates...so my flap vs. louver test is now out (sorry Dan, I actually bought the louvers...anyone need some louvers!?). But it glassed in quite nicely.
Used a doubler to get the fit close to flush, then a little Superfil to flush it up and smooth.
A little paint inside and out, and a little airbrush touch up after the first wet-sanding...
A little more fit and finish work, with helpers...
And some it'llbuffout work, some fiberfrax (thanks Dan), heat tape, and finishing touches...
You know, all I really wanted to do was add a checkerboard, since my buddy Joe Blank at Van's has been after me to do it for years! I just took the long way to get there...thanks to a lot of good reading, written by a lot of good friends...here at VAF. Thanks DR...I think! (Nyuck, Nyuck!)
Cheers,
Bob
Last edited:


