

Desert Rat
Well Known Member
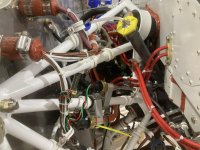
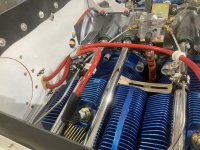
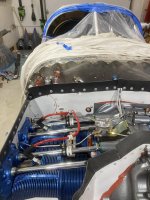
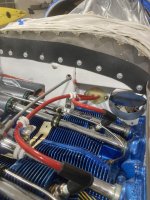
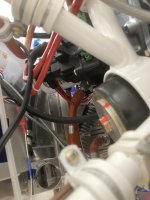
When I started looking into this, it seemed like there were a couple of instances where these leads were exactly the wrong length; Too long for the shortest routing without leaving a big loop flopping around, but too short to take a longer but more out of the way path.
It took me a long time to figure out something that made sense here. One of my big goals was to try and keep wires out from under the oil filter but even so, I ended up having to run two under there, given the lead lengths provided by Emag.
On the top of the engine I also wanted to avoid piggybacking adel clamps off the ones that support the fuel injector lines. Cessna does that exact thing in 3 different locations on the 172 but it just seems like something to be avoided if possible.
When I replace this harness in 500 hours or so, I think I'll likely hand fabricate specific lengths to see if I can get this a bit higher and tighter, but until then this seems like a nice neat installation that won't give any trouble.
When I was scratching my head trying to figure this out. I did a lot of googling and looking at pictures on VAF and build logs and what not. I really didn't find much that was helpful to my specific situation.
So, I'm posting these pictures here for critique and comment, but also so that people can find them in future searches. Hopefully they might help out some future builder who's wondering how the heck to route this stuff. There are also more on my build log entry from todays date.
I'm not saying this is the only way to do this, or even the best way, but it seems like it will work well in my very specific situation; RV7 with an IO390, dual P-mags, modified RV14 baffles, and an inverted firewall mounted oil cooler.
As always, questions or comments are always welcome.

")

