
Van's Air Force
You are using an out of date browser. It may not display this or other websites correctly.
You should upgrade or use an alternative browser.
You should upgrade or use an alternative browser.
Oh so close
- Thread starter 0302lj
- Start date


Since I'm in this phase with cowling etc,. What is your guys process for fiberglass to "be ready"? It seems like it could be never ending. When is it deemed good enough to paint. So far I have filled pin holes with epoxy twice. Still have a few large voids areas to fill.....then a couple iterations of Primer and sand down? What primer are you using?
I like spotting putty to do the final pinhole filling and 2K primer that is compatible with the top coat. Make sure that you thoroughly blow out any and all dust from the pinholes before filling them. Old credit cards and hotel key cards work well for getting the pinholes filled.Since I'm in this phase with cowling etc,. What is your guys process for fiberglass to "be ready"? It seems like it could be never ending. When is it deemed good enough to paint. So far I have filled pin holes with epoxy twice. Still have a few large voids areas to fill.....then a couple iterations of Primer and sand down? What primer are you using?
briand
Well Known Member
This?I like spotting putty to do the final pinhole filling and 2K primer that is compatible with the top coat. Make sure that you thoroughly blow out any and all dust from the pinholes before filling them. Old credit cards and hotel key cards work well for getting the pinholes filled.

RV7Guy
Well Known Member
NO, NEVER use a product that doesn't use a catalyst, EVER!!! It will continue to shrink long after it appears cured. I personally use micro balloons and epoxy for anything that is more than 1/16" thick. From there, I use Evercoat 416 glazing compound for light and finishing fill. It cures quickly and sands nicely.
RV7Guy
Well Known Member
Glass work!! If I have a specialty it is composites. Love working with glass and carbon. Glass work is easy but there are few things that must happen and most don't know or don't do them. These are just a few critical points if anyone has any questions, I'm happy to help. What I recommend is starting on the glass work right away. You don't have to have the part ready to install but doing it over time makes it more bearable. Follow the steps below and you'll be much happier.
1) The fiberglass parts must be thoroughly cleaned before any sanding or filling can occur. When the parts are pulled from the mold, I seriously doubt they take the time to clean the parts. This is critical because of the release compound used in the molds. The mold release can get into the pinholes and is on the surface. If you start sanding, you are spreading the mold release everywhere on the surface and imbedding it into the glass. So, the first thing I do is wash the parts with denatured alcohol. I do this 3 times for each part. Next is a bath with soap and water. Something like Dawn that is excellent for removing grease. A solid rinse and allowed to let dry. Then, one final wipe down with acetone.
2) Use a sanding block with 280-320 paper and sand the entire part. I like the firm but soft sanding blocks as they sand contours nicely. Clean thoroughly again.
3) Get a rattle can of high build primer and do a light dusting over the surface. The pin holes and imperfections will become apparent. Now you have a starting point.
4) I waste nothing. When I was working on the tail group glass and mixed epoxy, if I had any left I would apply it to a section of the cowl and squeegee it in. Later, after curing, I'd go back and sand. By the time, the cowl and wheel pants were ready to set up, most of the fill was done.
5) Fill any large imperfections with the glazing compound. Fill pin holes with epoxy or the compound.
6) Sand until it looks good and do the high build primer again. Lather rinse repeat.
This will get you started. Please don't hesitate to ask questions.
Yes, this is what I use and never had a problem with shrinkage filling tiny pin holes.
I like to give everything a nice sanding with a DA sander to start off. Then I apply glaze coat. Evercoat 417 is my glaze of choice but there are others just as good. I spread it thin then scrape most of it off while it is still wet. I just want the voids and pinholes filled. Not looking for any build up. Sand again with 180 grit. Now I high build prime for the first time. My long time primer of choice was AWL-QUICK from AkzoNobel. It getting tuff to find so now days I use K-36 from PPG. Once that is dry I use the previously mentioned red spot putty to fill any remaining pinholes. Use a razor blade as a spreader and only apply the tiniest amount. Put it on to thick and it won’t dry. Give it another 180 grit sanding and prime again. After drying, check for pinholes again sand completely with 320 grit. At this point the part should be ready for paint. If needed prime one more time.Since I'm in this phase with cowling etc,. What is your guys process for fiberglass to "be ready"? It seems like it could be never ending. When is it deemed good enough to paint. So far I have filled pin holes with epoxy twice. Still have a few large voids areas to fill.....then a couple iterations of Primer and sand down? What primer are you using?
I hope this helps
Agree with everything RV7Guy said but key for me was the high build primer.Get a rattle can of high build primer and do a light dusting over the surface.
Last edited:
"Firm but soft"? C'mon, Darwin, make up your mind!I like the firm but soft sanding blocks as they sand contours nicely.

Actually, I think he's talking about a sanding block like this. They make lots of different shapes. This is my "go to" block for most curved surfaces. A firm side and a softer side. I use a longer flat/harder block for flat surfaces. These work well for wet sanding too.

Only other comment to the thread I'd make is that 90-95% of the paint job is the prep work. Every flaw you can see in the prep will show thru in the paint job. "Paint hides nothing".
Laird
"I love composites"
")
Socal
Question! We have somewhat hard water, salt type softeners are common for households. Unsoftened water in our shop. Does hard or soft water matter for the cleaning process?Glass work!! If I have a specialty it is composites. Love working with glass and carbon. Glass work is easy but there are few things that must happen and most don't know or don't do them. These are just a few critical points if anyone has any questions, I'm happy to help. What I recommend is starting on the glass work right away. You don't have to have the part ready to install but doing it over time makes it more bearable. Follow the steps below and you'll be much happier.
1) The fiberglass parts must be thoroughly cleaned before any sanding or filling can occur. When the parts are pulled from the mold, I seriously doubt they take the time to clean the parts. This is critical because of the release compound used in the molds. The mold release can get into the pinholes and is on the surface. If you start sanding, you are spreading the mold release everywhere on the surface and imbedding it into the glass. So, the first thing I do is wash the parts with denatured alcohol. I do this 3 times for each part. Next is a bath with soap and water. Something like Dawn that is excellent for removing grease. A solid rinse and allowed to let dry. Then, one final wipe down with acetone.
2) Use a sanding block with 280-320 paper and sand the entire part. I like the firm but soft sanding blocks as they sand contours nicely. Clean thoroughly again.
3) Get a rattle can of high build primer and do a light dusting over the surface. The pin holes and imperfections will become apparent. Now you have a starting point.
4) I waste nothing. When I was working on the tail group glass and mixed epoxy, if I had any left I would apply it to a section of the cowl and squeegee it in. Later, after curing, I'd go back and sand. By the time, the cowl and wheel pants were ready to set up, most of the fill was done.
5) Fill any large imperfections with the glazing compound. Fill pin holes with epoxy or the compound.
6) Sand until it looks good and do the high build primer again. Lather rinse repeat.
This will get you started. Please don't hesitate to ask questions.
He recommends an acetone wipe down after the water. That should remove any deposits from the water. Also, this step is before sanding and that will get rid of any water deposits. NEVER use tap water as a final cleaning step before paint of any kind.Question! We have somewhat hard water, salt type softeners are common for households. Unsoftened water in our shop. Does hard or soft water matter for the cleaning process?
Hence why the really good shops charge so much these days! The paint is the cheap bit!Only other comment to the thread I'd make is that 90-95% of the paint job is the prep work. Every flaw you can see in the prep will show thru in the paint job. "Paint hides nothing".
Agree that only fillers and primers that are 2 part should be used. Having said that, this is a fantastic pinhole filler we’ve used as long as I can remember here at the shop. Best described as a wax on/ wax off type product to fill the microscopic pinholes in composites and body filler before priming. A little goes a long way, a gallon lasts us years. Not sure if it’s available in smaller quantities anywhere.
Attachments
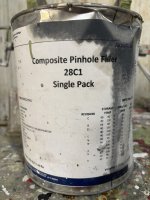
POLY-FIBER SMOOTH PRIME….works miracles and super easy to use 
Great process review…the 3rd step is also referred to as Guide Coat…I used the black powder stuff several times on each component.Glass work!! If I have a specialty it is composites. Love working with glass and carbon. Glass work is easy but there are few things that must happen and most don't know or don't do them. These are just a few critical points if anyone has any questions, I'm happy to help. What I recommend is starting on the glass work right away. You don't have to have the part ready to install but doing it over time makes it more bearable. Follow the steps below and you'll be much happier.
1) The fiberglass parts must be thoroughly cleaned before any sanding or filling can occur. When the parts are pulled from the mold, I seriously doubt they take the time to clean the parts. This is critical because of the release compound used in the molds. The mold release can get into the pinholes and is on the surface. If you start sanding, you are spreading the mold release everywhere on the surface and imbedding it into the glass. So, the first thing I do is wash the parts with denatured alcohol. I do this 3 times for each part. Next is a bath with soap and water. Something like Dawn that is excellent for removing grease. A solid rinse and allowed to let dry. Then, one final wipe down with acetone.
2) Use a sanding block with 280-320 paper and sand the entire part. I like the firm but soft sanding blocks as they sand contours nicely. Clean thoroughly again.
3) Get a rattle can of high build primer and do a light dusting over the surface. The pin holes and imperfections will become apparent. Now you have a starting point.
4) I waste nothing. When I was working on the tail group glass and mixed epoxy, if I had any left I would apply it to a section of the cowl and squeegee it in. Later, after curing, I'd go back and sand. By the time, the cowl and wheel pants were ready to set up, most of the fill was done.
5) Fill any large imperfections with the glazing compound. Fill pin holes with epoxy or the compound.
6) Sand until it looks good and do the high build primer again. Lather rinse repeat.
This will get you started. Please don't hesitate to ask questions.
And get a box or two of the rubber gloves…good to keep the oil from our hands off of the fiberglass..and it helps keep hands.
Yes! I have several for the block sanding. Also folded a full piece of scotch bright in 3rds, wrapping a round sheet of sandpaper it…works for countors"Firm but soft"? C'mon, Darwin, make up your mind!
Actually, I think he's talking about a sanding block like this. They make lots of different shapes. This is my "go to" block for most curved surfaces. A firm side and a softer side. I use a longer flat/harder block for flat surfaces. These work well for wet sanding too.
View attachment 94323
Only other comment to the thread I'd make is that 90-95% of the paint job is the prep work. Every flaw you can see in the prep will show thru in the paint job. "Paint hides nothing".
Laird
"I love composites"
Socal
