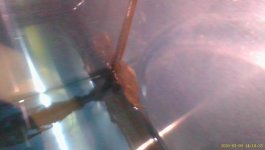
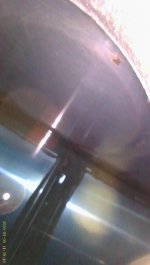
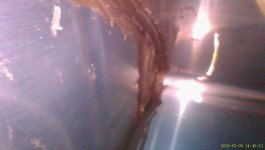
My 2007 RV-9A, which I did not build, has developed a weeping fuel leak at what appears to be the vicinity of the front outboard corner of the left tank. Although there are no relevant maintenance records, the tank appears to have been removed and worked on once before: the exterior screws heads are unpainted (the ones on the right tank are painted) and it looks like additional sealant of some kind has been added. Photos below: rear outboard corner, outboard side, outboard front corner.
I think this project needs to be put in the hands of a professional, which may not have happened last time... I’ve read the various threads, and would love to get the latest intel on shops specializing in this work. Close to me (central VA USA) would be a plus, but is probably asking too much. I suspect it won’t be cheap but I’d like to avoid the common GA combination of expensive AND long delays AND lengthy radio silences.
I think this project needs to be put in the hands of a professional, which may not have happened last time... I’ve read the various threads, and would love to get the latest intel on shops specializing in this work. Close to me (central VA USA) would be a plus, but is probably asking too much. I suspect it won’t be cheap but I’d like to avoid the common GA combination of expensive AND long delays AND lengthy radio silences.