Scott McD. - I love you man, but have to laugh at your recent post:
"It is not required that you beat on the angle to get it to bend."
Immediately followed by: "The instructions direct you to clamp the angle in a vise at the location of the bend. Use one hand to pull the angle in the direction you want it to bend. Use the free hand to hit it firmly with a soft faced hammer."
What's the difference between "beating" and "hitting firmly".
I will try and explain how I see the difference...
All metal has a certain amount of spring back. Meaning, if you apply a force to make it bend (in a bending break for example), when you remove the force it will "spring back to a lesser angle than what it was bent too. The alloys and tempers of aluminum we use in the construction of RV's has a lot of spring back.
Beating method -
If you clamp it in a vise and begin pounding on it with a big hammer you can get it to bend but it takes a lot of hammering effort and it is difficult to be precise.
Hitting firmly method -
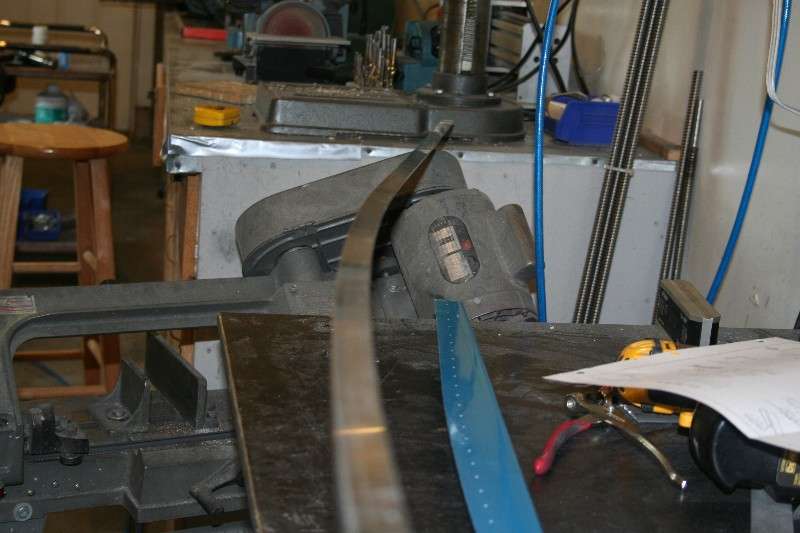
Clamp the angle in a vice with point of desired bent located at the edge of the jaws. Apply a bend force to the angle in the desired bend direction with one hand...with the other hand hit the angle firmly, once, adjacent to the vice. Note, it does not say beat on it repeatedly. If you are doing it correctly it will require one moderate hit and a
slight bend will be formed. Slight is all that is needed because you will link a bunch of slight bends together (about 1 inch apart) to produce the large radius curve that is needed.
So what is the difference? I only use a mallet with a rubber head that weighs about 1 pound. I could beat on the angle all day long with the mallet by it self and probably not get it to bend much at all. The combination of the "force" applied with the first hand, and the rap of a light mallet which causes it to overcome the spring back and take a set in the direction you applied the force.
As I have stated before, in my humble opinion, if this kit is aimed at beginning builders with only simple hand tools and no previous experience, there should be a better option for forming the longerons. If you don't want to make pre-formed longerons a standard part of the kit, at least offer an option at extra cost.
Until such time as that happens, my advice to any newbie builders is to plan on getting professional help with these parts.
All above meant constructively.
Maybe you are right...maybe the web site should say all of the parts are pre formed, except for the longeron angles (I always tell people this by the way).
The following is also meant constructively... because I am truly sorry you have had some frustration John.
The airplane can be built with the simple hand tools listed. I believe a large number of the 50+ RV-12's that are now flying were built that way by first time builders. It was never meant as a guarantee that anyone that wanted to would be capable of doing so. The estimate of 800-900 hour build time was not a guarantee either. A lot of builders have been landing within that time frame, but I fully expected some to take 1200+ and some to take less than 600.
Every project has to have a most difficult task. Make that task easier and then you have a different one that is most difficult. Choices have to be made when developing a kit as to where the most dollar value is in regards to doing work for the customer. I have not heard many complaints from RV-12 builders about the difficulty of bending the longerons. I think most RV-12 builders (actually most RV builders in general) would say that the canopy installation was the most difficult. So it seems like for the majority of builders it was reasonable design choice.
I hope you either already have, or soon will find a way to get passed this challenge so that you can move on to others that are still to come.


") Larry
Larry")