

Van's Air Force

The definitive Van's Aircraft support community! Buying, building or flying an RV? Join our exclusive family of mentors and enthusiasts!

Ideal Location and Size for Inspection Holes in Wheel Pants

iamtheari

Well Known Member
Sponsor
I flew my RV-14 for 3 years without the gear fairings and finally did all that fiberglass work last spring. I love the added speed but not having to remove wheel pants to check and adjust tire pressures. I'm planning to drill holes that I can get through with a pressure gauge or air chuck but I'm wondering if there are advantages to a specific location. I'm specifically thinking about tire geometry changes when the pressure is low, causing the hole to lose alignment if I drill it in an unlucky spot. But I guess there could also be considerations of moisture (water or snow on the runway) or dirt ingress, not to mention that elusive 0.1 knot of aerodynamic loss. Does anyone have good ideas here?

Also, what size hole is ideal? Are there some good plugs out there that can be used to regain that 0.1 knot and keep moisture and dirt out if I just drill the hole the right size?

Thanks in advance!
 
Don’t overthink this. The fairing is attached to the wheel axle, so it moves up and down with the wheel if there are tire pressure changes. Not an issue.
Some owners go down to the hardware store and buy snap in plugs (lots of small fingers), I don’t know their brand names. Others just go ahead and remove the fairings for air; you want to look over the tires and brakes regularly anyway.
 
I came across several threads on this topic before I drilled the wheel pant access holes on my RV-9A. Check out this one:

https://vansairforce.net/threads/tire-valve-extension.229378/#post-1789581

As suggested, I used a laser pointer to make sure the hole was drilled in the correct place, and made a mark on the tires to know when each is appropriately rotated to align the valve stem with the hole. Drilled 1" holes, and used a plastic plug from Amazon.
 
I flew my RV-14 for 3 years without the gear fairings and finally did all that fiberglass work last spring. I love the added speed but not having to remove wheel pants to check and adjust tire pressures. I'm planning to drill holes that I can get through with a pressure gauge or air chuck but I'm wondering if there are advantages to a specific location. I'm specifically thinking about tire geometry changes when the pressure is low, causing the hole to lose alignment if I drill it in an unlucky spot. But I guess there could also be considerations of moisture (water or snow on the runway) or dirt ingress, not to mention that elusive 0.1 knot of aerodynamic loss. Does anyone have good ideas here?

Also, what size hole is ideal? Are there some good plugs out there that can be used to regain that 0.1 knot and keep moisture and dirt out if I just drill the hole the right size?

Thanks in advance!
When I built my RV8, I used a spring loaded plug I got from Spruce. Like this : https://vansairforce.net/threads/camloc-access-door-for-wheel-pants.182110/. It required special straight air chucks and lots of trouble lining up the air stem. I would recommend putting a small hinged access door (maybe 2"X4") instead. It would be a much more user friendly solution. I plan on doing this on my RV4.
 
Anyone tried 1/4-turn fasteners for fast removal of the forward half?

I actually thought about doing this, but I didn't like how the resulting edge distance would have looked, and I wasn't up for totally redoing the flange. I think you'd have to use non-captive studs too, in order to be able to separate the two halves. I'm sure it could be done, I just didn't have the ambition.

FWIW, my Michelin Airstop tubes hardly leak at all.

This is the real secret, buy Airstops and check 'em a couple times a year!
 
I used 1/4 turns on all my wheel pants. Love em. Can remove all of em in less than 5 minutes. Great for checking air and brakes. Put em back on in less than 5 minutes. EZ.
 
I used 1/4 turns on all my wheel pants. Love em. Can remove all of em in less than 5 minutes. Great for checking air and brakes. Put em back on in less than 5 minutes. EZ
 

Attachments

  • IMG_7261.jpeg
    IMG_7261.jpeg
    1.4 MB · Views: 176
  • IMG_7264.jpeg
    IMG_7264.jpeg
    1.7 MB · Views: 160
  • IMG_7262.jpeg
    IMG_7262.jpeg
    1.2 MB · Views: 160
  • IMG_7263.jpeg
    IMG_7263.jpeg
    992.1 KB · Views: 138
  • IMG_7267.jpeg
    IMG_7267.jpeg
    1.4 MB · Views: 160
Be careful locating a hole with a laser. I'm sure it works for some.
On some wheels the valve stem is angled.
I made a scribe. It's a brass tube with a spring and a pencil. Slip it in place over the stem so it touches the inside of the pant. Rotate the wheel to draw a line. Pick a spot on the line for the hole.
I bought 3/4" Rubber antenna hole plugs. They fit pretty snug.
Last thing, align the valve stems exactly where you want them for checking pressure and draw a vertical line on the tire with torque seal.
Or
Use a borescope in the hole while rolling, to find the valve stem.
 
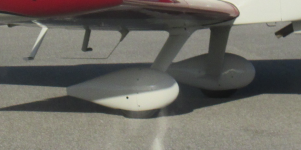
On my RV-8A I drilled a hole (don't recall diameter, maybe 7/8" to 1") in each wheel fairing that aligned with the valve stem and marked the tire as others have described. Fine in theory but in practice I found it was a hassle to roll the airplane back/forth to get the stem aligned, and ended up using Michelin Air Stop tubes...after that, I typically added air at annual and maybe one other time half way thru the year (often because I had to change/rotate tires or brake pads so I had to remove fairings anyway). On my current 14A project, I'm using Beringer tubeless tires...most people I've heard from report similar experience to the Air Stops (i.e. they seldom need air), however I'm thinking about putting in a larger access hatch just in case. Picture below is of Craig Saxton's RV-14 that was at the DeltaHawk tent at OSH. I think Synergy did this mod. It is very similar to what late model Cirrus and Cessna 182s are using, and it makes adding/checking air way easier than the 'align the stem with the small hole' method.
 

Attachments

  • Wheel pant access hatch.jpg
    Wheel pant access hatch.jpg
    1.3 MB · Views: 90
I just drilled a hole and left it open on my 6A. Was not really noticeable. Just big enough for an extension to get through, maybe 5/8"?
As others noted, paint a stripe on the tire. I use a large yellow Sharpie paint marker.

1754613825435.png
 
Keep it simple.

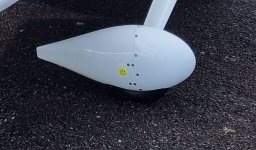
The Happy Face (thanks to my daughter) is actually a 1.5" diameter pop-out plastic plug, strategically located for easy access to the valve. A while line on the inside of the tire is used for fast alignment of the hole to the valve - when the white stripe on the tire touches the ground, the valve will be in the correct location.

Light. Simple. Inexpensive. Works.

20240602_115702.jpg
 
Thanks for all the tips. I run Beringer tubeless tires and they rarely need air. It's just not quite never, and kind of a chore to remove the wheel pants. I'll probably skip the holes for now, but the plane is set to go in for paint in a couple years and after that I'm hoping not to mess up the finish by drilling big holes in it. :)
 
This is such a fine job! Very good idea to use 1/4 turn. I guess people don't often realize that opening the wheel fairing to check air pressure is a great opportunity to take a look at the whole assembly. Shouldn't be seen as a burden. But you got the best of both worlds :)
 
Keep it simple.

The Happy Face (thanks to my daughter) is actually a 1.5" diameter pop-out plastic plug, strategically located for easy access to the valve. A while line on the inside of the tire is used for fast alignment of the hole to the valve - when the white stripe on the tire touches the ground, the valve will be in the correct location.

Light. Simple. Inexpensive. Works.

View attachment 94462
Hi i Am Marco, looking that installation , very nice very effective, as soon as possible coul be send to me a pic about what used Cap and where can find IT? Thanks in advence Marco
 
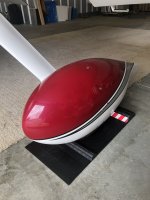
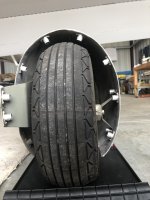
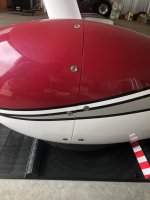
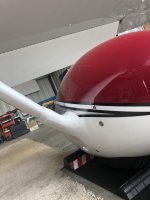
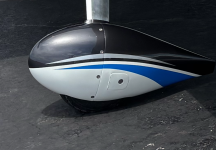
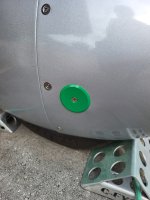
We used a laser pointer and arranged it to match the angle of the valve stem. Here's some shots of the final locations. I think the hole size is 1.25" to match a rubber plug I could easily source, but I don't remember exactly.

-G


1778586580633.png1778586592922.png
 
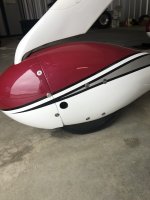
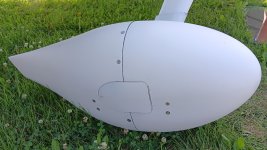
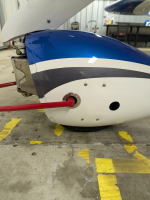
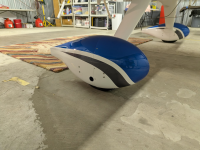
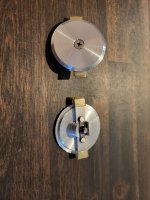
I layed mine out with a bit of guess work but they worked out ok. Doesn't take a huge hole, I can't remember what mine are but maybe 1". I then made these little covers modeled after float compartment covers. Wayyy better than taking the fairings off!
 

Attachments

  • 20250907_154036.jpg
    20250907_154036.jpg
    2.3 MB · Views: 30
  • 20250830_080000.jpg
    20250830_080000.jpg
    2.1 MB · Views: 29
Hi i Am Marco, looking that installation , very nice very effective, as soon as possible coul be send to me a pic about what used Cap and where can find IT? Thanks in advence Marco
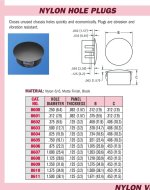
The plug is simply a plastic pop-out plug that you can purchase from many outlets around the world. Here is a link to the place I bought mine from:

www.farnell.com/datasheets/1933947.pdf

I used one like the last item on the list that is 1.5" in diameter. I bought a white one and put a vinyl sticker on it.

Hope that helps.
 

Attachments

  • Screenshot_20260513_065348_Chrome.jpg
    Screenshot_20260513_065348_Chrome.jpg
    154.4 KB · Views: 9
I layed mine out with a bit of guess work but they worked out ok. Doesn't take a huge hole, I can't remember what mine are but maybe 1". I then made these little covers modeled after float compartment covers. Wayyy better than taking the fairings off!
tappi molto belli, esattamente come vengoni fissati al carenatura, hai altre foto?thanks M.
 
Laser pointer is a great idea. A pair of small round magnets one inside, one outside also works well for marking hole location on curved parts.

Pick out your favorite McMaster Carr snap in plugs (fiberglass thickness matters for a good fit) and step-drill to the correct diameter.
 
Back
Top