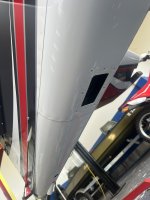
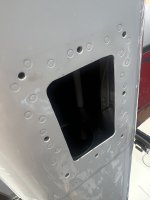
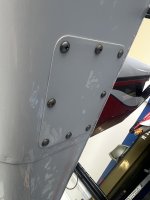
Clearly I am missing something. When I went to attach the HS I find 4 bolts to attach the forward spar to HS 814 angle, HS 819 aft deck etc that look impossible to get the nuts on the underside. Normal size hands got no chance. Can I flip the bolts and put the head down? I might be able to get that and will make future torques easier (maybe). Is there a clever tool or technique I am missing? Should I just cut an access plate in the side of the airplane since these are supposed to be torqued every CI?
A site search didn’t turn up much but maybe it’s been covered if someone will point me to it.
Thanks
Greg
RV 14A built, flown and sold (bad dog)
RV 14 on hold, thanks Vans/Lycoming
RV8 in process.
A site search didn’t turn up much but maybe it’s been covered if someone will point me to it.
Thanks
Greg
RV 14A built, flown and sold (bad dog)
RV 14 on hold, thanks Vans/Lycoming
RV8 in process.