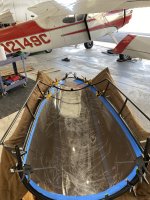
This may sound like a dumb question, but when you are trimming and smoothing the edges of the canopy, how do you position the canopy to get to the edges?
I’ve read a lot about how important it is to not lift or move the canopy until you’ve smoothed the edges, but if you are trimming it on a workbench I assume you’re doing it with the edges down on the table. So are you carefully lifting one side with one hand while you smooth the edge with the other, or are you flipping it upside down somehow so the edges are easy to access, or are you using some jig to hold it off the bench?
I’ve read a lot about how important it is to not lift or move the canopy until you’ve smoothed the edges, but if you are trimming it on a workbench I assume you’re doing it with the edges down on the table. So are you carefully lifting one side with one hand while you smooth the edge with the other, or are you flipping it upside down somehow so the edges are easy to access, or are you using some jig to hold it off the bench?