Well, the corner of my canopy snapped off, about a 1" square piece. From searching here, it looked like the consensus is that Weld On #4 was one good way to reattach it. So far I have been unable to get this stuff to work. Directions just say to apply it, assemble while still wet, initial bond forms quickly. So far what I have been trying is not working, it doesn't bond at all or even get sticky. The stuff is watery and doesn't seem to have any kind of affect on the canopy material. Has anyone done this job and can offer some tips on working with this adhesive?

Van's Air Force
You are using an out of date browser. It may not display this or other websites correctly.
You should upgrade or use an alternative browser.
You should upgrade or use an alternative browser.
Help with weld-on-#4 to reattach canopy corner
- Thread starter Draker
- Start date


BH1166
Well Known Member
No experience with this product but did go read the documents on its use. Its water thin. My experience with your type of joint , I would tape, from one side, the piece you have, perfectly. Then with a pipette or more readily available, a CA glue applicator apply very little #4, application will be via a wicking action. You’ll only use a very small drop or so as your area for gluing is very small per your picture.Well, the corner of my canopy snapped off, about a 1" square piece. From searching here, it looked like the consensus is that Weld On #4 was one good way to reattach it. So far I have been unable to get this stuff to work. Directions just say to apply it, assemble while still wet, initial bond forms quickly. So far what I have been trying is not working, it doesn't bond at all or even get sticky. The stuff is watery and doesn't seem to have any kind of affect on the canopy material. Has anyone done this job and can offer some tips on working with this adhesive?
BH1166
Well Known Member
Attachments
I had a similar issue. Ended up using #3 as I couldn't get #4 at the time. Edge gluing didn't work so I cut a scrap piece of plexiglass, tapered the edges, clamped the pieces in place and wicked #3 around the edges to glue it together. #4 is less likely to blush and would probably give a better look than mine, but it has kept the broken corner in place for over 8 years and 800 hours. You can see it if you zoom in...only pic I could find.

Weldon 4 is generally applied via capillary action using a
Arrange the parts along the joint line with no apparent gap, hold the two pieces in place by what ever means available, other than a hand is the best, ie: some type of "clamp".
Put some Weldon 4 in the applicator, about 1/2 full or so.
With the needle cap on the bottle, needle cover off, needle up, squeeze the bottle to force out some air.
Still squeezing, flip the bottle to needle down and release the squeeze.
Air will be drawn into the bottle and it will resume the original shape.
Touch the needle to one end of the joint on the top surface.
The glue should flow into the joint, may require a very gentle squeeze to just form a very small drop at the end of the needle. The drop will wick (capillary action) into the joint and flow along the joint. Leave the needle on the joint as the glue flows.
You will be able to see a slight change in the joint as the glue flows. The joint tends to become more transparent as the glue flows.
When the capillary action has reached the other end of the joint pull the needle away. You are done. Do not disturb the joint until the recommended time has elapsed.
If the capillary action did not fill the entire joint you can touch the inverted needle to the joint at the point where there appears to be a gap in the flow.
You will only use the equivalent of a couple of small drops of the Weldon 4.
You can return the extra in the applicator to the original can. If left in the applicator it will disappear over time.
If there is tape on the joint the Weldon will wick into the texture of the tape and distort the plex surface. Like wise the "clamp" should not be in contact with the joint or the glue may wick into that interface.
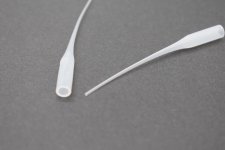
IPS AAB4 Weld-On 1.25 oz Applicator Bottle with Needle
or similar applicator, available from Amazon or TAP Plastics.Arrange the parts along the joint line with no apparent gap, hold the two pieces in place by what ever means available, other than a hand is the best, ie: some type of "clamp".
Put some Weldon 4 in the applicator, about 1/2 full or so.
With the needle cap on the bottle, needle cover off, needle up, squeeze the bottle to force out some air.
Still squeezing, flip the bottle to needle down and release the squeeze.
Air will be drawn into the bottle and it will resume the original shape.
Touch the needle to one end of the joint on the top surface.
The glue should flow into the joint, may require a very gentle squeeze to just form a very small drop at the end of the needle. The drop will wick (capillary action) into the joint and flow along the joint. Leave the needle on the joint as the glue flows.
You will be able to see a slight change in the joint as the glue flows. The joint tends to become more transparent as the glue flows.
When the capillary action has reached the other end of the joint pull the needle away. You are done. Do not disturb the joint until the recommended time has elapsed.
If the capillary action did not fill the entire joint you can touch the inverted needle to the joint at the point where there appears to be a gap in the flow.
You will only use the equivalent of a couple of small drops of the Weldon 4.
You can return the extra in the applicator to the original can. If left in the applicator it will disappear over time.
If there is tape on the joint the Weldon will wick into the texture of the tape and distort the plex surface. Like wise the "clamp" should not be in contact with the joint or the glue may wick into that interface.
Last edited:
sansoneservices
Well Known Member
I have had better results if the plexi is warmed first with a heat gun. No need to warm the solvent
Gently! Don't soften the plexi - it's easy with a heat gun.I have had better results if the plexi is warmed first with a heat gun. No need to warm the solvent
Dave
motodave
Well Known Member
I did the same repair to a friends RV7 tip up as gust caught his canopy and snapped off 6-8" long piece completely on the bottom corner. I used a tiny amount of the adhesive (it's really thin as people mentioned) and clear packing tape on the inside. The tape was invisible, held the parts together and we left it on and it has held for a year or so. We let it dry for 24 hours to be safe although it fuses really fast. Great stuff just make sure everything is really clean.... my .02.Thanks, everyone. Any suggestions on how to "clamp" that piece?
Another suggestion is to use a Weldon #16 which is much thicker at a couple of places, it will work like tacking a weld to hold a piece together. Once cured and in its place use Weldon #3 or #4. For full disclosure, I have not used #4 at all but #3 has worked well for me and local TAP plastic should have it. I may have some #16, if you want to stop by to get it.I did the same repair to a friends RV7 tip up as gust caught his canopy and snapped off 6-8" long piece completely on the bottom corner. I used a tiny amount of the adhesive (it's really thin as people mentioned) and clear packing tape on the inside. The tape was invisible, held the parts together and we left it on and it has held for a year or so. We let it dry for 24 hours to be safe although it fuses really fast. Great stuff just make sure everything is really clean.... my .02.
I used the clear packing tape method, and the "bottle with a needle on top" applicator, and it seems to be holding! Thank you.I did the same repair to a friends RV7 tip up as gust caught his canopy and snapped off 6-8" long piece completely on the bottom corner. I used a tiny amount of the adhesive (it's really thin as people mentioned) and clear packing tape on the inside. The tape was invisible, held the parts together and we left it on and it has held for a year or so. We let it dry for 24 hours to be safe although it fuses really fast. Great stuff just make sure everything is really clean.... my .02.
