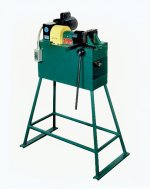
I'd wait for the Rolo tool, which is a knock off of the original Parker tool. It just works. Mine is an old one and I think has a finer thread pitch than the Rolo, but pretty sure with the care you are excercising in your method, you will be super happy.
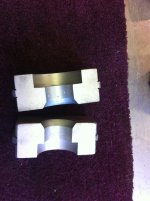
All of those samples show witness marks down the side that to me don't look normal at all. I suspect over pinching of the tube and/or the tube being slightly compressed or triangulated enough to allow one side to bias....
The parker tool won't do that. I'd wait.
Steve.
All of those samples show witness marks down the side that to me don't look normal at all. I suspect over pinching of the tube and/or the tube being slightly compressed or triangulated enough to allow one side to bias....
The parker tool won't do that. I'd wait.
Steve.

")