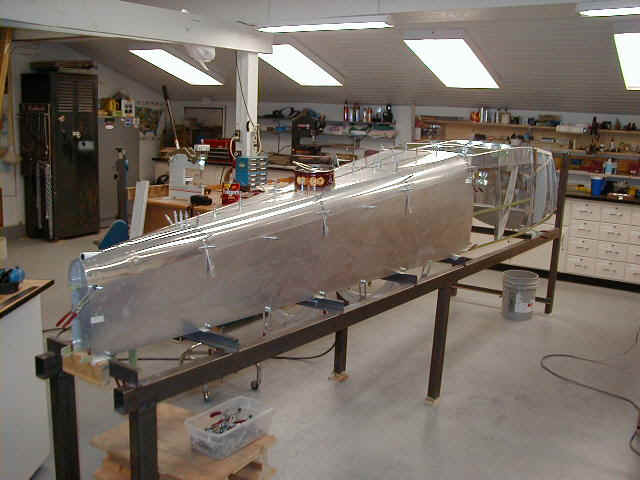
I have been mildly dreading this moment ? building the fuselage jig for the RV-3 ? but not for the reason you might think. I really wasn?t too worried about the actual building (although how you get wood that won?t warp, and build the thing with real precision that?s good enough for an airplane were troubling mysteries?), I was just not looking forward to finding all of my carpentry tools (never unpacked since last year?s move?) and digging through the mountains of stuff piled on my radial arm and table saws!
Actually, building the jig was sort of enjoyable. Precision is taken care of by ?mass producing? identical parts, like the ?ladder? rungs ? seven pieces all identical in length. Set up the saw for each type of part and make them all at once. It sure makes it easier to square things up that way. Louise went with me to Lowes to pick out the wood the day before ? it is much easier to sort through a pile of sixteen foot 2x8?s looking for two perfect ones when you have a partner, believe me! Materials for the jig ran about $150. If you consider I put about 8 man-hours into the job, that?s a reasonable price to pay for shop-related entertainment?..
You can find some photos of the ?build? at this link?
http://picasaweb.google.com/Ironflight/2009_11_03BuildingRV3FuselageJig#
?.and here are a few notes and random thoughts from along the way:
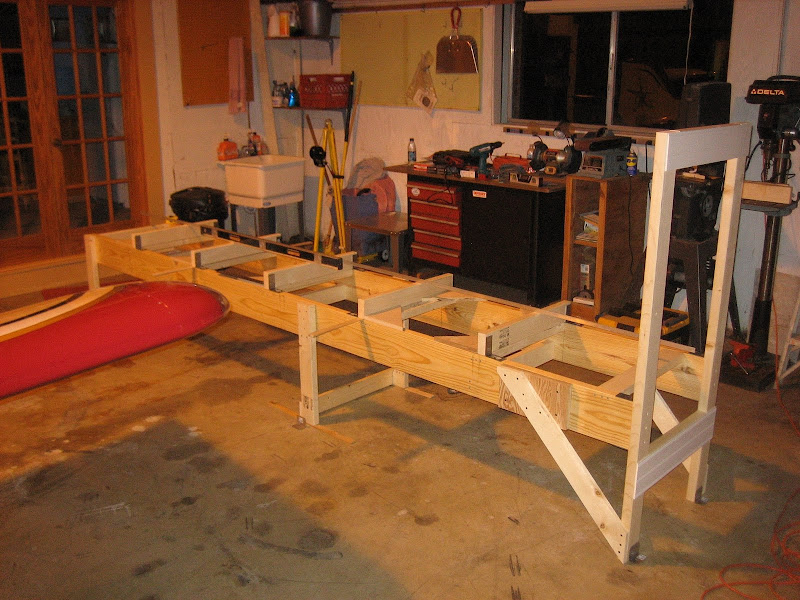
1) Take care to cut everything very square (a radial arm saw is perfect for this), and alignment during construction almost takes care of itself.
2) I was not surprised o find out that my garage floor with neither flat nor level ? I went on faith that the two side-rails were straight enough to act as ?keels? to keep the jig true.
3) I cut two lengths of cross-bars, 21? and 24?. The 21?s went between the side rails, the 24?s on top to form the ?bed? where the longerons will rest. Since every piece that went between the cross-bars were the same length, I knew that they would be aligned.
4) As is typical of Van?s clever drawings, read them very, very carefully. The datum for each crossbar is given on the drawing, and is the FORWARD edge of edge cross bar ? for all but ONE of them. One of them is a measurement to the AFT edge. Don?t ask me why?.just re-do it when you do it wrong.
5) Galvanized angles are great for bracing the ?bed? crossbars, and making sure they are vertical. Using ?? plywood for the triangular braces, and sandwiching the ?bed? crossbars between the triangles and the braces, you can leave the ?bed? parts loose until you are doing final alignment. You can then slide shims under from the side to bring all the ?bed? cross-bars into alignment. Don?t fasten them down until you get it into final position.
6) I have not yet fastened the jig to the floor, and right now, and considering not doing so. It is heavy enough to be very stable, and my hangar floor appears to be very level. Unless/Until it shows signs of warping, I am not sure that it is going to have to be drilled in. I?ll let it set for a week and see if it changes shape.
7) I used a couple of 19? 2x4?s nailed in between the two uprights of the firewall supports to brace them for attaching to the front of the jig ? this made it very easy to assemble. I might just leave them there until I find that they are in the way.
8) The diagonal braces that run from the side rails to the bottoms of the firewall supports are shown as bowing outward from the narrower side rails to the wider firewall supports. I didn?t like this, and used one inch plywood to make the side rails wider where the diagonals attached. Much cleaner!
9) I elected to go with 2x8?s instead of the 2x6?s shown on the plans ? just seemed more rigid to me! You need 13-foot lengths, so will have to 16 footers, unless you have a very odd lumber yard nearby.
10) A package of cedar shims is rally handy to bring everything into final alignment.
Now I can?t wait for Louise and I to start assembling actual aluminum pieces!
Paul
Actually, building the jig was sort of enjoyable. Precision is taken care of by ?mass producing? identical parts, like the ?ladder? rungs ? seven pieces all identical in length. Set up the saw for each type of part and make them all at once. It sure makes it easier to square things up that way. Louise went with me to Lowes to pick out the wood the day before ? it is much easier to sort through a pile of sixteen foot 2x8?s looking for two perfect ones when you have a partner, believe me! Materials for the jig ran about $150. If you consider I put about 8 man-hours into the job, that?s a reasonable price to pay for shop-related entertainment?..
You can find some photos of the ?build? at this link?
http://picasaweb.google.com/Ironflight/2009_11_03BuildingRV3FuselageJig#
?.and here are a few notes and random thoughts from along the way:
1) Take care to cut everything very square (a radial arm saw is perfect for this), and alignment during construction almost takes care of itself.
2) I was not surprised o find out that my garage floor with neither flat nor level ? I went on faith that the two side-rails were straight enough to act as ?keels? to keep the jig true.
3) I cut two lengths of cross-bars, 21? and 24?. The 21?s went between the side rails, the 24?s on top to form the ?bed? where the longerons will rest. Since every piece that went between the cross-bars were the same length, I knew that they would be aligned.
4) As is typical of Van?s clever drawings, read them very, very carefully. The datum for each crossbar is given on the drawing, and is the FORWARD edge of edge cross bar ? for all but ONE of them. One of them is a measurement to the AFT edge. Don?t ask me why?.just re-do it when you do it wrong.
5) Galvanized angles are great for bracing the ?bed? crossbars, and making sure they are vertical. Using ?? plywood for the triangular braces, and sandwiching the ?bed? crossbars between the triangles and the braces, you can leave the ?bed? parts loose until you are doing final alignment. You can then slide shims under from the side to bring all the ?bed? cross-bars into alignment. Don?t fasten them down until you get it into final position.
6) I have not yet fastened the jig to the floor, and right now, and considering not doing so. It is heavy enough to be very stable, and my hangar floor appears to be very level. Unless/Until it shows signs of warping, I am not sure that it is going to have to be drilled in. I?ll let it set for a week and see if it changes shape.
7) I used a couple of 19? 2x4?s nailed in between the two uprights of the firewall supports to brace them for attaching to the front of the jig ? this made it very easy to assemble. I might just leave them there until I find that they are in the way.
8) The diagonal braces that run from the side rails to the bottoms of the firewall supports are shown as bowing outward from the narrower side rails to the wider firewall supports. I didn?t like this, and used one inch plywood to make the side rails wider where the diagonals attached. Much cleaner!
9) I elected to go with 2x8?s instead of the 2x6?s shown on the plans ? just seemed more rigid to me! You need 13-foot lengths, so will have to 16 footers, unless you have a very odd lumber yard nearby.
10) A package of cedar shims is rally handy to bring everything into final alignment.
Now I can?t wait for Louise and I to start assembling actual aluminum pieces!
Paul