Van's Air Force

The definitive Van's Aircraft support community! Buying, building or flying an RV? Join our exclusive family of mentors and enthusiasts!

Fuel tank rivet shows some blue…

RNB

Well Known Member
Sponsor
Bottom surface of my right fuel tank has one rivet that has a small amount of blue showing, it does not drip in the hangar and does not trail back the wing. I think I have some time to repair this and am trying to think through the process to handle this. If I send something to van’s will they give me a best practice response?

I’m thinking to try and get a new weight and balance on my plane, Might try to run my fuel tanks low, empty the rest. When empty, drill out the rivet. How do I retrieve the shavings from inside the tank? It is quite distal to the filler.

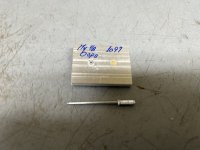
I’m guessing the fix is a properly sized cherry max rivet coated with pro seal followed by lengthy dry time.

I worry I could cause a larger problem.
 
Very old discussions claim vans says to use green loctite and maybe this product
 
Pictures always help for answers/suggestions...a rivet installed wet with short cure Proseal can be flight ready in 30 minutes. Even with B 1/2, its next day. Proseal requires no air to cure, just tank to be drained. The Locktite has worked for many, though I've never used it.
 

No mention of cleaning inside debris. Can I trust my fuel filter?
EZ-OOPS sealed rivets - I took Paul's system a bit further and make a -3 x 100* head on a sealed stem - Pop AK41H rivet just to solve this problem w/o having to enlarge the dimple to match an AN426AD3-(x). The answer to your question about what to do about whatever "shavings" may be left on the inside of the tank after drilling out (with close vacuum cleaner suction), the inlet screen in the tank should take care of that. What few pieces there are just wander around endlessly with the screen preventing them from migrating further.

Since each rivet I modify is "handmade", I don't like to hand them out w/o a need - but if you would like to try one, I'll be glad to send one to you. I have done several tank repairs using them with no failures so far, however YMMV and I wouldn't want to guarantee sucess w/o some oversight on your particular process.

See below for comparison between standard -3 bucked rivet and my EZ-OOPS. Other than opening the hole to a #30 drill size, my rivet is a straight drop in ...

HFS
(559) 816-0433
 

Attachments

  • EZ-OOPS Head Comparison .jpg
    EZ-OOPS Head Comparison .jpg
    1.7 MB · Views: 89
  • EZ-OOPS Head Size Comparison .jpg
    EZ-OOPS Head Size Comparison .jpg
    1.9 MB · Views: 90
Last edited:
I’m reading of using green loctite to wick into the weep.
Anyone who has spent any time in this game knows that if this does work (it often doesn’t) it is a temporary fix. Replacing the weeping rivet and sealing it is the way to make a permanent fix. David’s rivets are better than the ones I made, but I haven’t had any recurring leaks with what I did.
 
Anyone who has spent any time in this game knows that if this does work (it often doesn’t) it is a temporary fix. Replacing the weeping rivet and sealing it is the way to make a permanent fix. David’s rivets are better than the ones I made, but I haven’t had any recurring leaks with what I did.
What about metal in the tank?
 
Back
Top