Completed Installation
I completed my FlyLED "The Works" installation today. I replaced my existing landing lights (2x50 Halogen per wing), 2 wing strobes, and tail position light with Paul's system. I could not be happier with the results. For the instant gratification crowd, here's a link to the photos -
https://randyking.smugmug.com/FlyLEDs-The-Works-Lighting-System
The system I replaced was adequate at best but, because there was no strobe in the tail, it wasn't night legal. The stock 50x2 halogen landing lights in each wing had been replaced by the previous owner with low wattage Home Depot LED bulbs. The landing lights were worthless. And, replacing them with halogen bulbs was not desirable. I've seen the amp draw on four of those bulbs and it ain't pretty! So, I was looking for an LED solution for the landing lights and 360 degrees of strobe coverage. I looked at a lot of potential solutions but nothing came close to touching the $800 price point for Paul's system.
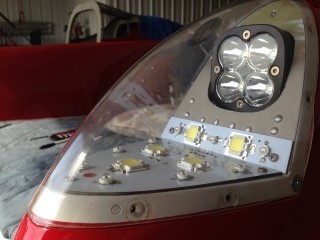
I received the kit from Paul and began the project. Building the boards was very straightforward. Just follow the directions closely and use a good quality solder system. I use a SMD workstation but only because that was the cheapest route to a decent, temperature controlled soldering iron. It only cost $60 bucks. An excellent investment if you plan to do any serious solder work.
You have to pay close attention when soldering the components to make sure you put them on the right side fo the board. Paul's boards are reversible so you have to make sure you get left and right correct and solder stuff on the correct side.
I broke one of the strobe LEDs while bending the tabs. It was the last one that I installed so I though I had it down. Maybe I was moving a little too fast. Paul didn't quibble, he just sent me a new LED. And, he found it somewhere close by on Amazon and shipped it direct to me - in just a few days.
That was really the only issue with building the boards. I was able to bench items them all successfully before moving to the airplane. Having a decent 12V power supply comes in handy here but you can make do with a 9v battery and some jumper wires with alligator clips.
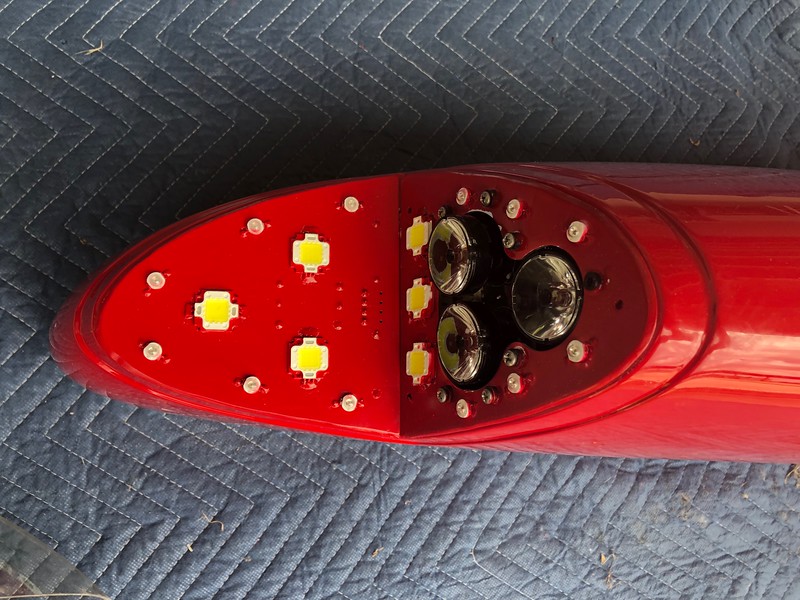
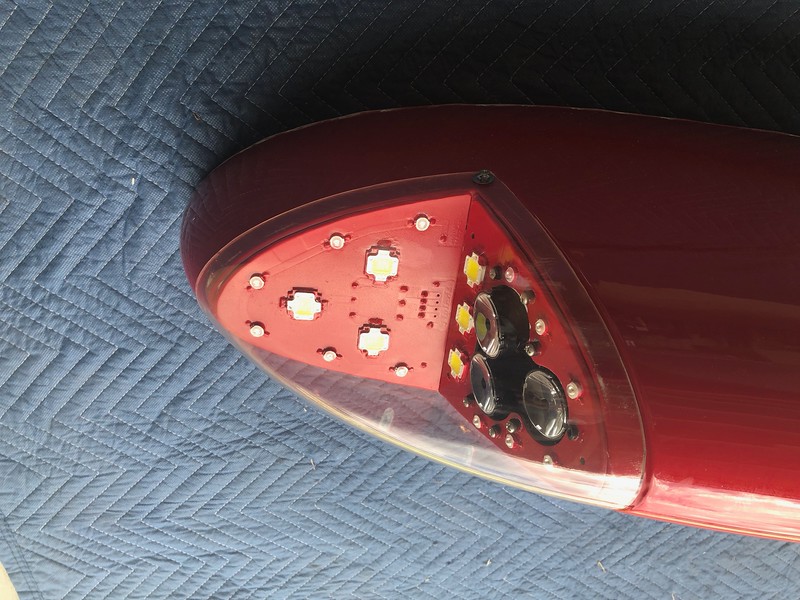
The majority of my time went to making the aircraft modifications and installing the necessary wiring. I decided to pull the existing wingtip and tail light wiring and replaced it with wiring that Paul sent me as part of his harness kit. You could quite easily make up all the wiring yourself but, for $80 Paul's kit makes it easy and he includes a connector for the board that is of better quality (inserted dsub pins instead of soldered ones) than the one that ships with the basic kit. I had to remove both wingtips, all the underwing access plates, all the floor panels, the baggage panels, the tail access panels, tail fairing, and a couple of the side panels to route the wires. Finding a place for the controller board was also a challenge. I ended up mounted it under the floor on below the pilot seat.
Trimming the boards to fit and modifying the wingtip coves takes some time but isn't overly difficult. I decided to paint the board to match my wing color which greatly increased the construction time required. But, I think it also greatly improved the looks of the system. Masking for painting isn't difficult but does require some care, good tape, and a sharp knife.
My airplane had a wig-wag system already but I eliminated it to use the much better system provided with the kit. I also installed a switch to enable the Taxi Flood feature.
Everything works very well. I'm exceptionally happy with the final product and with the quality of the kit.
I highly recommend FlyLED's THE WORKS system!
Randy


")