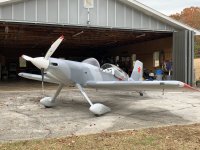
Spent this afternoon doing the initial fit of the F1 cowling - remember that this is a 20+ year old kit/cowling…and it fits pretty well with minimal trimming! Of course, there is lots of fine tuning to do, and the rear has to be trimmed to fit….
I decided to go with the 2” naval cannon option to take care of critters on the runway when I’m landing…..

I decided to go with the 2” naval cannon option to take care of critters on the runway when I’m landing…..