What's new
Van's Air Force

Don't miss anything! Register now for full access to the definitive RV support community.

DIY Back Rivet Plate #2

Aero_Octaveus

Well Known Member
I'm resurrecting an old thread to a new one.

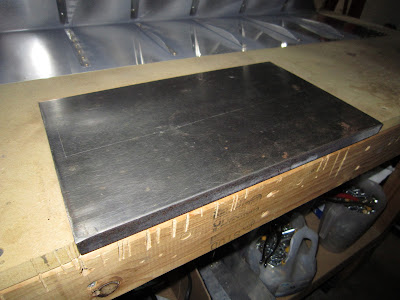
I have ordered my tools from Planetools.com and noticed after that I don't get a back rivet plate. So after reading through the threads...Seems like many opt to make their own larger plates.

Its seems that everyone goes for a thick cold rolled plate that is polished. How do you protect the steel from rusting? If you do protect it, do you worry about transfer of wax/oil/lube to the aluminum skins?

Has anyone used stainless steel (#304). I know it is not as hard as the cold rolled steel....is this an issue? (Or do they have problems with the "graining" transferring to the rivet head?)

Over thinking things as usual!
Garet
 
Welcome to VAF!

Garet, Welcome aboard the good ship VAF:D

I used a piece of 3/8" steel 16 x 24" or so. Did not do anything special to finish it off, just used it with the natural patina.

All worked fine for me.
 
I used a piece of 1/4 thick steel, works great. I polished the surface and edges using my 3M wheel, and I give it a wipe with oil after use and store it in a plastic bag. Doesn't take a second to wipe the oil off again before using.
One piece of advice (that I ignored initially) is to make it long enough for the longest rivet line you will be back-riveting, (rudder bottom on the RV-8 I think?), as you may forget to move the plate as you rivet. I thought I was smarter, I used a shorter piece of steel, and it cost me a rudder skin.
 
+1 for cold rolled

I bought a 60" piece of cold rolled steel from onlinemetals.com

PRODUCTS
1 piece @ $53.36/piece
Mild Steel 1018
Cold Finish Rectangle
0.375" x 3"
Cut to: 60"

I had just read several sob stores about builders back riveting past their plates, so I got one as long as my EAA table. Very solid. Worked great riveting the rudder. Easy to clamp to the table as well!
 
This is a good time to test every new process/tool before using it on your plane. There may be nuances that you will discover. It would be best to find that on a practice piece not in the middle of your rudder. YMMV.


edit:
quote: "sob stores about builders back riveting past their plates"

yep-- I learned that too.
 
From Avery

I used the 3/4" plate available from Avery.
My work table is a solid hardwood door with a 3/4" cabinet grade plywood on top.
I cut out the steel plate pattern in the center to the front of the table edge.
The plate sits flush with the table and you can easily move a large piece to accommodate all the rivets you need to buck.
A little WD40 will keep the plate shiny for years.
Many ways to do this, almost like priming a piece of aluminum.;)
 
I used my table saw. Worked great!

I second this as a great use for a table saw. Like other cautions don't get in such a hurry that you don't assure the rivet you want to hit isn't aligned over the slot cut in the top for the miter guide. Ask me how I know.

I alos use about a 6x12" 1/4" CRS plate. Nothing fancy just polished is a bit with fine sandpaper and spray out down with WD-40 after use. Any surface rust that develops just wipes off before use. I just take my time and push down on the rivets I want to set with my finger to make sure it is firmly over the plate before I use the gun to set them.

If you have a machine shop around you can probably find a piece of scrap or a drop off they will part with for peanuts if not give it to you.
 
Back plate

I put mine in a section of plywood too but drew alignment lines on the plywood. It makes it easy to see if the work area is on top of the plate.
 
I second this as a great use for a table saw. Like other cautions don't get in such a hurry that you don't assure the rivet you want to hit isn't aligned over the slot cut in the top for the miter guide. Ask me how I know.

Yep, I treated myself to a new rudder skin for that same reason:eek:
 
Got two of these for about $10 each from a local welding shop. They're 3/4" thick which matches the depth of the table top. Size is about 9" x 15". Protect it with Boeshield. If I were starting my workshop over from scratch, I'd do the same.

IMG_0033.JPG
 
WD-40

Hmm WD-40 never thought of that. Everything i've read in the past 10 years is that WD-40 is the devil so I abandoned it.

I suppose a quick treatment and a good clean wipe would work.

Thanks for your input guys!!:D:D:D

Garet
Total RV noobie
 
Back Rivet Plate Done

Well. Finished the back plate. Ordered a 24" x 6" x 3/8" cold rolled bar. Not Cheap...$75.00:mad: Cleaned with scotchbrite and then used 220grit sandpaper. I used WD-40 on it and I'm very pleased with how it turned out.

IMG_9971.JPG


IMG_9972.JPG


Thanks for your help guys!
 
A clean aircraft factory is a slow aircraft factory. Get moving! I personally think aluminum dust on those leather couches will freshen them up a bit. Tell the wife you're going for a Nuevo Industrial look.
 
Funny

A clean aircraft factory is a slow aircraft factory. Get moving! I personally think aluminum dust on those leather couches will freshen them up a bit. Tell the wife you're going for a Nuevo Industrial look.

We need a "like" button. That's funny Bill.
Looking at my shop, I must be fast!
 
Im still waiting for my tools to arrive :( and I also have to wait for the Canadian Government's approval to start building (Yup...you read that right).

The basement is just for assembly and tinkering for now. All the fabrication will be out in the unheated garage (Gotta work on getting heat!!). It snowed today and I'm already dreading the -20/-30deg weather that will come soon. So the basements not a bad deal right now.
 
Well. Finished the back plate. Ordered a 24" x 6" x 3/8" cold rolled bar. Not Cheap...$75.00:mad: Cleaned with scotchbrite and then used 220grit sandpaper. I used WD-40 on it and I'm very pleased with how it turned out.

...

Have you used that setup yet? In my experience you are going to need a lot stiffer table than that one appears to be. I had to move mine to the floor to get acceptable results.
 
Doh!!!

Have you used that setup yet? In my experience you are going to need a lot stiffer table than that one appears to be. I had to move mine to the floor to get acceptable results.

Hmm..I haven't tried out the table yet, but I guess i will find out soon enough! Its a solid table, (1" thick solid hardwood w/ steel legs) but I didn't even think that it had a big a bearing as you say it would. Thanks for the tip....Ill see how I do on my practice projects, and hopefully it will show me if that table will work or not. (my back is already sore thinking of working off the floor:eek:)
 
Results

That table may not work for you. If money is an issue for a very sturdy metal table, and if you live on a concrete slab, I recommend go to a metal shop and getting a 5ft long by 6" wide 3/4" thick of steel. Then go to home depo or lowes and get 3/4" thick MDF board. Cut out 5ftx6" in the MDF board and put it on the concrete floor and use that. I have a hard time getting up and down off floor but the concrete does a good job.
good luck!
cj
 
Back
Top