As the original poster, here ..,
Secondly, as I haven’t built the plane, where would I get more information …
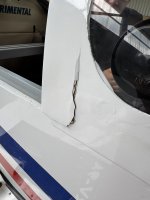
Does anyone have pictures how they screwed the fairing into the roll bar? Seems straight forward…
I see by your profile you may not have convenient access to the usual building materials we have in N America. (Although I’d love to visit your island some year)
I’ll describe a process that should work with materials you should have locally.
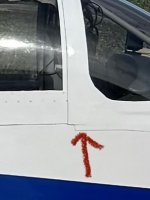
1- mask off areas you don’t want to mess up
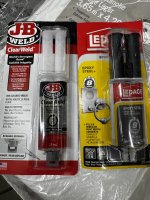
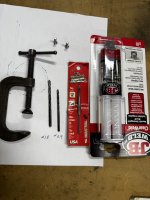
2- mix up a paste of 2part epoxy (as pictured or similar, 5 minute epoxy is fine)
3- work the paste under the fairing, than clamp in place
4- if you is seepage, clean it up immediately
Than remove the masking tape BEFORE THE EPOXY DRYS
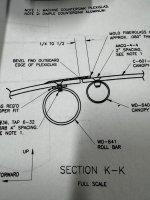
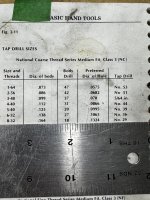
5- after epoxy dries, locate the center line of the roll bar & drill a #29 hole through the fiberglass/plexi/ steel roll bar. Repeat for # of screws you are installing
6- drill out the holes to #18 through the fiberglass/plexi layers ONLY.
7- gently use 8-32 tap through the roll bar for your screws
8- carefully countersink holes so screw heads will be flush. Tighten screws in place, done that portion.
9-mask off the rough joint between the vertical & horizontal fairings, you could use anything from the ‘liquid metal’ pictured, fiberglass ‘micro’ slurry, automotive filler(bondo), etc. to smooth out the joint.
10- Finish & paint. I would suggest you spot paint the screw heads to prevent corrosion. As for the joint repair, make the paint repair as small as possible so it is least noticeable.
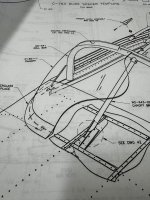
As for your question on Vans original instructions for W/shield & fairing installation, basically, drill & screw the plexi to the roll bar, than rough up the plexi surface & lay the fiberglass strips directly over the plexi using the wetted fiberglass epoxy as the gluing agent. (Sometimes this process doesn’t hold up to rough handling as you found out)
This proposed ‘fix’ just brings the screws to the surface to hold both the plexi and fairing to the roll bar. (&will be much more robust)
Good luck!