
Van's Air Force
You are using an out of date browser. It may not display this or other websites correctly.
You should upgrade or use an alternative browser.
You should upgrade or use an alternative browser.
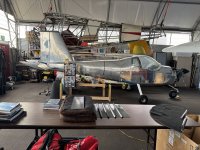
Building RV12iS at the point of deciding when to begin attaching the tail cone to fuselage…..
- Thread starter Dwillows
- Start date

BobD
Member
On my RV-12ULS build, under advice, I left the attaching of the tail cone until as late as possible. I just cut the trim control wire and fitted an online plug and socket. I propose to do the same on my iS build.Shall I route and instal wiring and plumbing now or later, after the cone is attached? What do people think?
I have avionics and finishing kits.
Despite the KAI sequence, I found it enormously helpful to put off attaching the tailcone as long as possible: after all of the wiring and plumbing was done, as well as drilling for the flaperon actuating shafts.Shall I route and instal wiring and plumbing now or later, after the cone is attached? What do people think?
I have avionics and finishing kits.
Rv-12David
Active Member
I’m waiting too. My tail cone is temporarily attached with Clecos. The avionics should arrive soon and I think it will be so much easier to set things up with out the tail on. Having it cleco’d on I’ve been able to set everything thing else up - rudder cables, rear window etc - so once the electronics are in it will be easy to put it back and rivet everything. I’d also like to fill the tank and run the fuel pumps while it’s easy to see all the plumbing … just in case.
Attachments
Why the plug. Just coil up the wire from the back and attach after fitting the tailcone. Worked for me.On my RV-12ULS build, under advice, I left the attaching of the tail cone until as late as possible. I just cut the trim control wire and fitted an online plug and socket. I propose to do the same on my iS build.
There were several posts at the time of the SB prescribing the addition of the clips to the bulkheads (SB-00053) with descriptions of how people did that. One way was to lay pieces of closed-cell foam insulation inside the bottom of the cone, to crawl on without bending the bulkheads. The KAI describes installing strings during construction, going from the aft bulkhead forward, which can be used later to pull the control cables aft. You might be able to push a stick (fishing pole, etc.) forward with a string attached, for later use pulling the cables.Thanks for the comments …. Looks like the “postpone cone attachment if possible” recommendations dominate. Any advice about worming back into the tail cone to string wires and plumbing to avoid over stressing bulkheads, etc?
unladenswallow
Active Member
I installed and tested everything I could before attaching the tailcone, including the canopy, autopilot servos, avionics and engine. The avionics wiring makes installing the rudder cable links a little more difficult, but it wasn't too bad. See the Build Order section of https://docs.google.com/document/d/1erLdUjXLkh-B2sIy7jC4rPlxlNmxPydAs8rRP5Ti3VE/edit?usp=sharing for more.
Rv-12David
Active Member
For installing the Rudder cables I temporarily clecoed the tailcone in place before adding any of the avionics. You can fit and install the rudder cables. With the tunnel nearly empty it’s quite easy to install the hardware. Once you’re happy disconnect the cables from the rudder and you can remove the tailcone. Everything at the forward end can stay in place. Now you can fill the tunnel with wires etc and not have to reach in to put in cotter pins.
I agree with this for sure. It was a joy to sit on my rolley stool to drill and install the flaperon linkages, access wiring in the rear tunnel, etc.For installing the Rudder cables I temporarily clecoed the tailcone in place before adding any of the avionics. You can fit and install the rudder cables. With the tunnel nearly empty it’s quite easy to install the hardware. Once you’re happy disconnect the cables from the rudder and you can remove the tailcone. Everything at the forward end can stay in place. Now you can fill the tunnel with wires etc and not have to reach in to put in cotter pins.
I recommend clecoing the fuse side skins on as well. Several times I was glad I had done that when I needed to reach things later. I'm too old and creaky to crawl in to work under the panel shelf or install cables, push rods, etc!
I'd say wait to rivet the side skins until you're ready to install the tailcone...and rivet the tailcone as late in the game as possible - like a week before the DAR arrives.
Just sayin'
")
I agree with this for sure. It was a joy to sit on my rolley stool to drill and install the flaperon linkages, access wiring in the rear tunnel, etc.
I recommend clecoing the fuse side skins on as well. Several times I was glad I had done that when I needed to reach things later. I'm too old and creaky to crawl in to work under the panel shelf or install cables, push rods, etc!
I'd say wait to rivet the side skins until you're ready to install the tailcone...and rivet the tailcone as late in the game as possible - like a week before the DAR arrives.
Just sayin'
FWIW, I waited to marry the fuse and tail cone on my legacy -12 also.Despite the KAI sequence, I found it enormously helpful to put off attaching the tailcone as long as possible: after all of the wiring and plumbing was done, as well as drilling for the flaperon actuating shafts.
Working from memory here...the procedure went roughly as follows...
Install the ADHRS unit with wiring and pitot lines, the Trim Actuator wires, stabilator cables, pitot lines, and fuel vent lines in the tailcone. Coil flexible items in the tailcone forward end until ready to mate.
Same with the Fuse section...do what you can by standing/sitting at rear of the fuse before mating. For my legacy -12 this included the flaperon torque tubes, installing the flaperon actuator with linkages, coil remaining "tunnel" wires and pitot/ADHRS lines the until ready to mate.
When ready, move the fuse and tailcone as close together as possible, think "skinny" thoughts, make all the connections you can, then slide the two sections together and cleco. Then stop, go home, have a beverage.
Wait overnight to "cogitate", replay the whole thing in your mind, say prayers and "Hail Marys".
Next day review the KAI, more prayers, and "nail" it all together. There's really almost nothing that can go seriously wrong, but the prayers can't hurt, eh?
Hope this saves future "mature" and slightly overweight builders many uncomfortable hours crawling into the back. There will still be some but not as many.
Enjoy,
Dave
