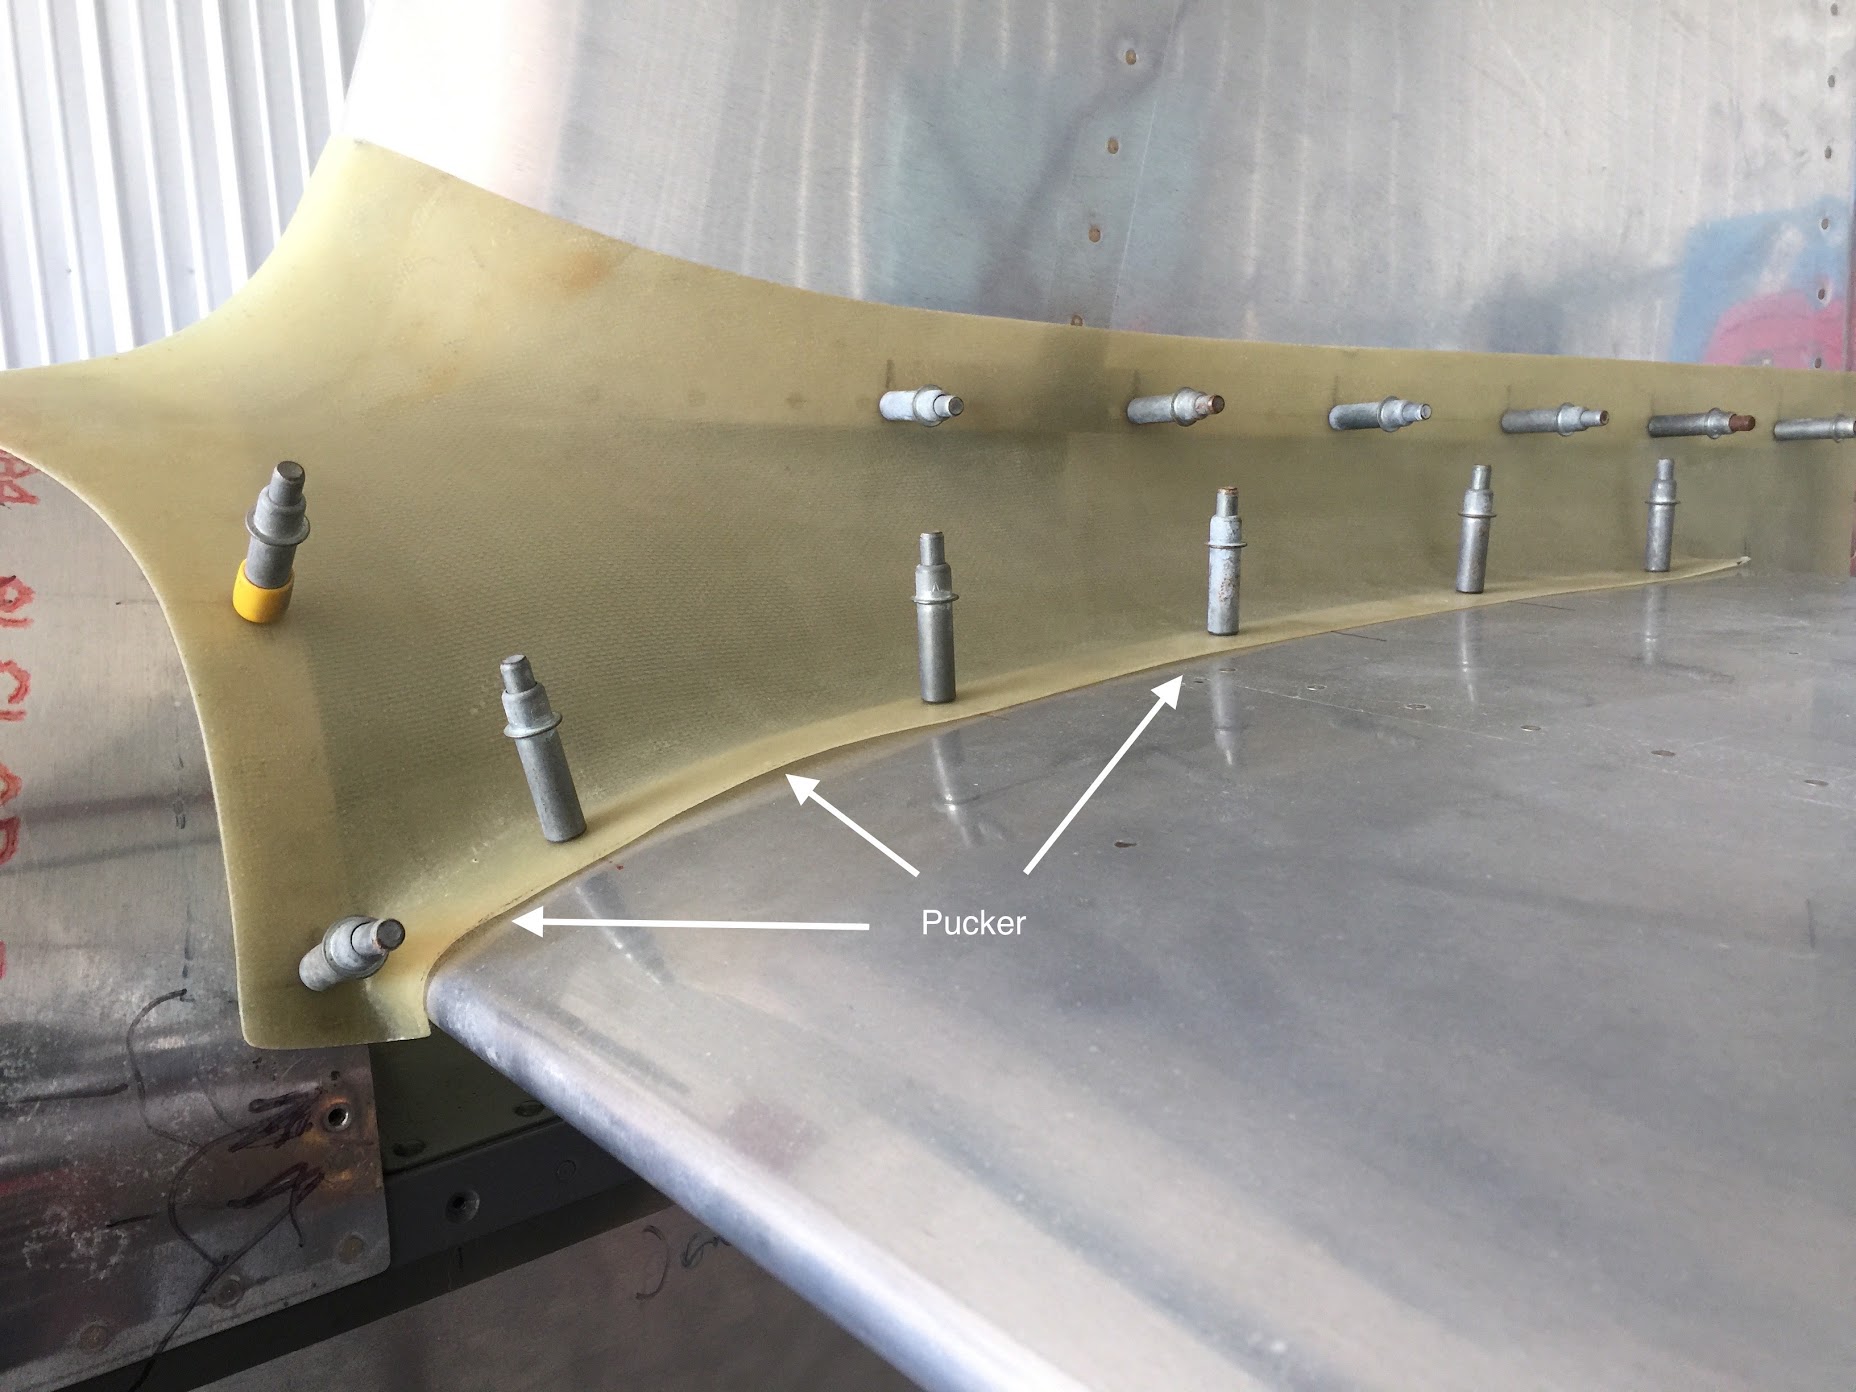
Your fairing looks pretty typical (like a piece of bacon). Doesn't look good now, but it's not hard to fix and make it so tight, you can't get a fingernail under it the entire length of the fairing - without screws. The clecoes I see in your photo are fine, but they should remain nothing but a hole to hold the fairing still while curing, that is filled later. You'll need one screw at the front on each side just forward of and slightly below the leading edge of the HS. 3 more screws each side at the very back - one one the aft HS spar flange, one on the VS aft flange, and one(or two - depending) on the longerons. You fix the 'bacon' by fiberglass cloth and flox underlayment. Here's how:
Tape some heavy duty wax paper to your HS and VS in a wide area where the fairing sits covering everything that could get touched by the resin/flox mixture. Install the fairing loosely by hand(no clecoes) and trace the outline of the fairing on the wax paper on the VS & HS, then remove the fairing. Lay wetted layers of fiberglass cloth on the wax paper along the lines drawn - on the inside of the line with just a little overlap (this part will be ground off later to give you the shape you want). Use 2-3 layers of 9 oz fiberglass tape or BID. On top of this layered cloth spread a resin/flox mixture about the consistency of peanut butter about 1/8" thick. You want it to be loose enough to flow into voids, but stiff enough to hold its shape. Then clecoe the fairing in place onto the plane. You may have to 'work' the clecoes a bit for them to slip through the glass cloth. You could put a little car wax on the clecoe to make easier to remove/clean up after the cure, but it's not necessary. Take a Popsicle stick and wipe off excess resin that has oozed out along the edge. Let it set and cure for 24 hours. Then remove the clecoes - you'll probably need to twist them a bit to get them loose before pulling them out. Pop the fairing off the empennage - you may need to use a spatula or something similar to pry it loose, but be patient - it will pop off. Remove the wax paper that has stuck to the fairing. Then you'll need some good quality sand paper and hand held belt sander or orbital sander to grind off the excess along the edge of the fairing to give it the shape you want. You'll also want to sand/grind off excess flow out on the inside of the fairing that isn't along the edge to save weight and make it lay down nicely. All this sanding takes about 10 minutes with the sanders I've mentioned and really good sand paper (available at auto paint stores). Next you'll notice the uneven 'thickness' along the previously mentioned 'bacon' edge. Use the same mechanical sander, or hand sander to take this material down - from the top - to a uniform even, thin edge thickness. You should now be able to lay the fairing on the airplane and it should sit flat and almost perfectly even and smoothly sitting on the surface - without screws. If it isn't perfect, just redo the exercise, but this time just use resin with micro (no cloth) and a little flox mixed in along the drawn line on the wax paper, clecoe the fairing in place on top of this 'scmutz' and let it cure. This layer will be a little easier to sand. You may need to do this a couple times to get an enviable tight fit, but it really doesn't take very much time. Most of the time is spent waiting for the epoxy to cure. When you have a perfect fit, fill the clecoe holes with some of your slurry mixture and sand it smooth. The clecoe holes in the skin can be just left alone - they will be covered up with the fairing. If you made the mistake of following the plans and installing the numerous, unnecessary bacon inducing pucker platenutes, - not to worry...... they can be just left alone too because the fairing will also cover up this mistake. My fairings have all been held in to place with just three screws on each side - one on the extreme front and two on the back. I'm pretty sure I could fly my plane without any screws, and the fairing would just stay in place. My fairings actually wrap around the leading edge, so that helps too.
Here's another tip - don't do it all at once. Do just one surface at a time.... horizontal, then vertical.
Hope this helps.