Sometimes I have an idea which actually works out well. Amazing, but true.
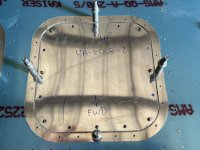
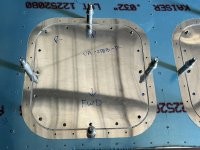
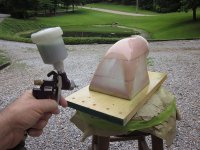
Subject is the hatch kit for the forward top skin of a 7, 9, or 10. The OP-43 installation drawing suggests forming a proseal gasket by using a piece of plastic wrap. I tried it and wasn't satisfied; too many surface irregularities because the plastic tends to wrinkle when trapped between the hatch and the support ring.
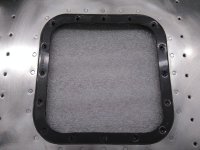
So I stripped it out and started over. This time, I sprayed three coats of ordinary PVA mold release on the back side of each hatch panel. Cure the PVA overnight, then mix proseal, spread it generously on the support ring, and screw down the hatch. Let it cure two or three days, then skim the squeeze out from the upper surface with a razor blade. When you remove the screws, the hatch will pop right out, leaving the PVA adhered to the proseal like a sheet of plastic. It won't peel off...but PVA is water soluble. Take the skin panel to the nearest water hose and it will rinse right off.
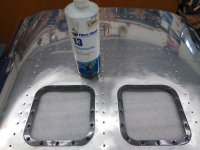
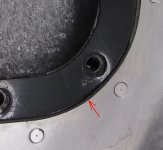
The nice thing is how easy it is to correct if not perfect. Got an air bubble cavity or other surface imperfection? Shoot another round of PVA on the hatch, slop more proseal on the clean dry previous, and screw it down again. The new proseal will adhere to the previous application just fine.
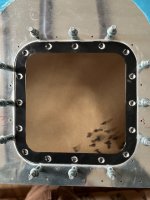
I buffed the assembled cover plate and skin with a red scotchbrite pad, which leaves a filler in the gap. A quick razor trim will clean up the ID of the ring.
.
Subject is the hatch kit for the forward top skin of a 7, 9, or 10. The OP-43 installation drawing suggests forming a proseal gasket by using a piece of plastic wrap. I tried it and wasn't satisfied; too many surface irregularities because the plastic tends to wrinkle when trapped between the hatch and the support ring.
So I stripped it out and started over. This time, I sprayed three coats of ordinary PVA mold release on the back side of each hatch panel. Cure the PVA overnight, then mix proseal, spread it generously on the support ring, and screw down the hatch. Let it cure two or three days, then skim the squeeze out from the upper surface with a razor blade. When you remove the screws, the hatch will pop right out, leaving the PVA adhered to the proseal like a sheet of plastic. It won't peel off...but PVA is water soluble. Take the skin panel to the nearest water hose and it will rinse right off.
The nice thing is how easy it is to correct if not perfect. Got an air bubble cavity or other surface imperfection? Shoot another round of PVA on the hatch, slop more proseal on the clean dry previous, and screw it down again. The new proseal will adhere to the previous application just fine.
I buffed the assembled cover plate and skin with a red scotchbrite pad, which leaves a filler in the gap. A quick razor trim will clean up the ID of the ring.
.
Attachments
Last edited:
")

")