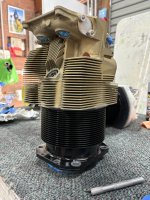
Van's Air Force

The definitive Van's Aircraft support community! Buying, building or flying an RV? Join our exclusive family of mentors and enthusiasts!

Overhauling an IO360-C1E6 for a RV14

Yours are not "long reach". The plugs maybe are called that, but that's to accommodate the overall length of the bronze adapter. Below are short-reach adapters vs long-reach (for thick-wall cylinder heads, like 390's, which have the yellow paint).

View attachment 117965View attachment 117966

Here's some background info: https://www.lightspeedaero.com/Products/Sparkplugs.htm
Thank you!

It’s been hard to work this out. Not sure why they make it so hard - but you are right, the ones supplied to me are short reach once in the adapter.

I guess I wanted to also make sure these were the right ones for this engine. It’s confusing - especially the lycoming document 1042 which says “
Since the same engine models can use either short or long reach spark, do not use the engine model as the only basis to identify the spark plugs to be installed on the engine per Tables 2 through 5.”
 
Last edited:
Thank you!

It’s been hard to work this out. Not sure why they make it so hard - but you are right, the ones supplied to me are short reach once in the adapter.

I guess I wanted to also make sure these were the right ones for this engine. It’s confusing - especially the lycoming document 1042 which says “
Since the same engine models can use either short or long reach spark, do not use the engine model as the only basis to identify the spark plugs to be installed on the engine per Tables 2 through 5.”
From what I've been able to figure out, there are thick-wall and thin-wall head castings, which accept long- and short-reach plugs respectively. Presumably, the thick-wall castings are for turbo engines. The thick-wall castings are also used to make the 390/580 heads, as the thicker casting has enough meat to accommodate boring out to the larger cylinder diameter.

And to clarify, my terms of thick-wall and thin-wall have nothing to do with the cooling fins. This is just the dome thickness of the combustion chamber.
 
....... my terms of thick-wall and thin-wall have nothing to do with the cooling fins. This is just the dome thickness of the combustion chamber.
Below are pics of the same location of thin-wall and thick-wall castings. Pretty easy to see the difference.
Also, with the thick-wall castings, it's even more critical to modify the baffle behind #3 and in front of #2 to get cooling air to the lower part of the fins.

1779103088288.jpeg1779103055106.jpeg
 
Below are pics of the same location of thin-wall and thick-wall castings. Pretty easy to see the difference.
Also, with the thick-wall castings, it's even more critical to modify the baffle behind #3 and in front of #2 to get cooling air to the lower part of the fins.

View attachment 117972View attachment 117971
This is probably the best pic I have of that side of my cylinders. They are all LW-12993
 

Attachments

  • IMG_9142_Original.jpeg
    IMG_9142_Original.jpeg
    5.5 MB · Views: 24
This is probably the best pic I have of that side of my cylinders. They are all LW-12993
Bingo! That proves you have thin-wall heads.

Of course, it's all water under the bridge for you at this point, but you could have bored out your crankcase to accommodate 390 cylinders. Pretty simple mod if you're overhauling the crankcase already. That's how Barrett et al made the original 390's.
 
Bingo! That proves you have thin-wall heads.

Of course, it's all water under the bridge for you at this point, but you could have bored out your crankcase to accommodate 390 cylinders. Pretty simple mod if you're overhauling the crankcase already. That's how Barrett et al made the original 390's.
I actually investigated this for 5 mins - but the case overhaul shop said they have no experience in it. Plus the object here was a value for money overhaul, so there’s that!

So I’m relying (hoping!) that the comments about the angle valve being around the same speed in the taildragger as the 390 will be my reality.
 
Post #10 is a bit of a de-brief / overview of what we overhauled and the decision$ we made to replace parts on this engine (apart from the mandatory replacement parts of course).

I go into why we decided to replace some parts which were not required to be replaced, and also some cost decision$ we made along the way.


The next post will be a post about what the actual costs were for this project (hint: it's 36% labour and 64% parts with me doing a lot of the gruntwork). I'll also work out how the costs of doing it locally stacked up against buying a factory new engine from Lycoming, or buying an overhauled engine from one of the major shops (Lycon, Barret etc).

Happy reading!

Photo of where we are at today (installing all the SDS components in preperation for the engine runs).
 

Attachments

  • IMG_3185.JPG
    IMG_3185.JPG
    2 MB · Views: 17
  • IMG_3233.JPG
    IMG_3233.JPG
    3.5 MB · Views: 17
Back
Top