I hit the backorder wall on wing assembly and have moved on to the flaps. Everything is deburred and primed and flap substructure riveted. I’m ready
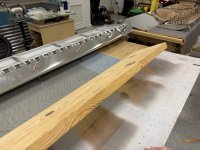
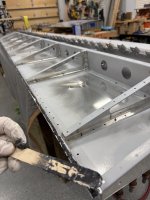
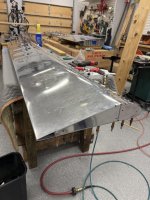
(I thought) to rivet the skins. A couple of early posts implied that skin edges were pre - bent to their final shape, and at least one on-line YouTube video proceeds through flap assembly without any mention of a brake or bending the flap upper skin trailing edge. There is no mention of skin bending in the General Notes for FL-15500 assembly (KAI page 36-04). However, page 36-24 of the KAI notes “Complete all trailing-edge forming …” just before the step of applying Fuel Tank Sealant and attaching the upper skin with it’s trailing edge. When I did a dry run attaching the skins to the substructure with clecos, it looks to me like the trailing edge of the upper skin definitely needs additional bending before final assembly and riveting. I’ve attached a photo of the upper skin as it shipped and a photo of the upper and lower skins attached to the substructure. Am I correct in proceeding with additional bending with my home-made brake per Section 5 General Information (page 05-09)? Any additional guidance? Thanks!

(I thought) to rivet the skins. A couple of early posts implied that skin edges were pre - bent to their final shape, and at least one on-line YouTube video proceeds through flap assembly without any mention of a brake or bending the flap upper skin trailing edge. There is no mention of skin bending in the General Notes for FL-15500 assembly (KAI page 36-04). However, page 36-24 of the KAI notes “Complete all trailing-edge forming …” just before the step of applying Fuel Tank Sealant and attaching the upper skin with it’s trailing edge. When I did a dry run attaching the skins to the substructure with clecos, it looks to me like the trailing edge of the upper skin definitely needs additional bending before final assembly and riveting. I’ve attached a photo of the upper skin as it shipped and a photo of the upper and lower skins attached to the substructure. Am I correct in proceeding with additional bending with my home-made brake per Section 5 General Information (page 05-09)? Any additional guidance? Thanks!