

vanscommuter
Member
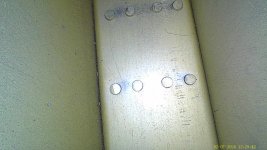
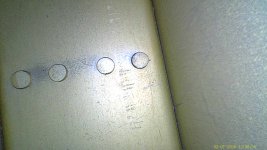
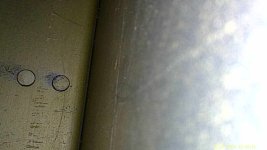
Good evening, This is my first run at the SB-00036 inspection on my RV-3a, and this is the planes first SB-00036 as well. I am using a Teslong articulated head borescope. My results seem ok to good. But I have what i hope is a scratch not a crack on the right outboard. The left side looks clear no cracks. I am on the fence about the inboard tooling hole access, this access was not that great for me, and maybe resulted in the scratch pictured. I think i would have a much better inspection result if i had just drilled a hole in the lower stabilizer skin as indicated by " redhawk " in the access or inspection thread.
On my first photos i did not see any problems, but i was struggling with the borescope. I tried to pull back and swing the scope end forward to get a bit more distance/perspective, and then i saw the scratch..
I am attaching 3 pics in the order taken.
Does anyone care to comment on scratch or crack? I am leaning toward scratch not crack.
I don't see a way forward to clean this area for further inpection while still using the inboard stabilizer rib as the access. Has anyone figured out how to clean this area? I feel like a radiologist doing a endoscopic surgery or something, except i only have the one camera and no tools on my scope end. Has anyone tried attaching a brush or rag to the end of the scope. The Teslong scope is not very stiff at the extension length i am using at 29" away from the tooling hole.
")
