

Van's Air Force
You are using an out of date browser. It may not display this or other websites correctly.
You should upgrade or use an alternative browser.
You should upgrade or use an alternative browser.
RV-15 #42
- Thread starter 543TB
- Start date



You mention starting with the aileron and flaps. Be sure to review https://vansairforce.net/threads/part-replacement-announcement.240677/ before doing so.
I'll be curious if you can do the ailerons and flaps out of order. I was going to look at that possibility today as I've hit roadblocks in most other directions.
Indeed. Since we have a -10 in progress it turns out we have some of the correct nutplates already in hand. It is a challenge when we're missing little bits and pieces everywhere, isn't it? My operating philosophy on this after looking at all the plans is that we can get ailerons done minus the lead weights and slip those in when they get here. I'll keep you updated, we're starting on them today!You mention starting with the aileron and flaps. Be sure to review https://vansairforce.net/threads/part-replacement-announcement.240677/ before doing so.
I'll be curious if you can do the ailerons and flaps out of order. I was going to look at that possibility today as I've hit roadblocks in most other directions.
Pulled the first rivet (and pulled and set about 40 of its friends). We did run into a roadblock pretty quickly, though. The parts callout on 34-5 says you need 15004-001 but the image of the exploded diagram and every other page shows the opposite mirror image part 15004-002. We're on hold now until we hear back from Van's whether the diagram is correct or the parts callout. We decided to rivet it together as depicted and hold until we know for sure that we don't need to drill it out.
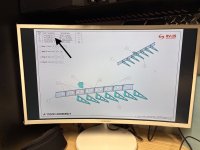
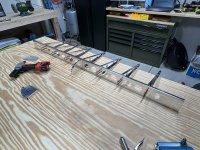

The wing has the same thing going on with part numbers, I think myself and a few others have concluded the drawing is the correct reference.Pulled the first rivet (and pulled and set about 40 of its friends). We did run into a roadblock pretty quickly, though. The parts callout on 34-5 says you need 15004-001 but the image of the exploded diagram and every other page shows the opposite mirror image part 15004-002. We're on hold now until we hear back from Van's whether the diagram is correct or the parts callout. We decided to rivet it together as depicted and hold until we know for sure that we don't need to drill it out.
View attachment 107990View attachment 107991
Does your packing list description identify those parts as either right or left? I don't have mine with me.
That's a good question... The inventory just says "rib left" and "rib right" but there are three of each and they alternate in the drawings, so the end parts callout makes sense but the wildcard is which way the middle one faces. The assumption was that if every drawing matched, the assembly should look like the drawing. The initial (and prompt, I might add) response from support was that I'm right that the plans are conflicting and they are forwarding to engineering.The wing has the same thing going on with part numbers, I think myself and a few others have concluded the drawing is the correct reference.
Does your packing list description identify those parts as either right or left? I don't have mine with me.
No, the line is contiguous regardless of the part used, it's simply which way the flange faces. It probably doesn't matter in the long run but since we're all in the proverbial "beta test" group we can save each other headaches down the road by identifying confusing instructions.Would the wing skin pre punched holes not confirm orientation?
I suppose it's possible, but I would expect them not to. The holes in the ribs are coplanar.Would the wing skin pre punched holes not confirm orientation?

No, the line is contiguous regardless of the part used, it's simply which way the flange faces. It probably doesn't matter in the long run but since we're all in the proverbial "beta test" group we can save each other headaches down the road by identifying confusing instructions.
Great, keep the info coming! When I built the 14 there was a wiki doc with "Gotchas" It would be great if one could be started.
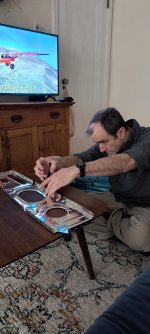
Boy do I long for the days when it is 18* -10 here yesterday. Topping out at a balmy 7 today.What to do when it's only 18°F outside?
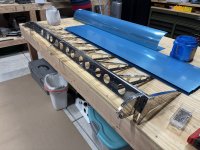
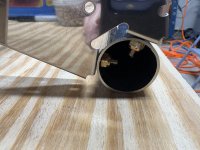
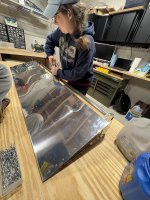
Yesterday finally felt like an accomplishment. We finished working on the left wing rear spar up to the end of section 25 and then turned attention back to the left aileron. The parts callout is wrong in several areas, including calling for 426 4-3 rivets for the counterweight nut plates... this is straight up incorrect as the holes are #40 sized, it looks like *3-4* flushes are the correct size. We used a nut plate from our own stash for the missing AN3-bolt accepting L-shaped one that Van's has already acknowledged was incorrectly called for and supplied. The nuts called for to attach the counterbalance pipe were correctly called for, but incorrectly supplied in the tacklebox (1032 sized instead of the required 832). So, we would not have been able to finish without utilizing supplies already on hand and are still waiting on the backordered lead weights, the insertion of which are the very last step, but otherwise it felt like it all came together very quickly and easily once we got our bearings.


Out of curiosity, how much deburring have you done?
Nope. That rib kinda hangs in space except for where it is riveted to the spar and skin, there is no connection to the mid of the counterbalance pipe, we ended up erring on side of matching the diagram.Did you ever hear back from Van’s about the orientation of the middle fwd rib? That was a head scratcher for me today, too - have not yet riveted it in.
About 50% of what we did on the -7 and -10. One side is smooth and the other side has tangible burrs on the holes, and pretty much every edge needs a pass over the bench grinder wheel to smooth as well.Out of curiosity, how much deburring have you done?
About 50% of what we did on the -7 and -10. One side is smooth and the other side has tangible burrs on the holes, and pretty much every edge needs a pass over the bench grinder wheel to smooth as well.
Definitely less than the -10 but still time consuming to do right…
Finished the left flap today after two long afternoon building sessions. The first session ended with a pause after doing the twelve LP4-3s into the trailing end of the bottom skin to the ribs. That turned out to be a fortuitous choice as the opportunity to look ahead into the remaining instructions allowed us to discover that while the top skins are pre-dimpled from the factory, the underlying ribs did not have corresponding dimples and the KIA does not contain instructions to dimple there. Took care of that and mixed up some yummy smelling proseal  and some 730ish blind rivets later we have ourselves a flap!
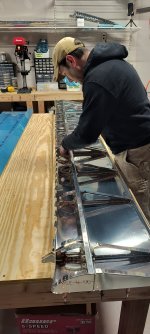
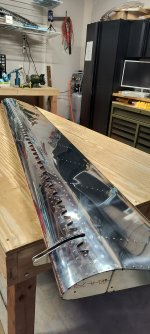
and some 730ish blind rivets later we have ourselves a flap!